How to Grow and Scale Your Brand (5 Tips)

Starting a business is difficult, and scaling a brand into something bigger is another challenge in itself. Many entrepreneurs don't realize that a company must be both flexible and sustainable in order to grow securely.

Fortunately, setting up your brand's processes and operations can be a relatively straightforward process. When you establish a solid foundation and streamline your workflows, you can increase your chances of navigating growth more easily.

In this post, we'll discuss why smart scaling is critical for any business that wants to last in the long run. Then, we'll look at 5 key tips you can implement to start growing your brand safely. Let's get started!

Why Scaling Your Brand Is So Important

In business, scaling is the idea of setting up your processes to foster and support steady (or rapid) expansion. If it's not done well, growing companies can get stuck with more customers than they can handle.

Alternatively, they may not be able to maintain a certain level of quality throughout the sales funnel due to the strain of growth. This can ruin a reputation and sink a business as well. Typically, this happens because inexperienced entrepreneurs focus on growth tactics before they've established their foundation.

To put it simply, many would-be-successful businesses have failed due to issues with scaling. In fact, about 19% of businesses fail within their first year and a whopping 50% fail within 5 years. Moreover, expanding too fast is often cited as one of the top reasons that companies go bust.

Therefore, if you want to protect your business from a similar fate, you'd be wise to think about scaling. That way, you can avoid this issue and grow seamlessly.

5 Key Tips for Growing and Scaling Your Brand

Now let's talk about how you can set up your business for growth and scalability.

1. Have a Clear Vision and Mission

Having a clear vision and mission is essential for your brand's image and identity. Your mission is your brand's purpose. It's what you are doing for customers and the world right now. A vision is the ultimate, long-term dream for your business, and it's linked to your brand values.

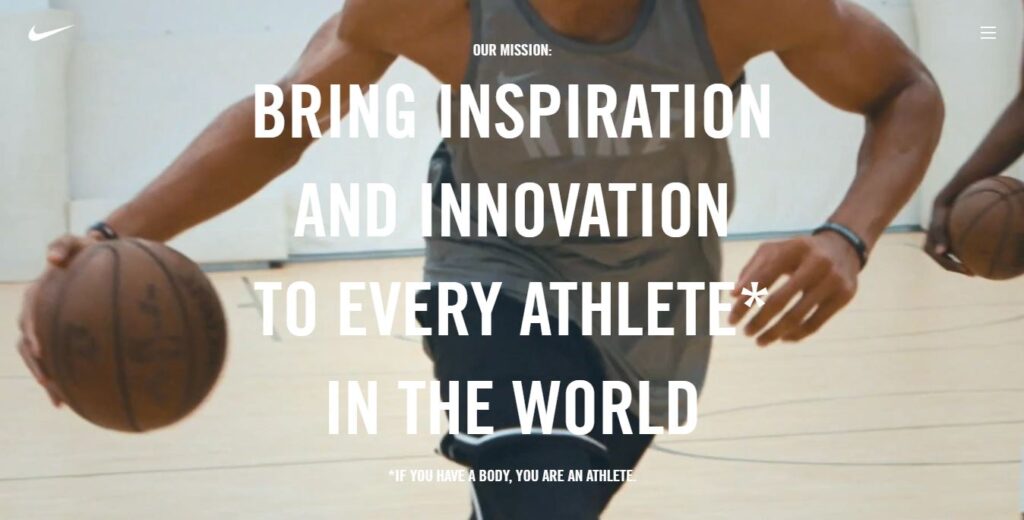
Nike has a meaningful vision and mission statement. It's short and simple, but it effectively describes what the company is doing for the world:

Vision and mission statement for scaling your business

A memorable vision and mission statement give your business direction. Customers and employees alike can refer to it for guidance around the purpose of your organization.

Coming up with your own vision and mission can take a long time, but that's okay. You'll want it to be something that means a lot to you. It should resonate with all the founding members of your organization.

To land on a mission, you might want to start by identifying your biggest selling point. Consider what sets you apart from your competitors. Then, expand on that with your values and goals.

Once you've come up with the winning statement, share it everywhere for customers, the public, and employees to see.

2. Optimize Your Workflows with Templates and Style Guides

Templates are pre-designed documents that can speed up the content creation process. They can eliminate the need for most formatting and designing, allowing you to simply fill in the blanks.

Essentially, templates can save you a ton of time. If you're looking for a beginner-friendly tool to help you create templates for your brand, Canva is a popular option:

Canva for growing a brand

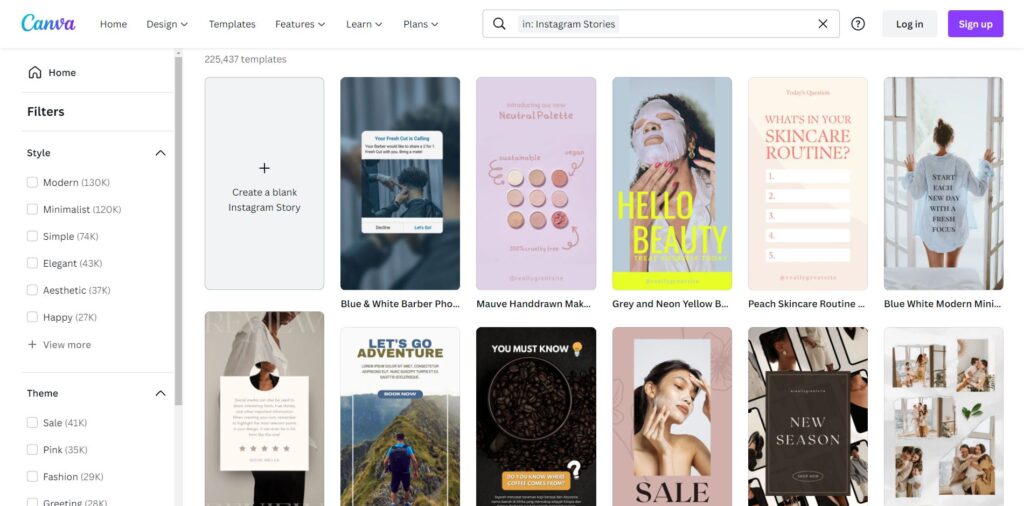
This platform has thousands of templates for a range of different tasks and channels, including presentations, graphics, and even social media posts.

Creating company style guides can also increase your productivity and efficiency. This type of document can also help maintain consistency across your brand.

Ideally, a style guide should be as detailed as possible, but it should also allow for some flexibility and innovation. When creating a style guide, you might want to begin with logo designs, a color palette, typography, and image requirements. You can gradually build in more details as time goes on. 

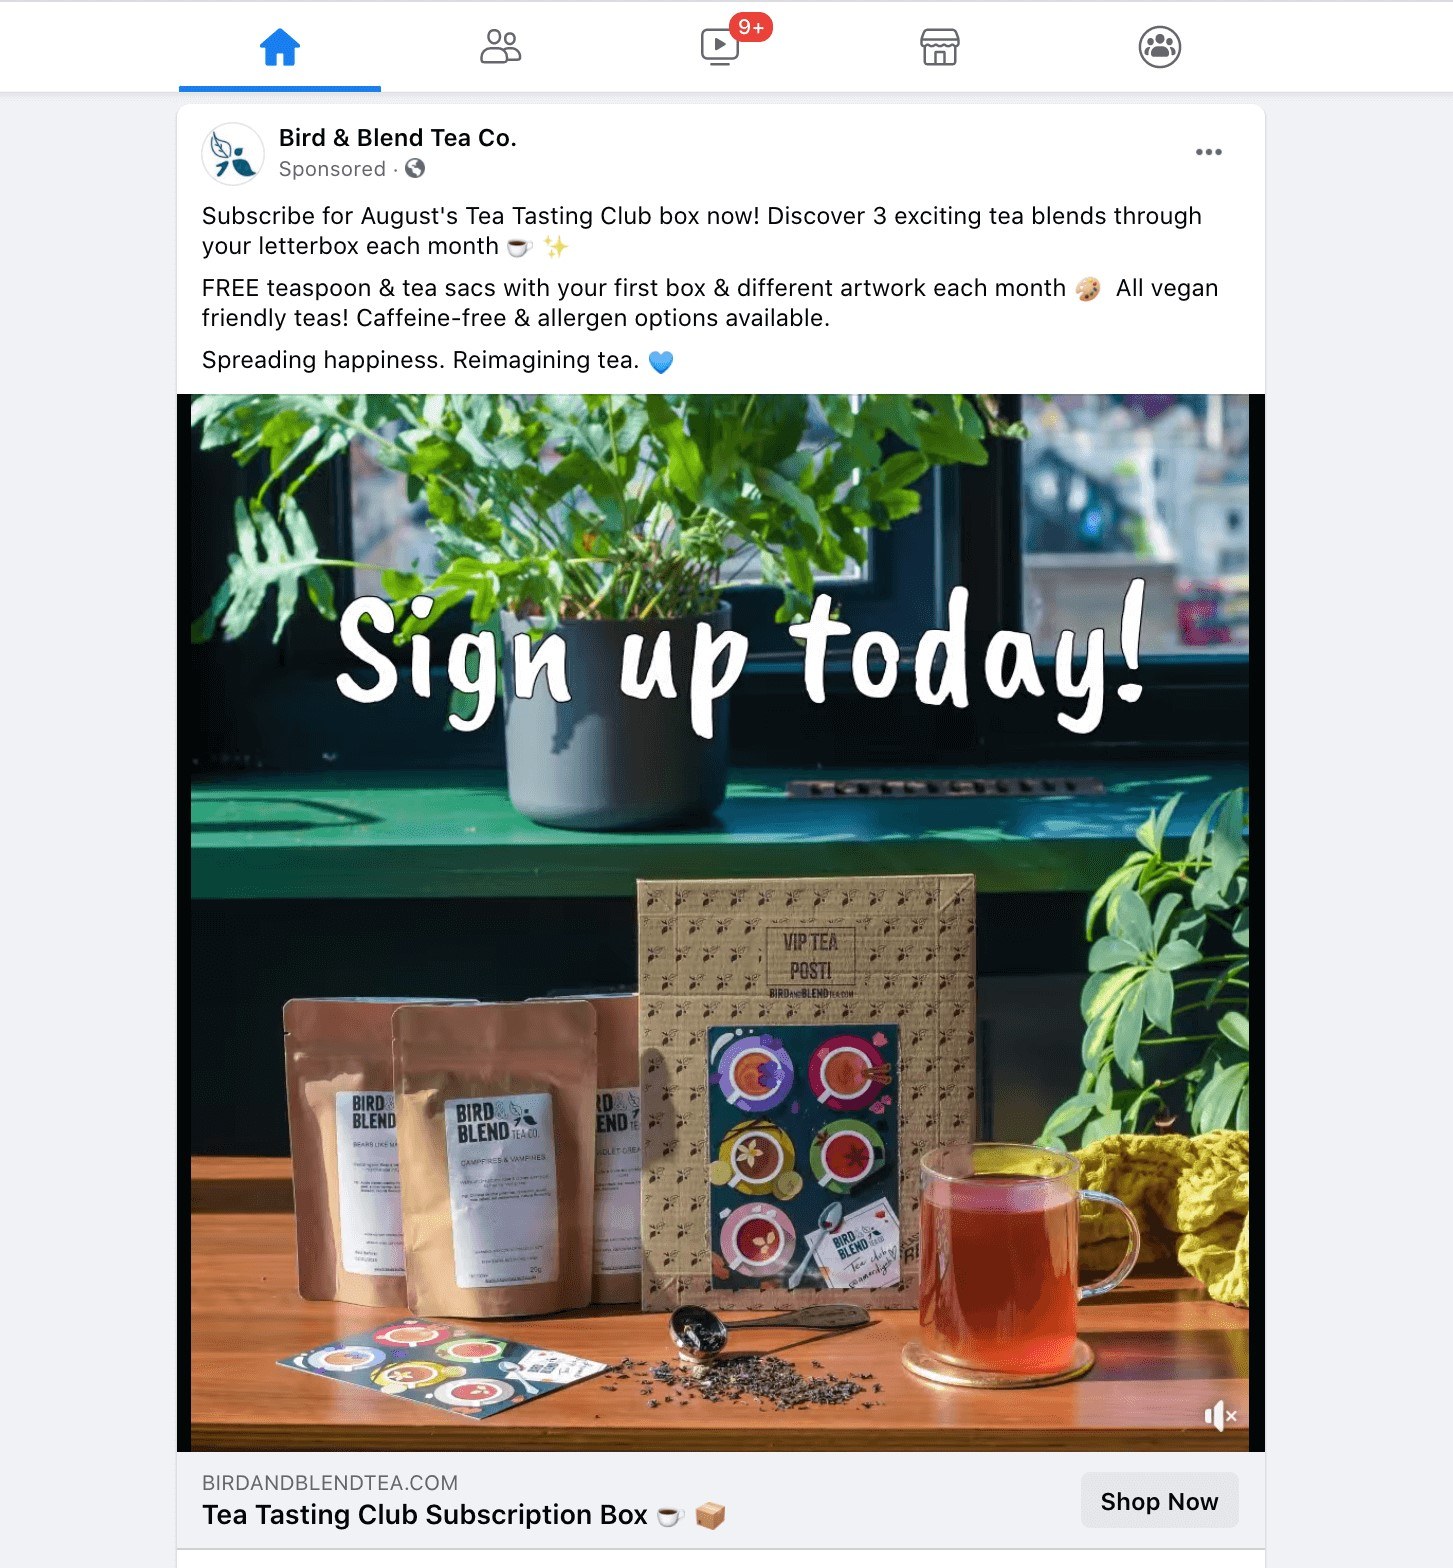
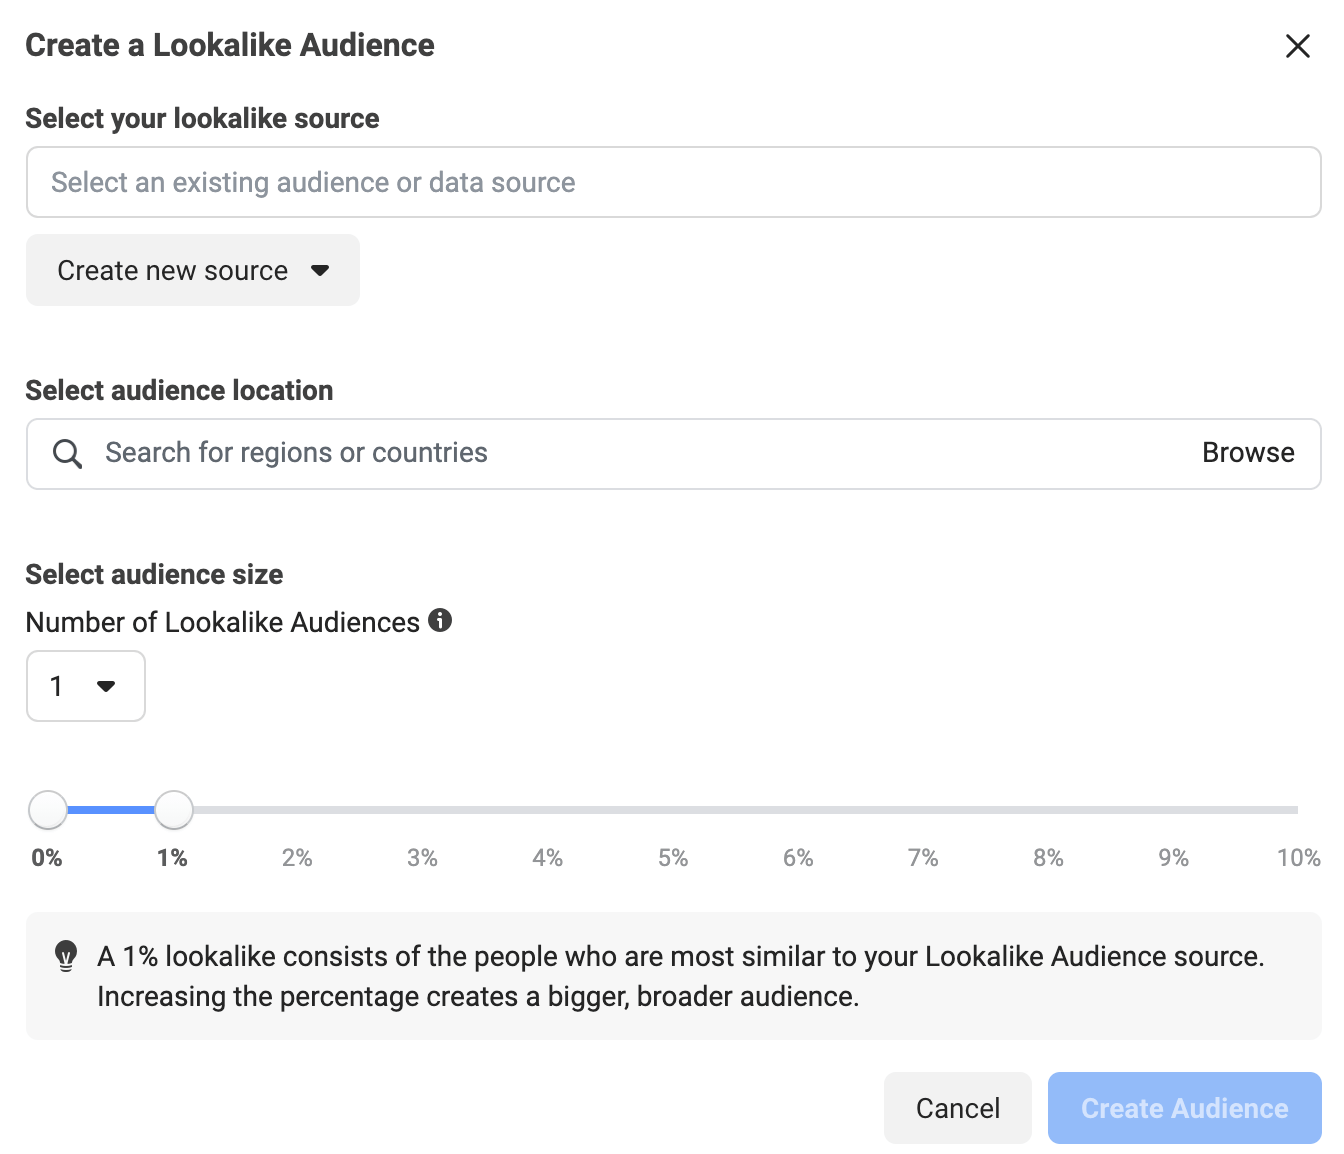
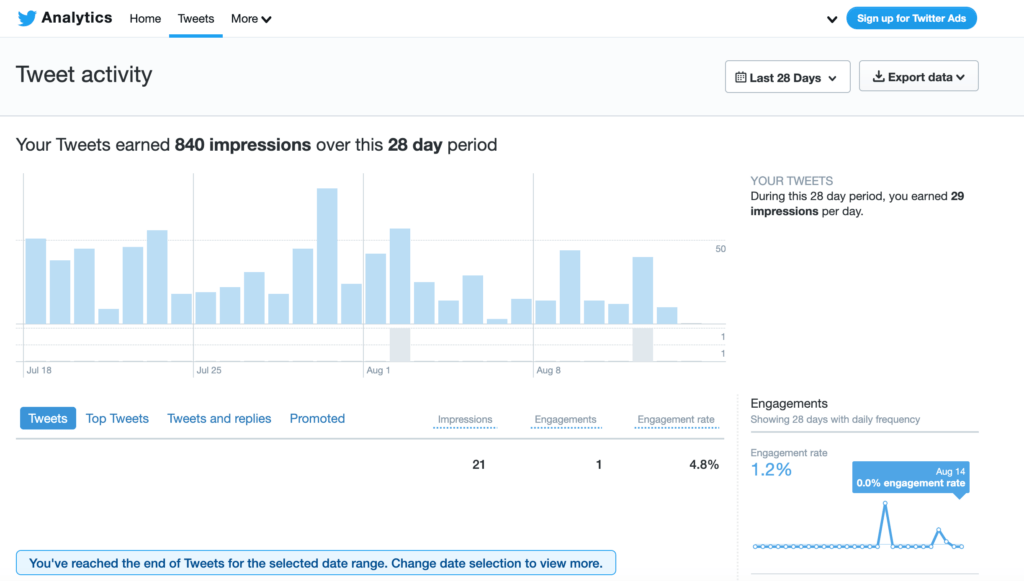
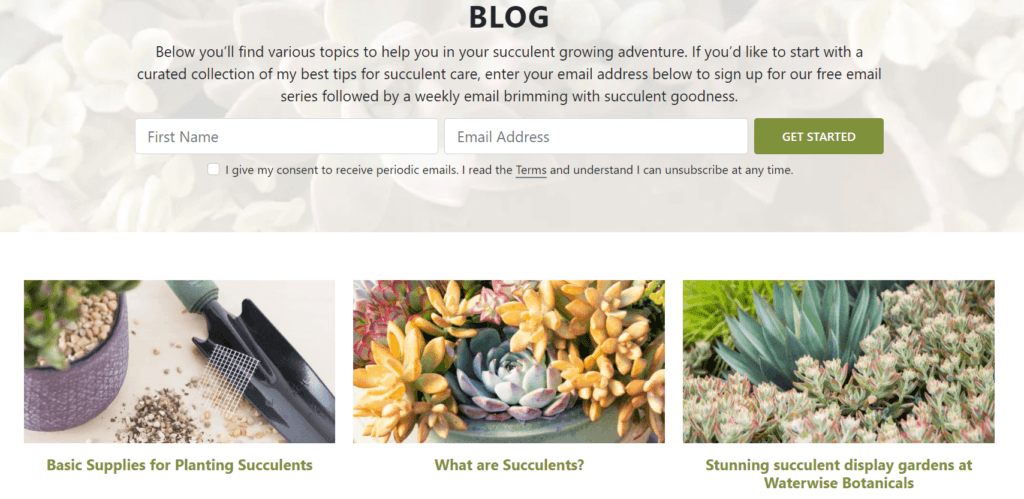
3. Streamline Your Social Media Content

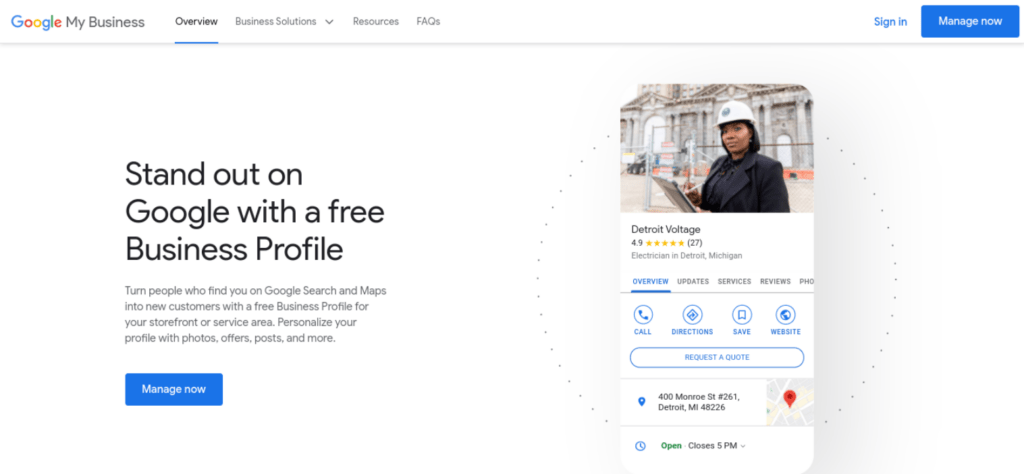
Social media content is one of the best ways to reach a wide range of potential customers efficiently and affordably. When you use social media, you can increase brand awareness and educate potential customers about your products and services.

Additionally, including powerful calls to action in your social media posts can boost your conversion rates. In a nutshell, if you want to scale your brand, you'll likely need to be on a range of social media channels.

nelio content plugin for growing and scaling a brand

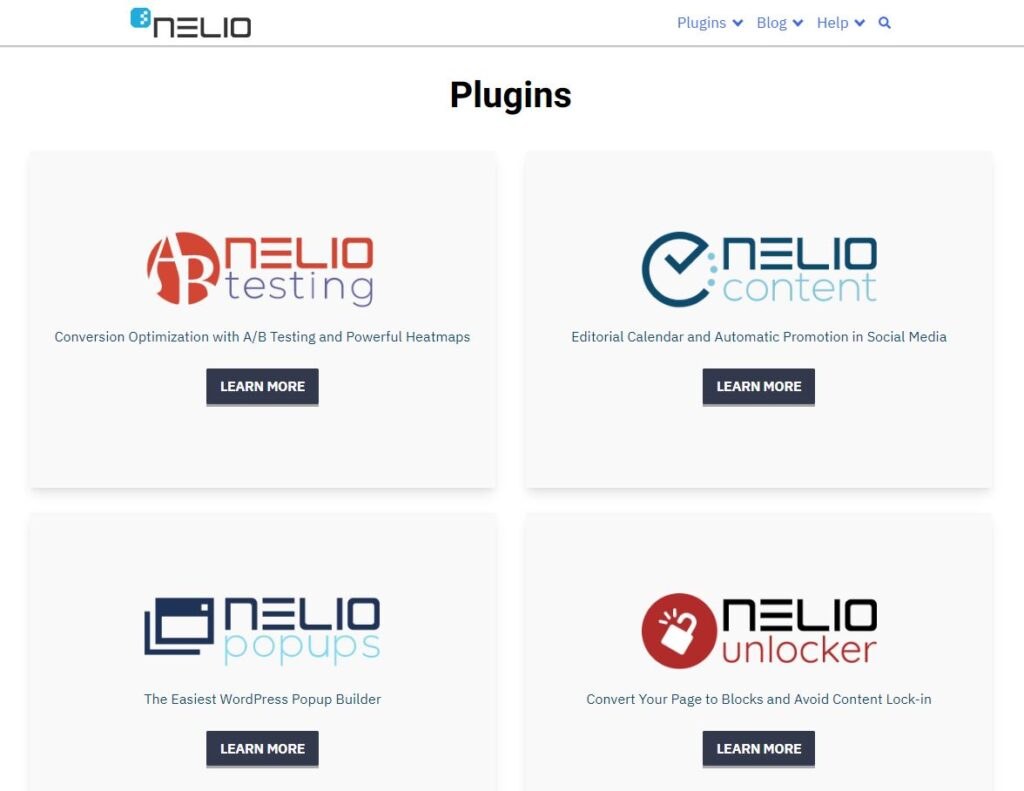
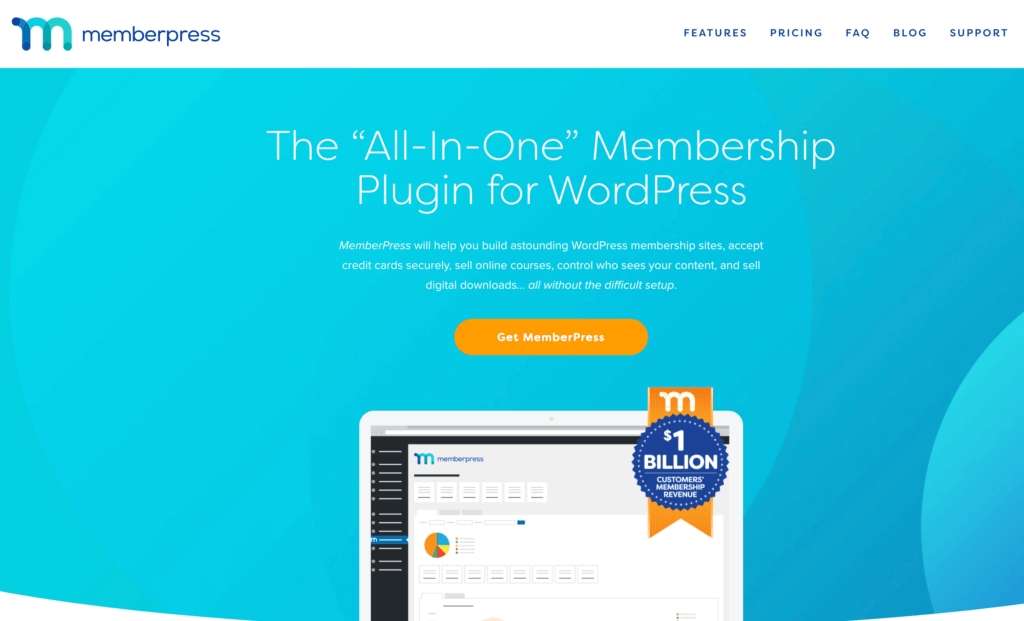
If you use WordPress, you can use Nelio to get a head start on social media. Nelio Content specifically enables you to automate and schedule your social media posts on a variety of channels.

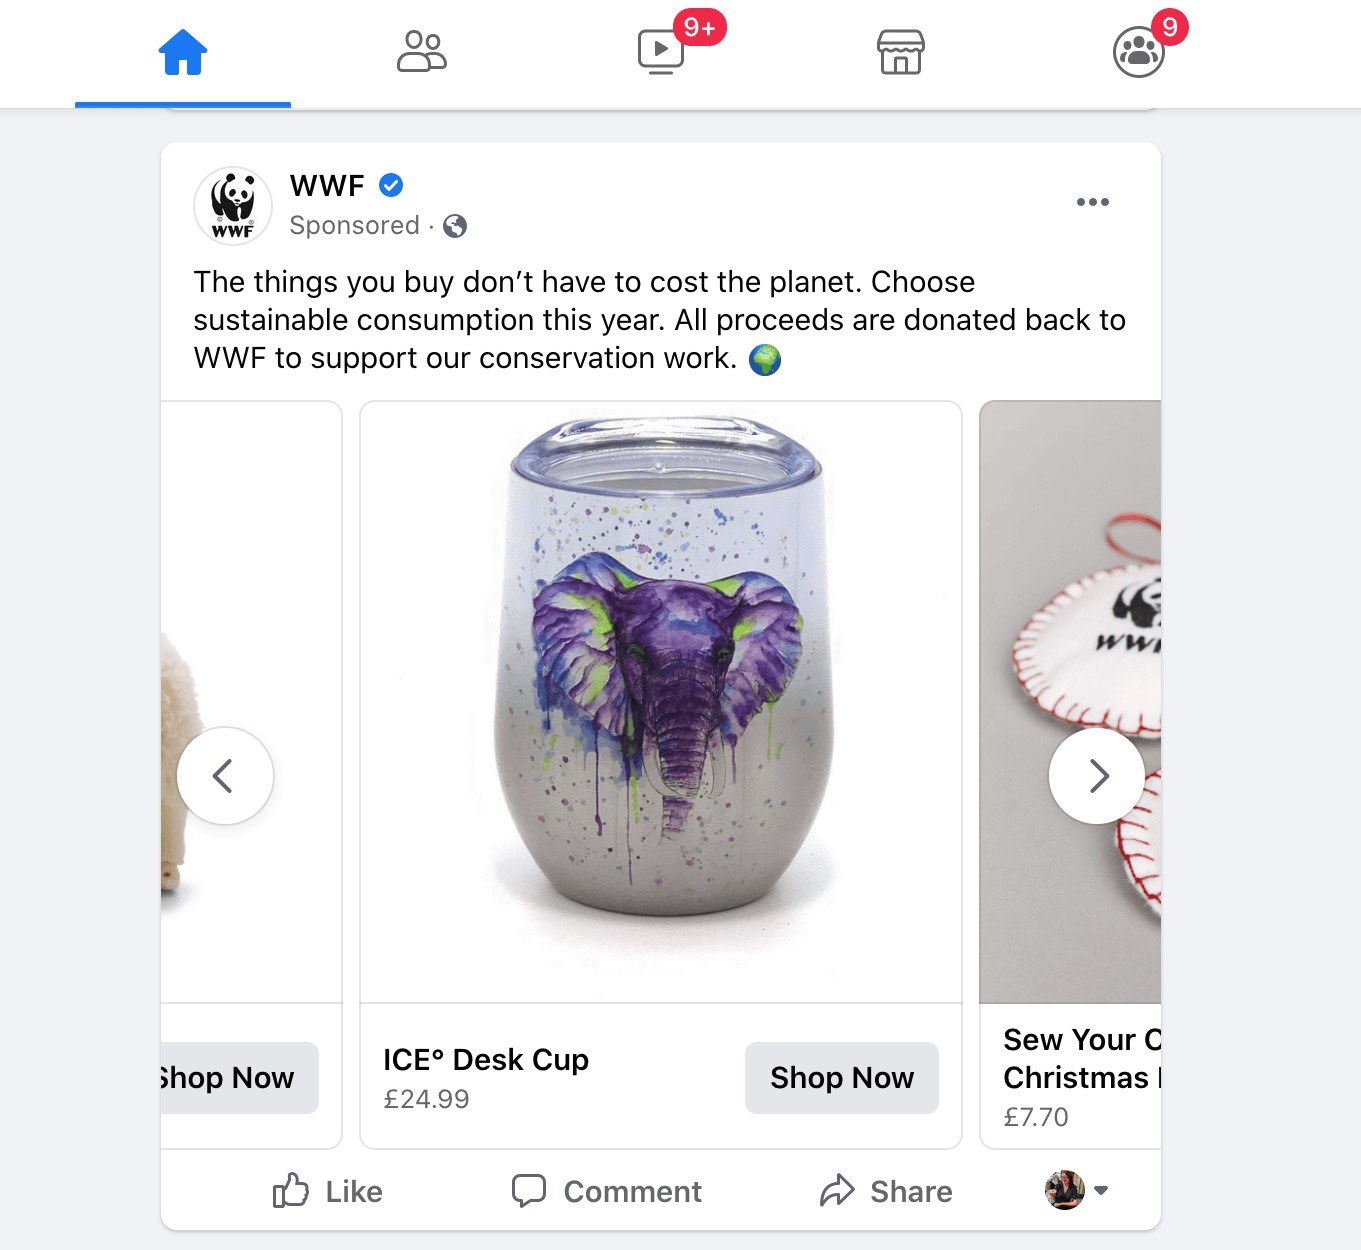
4. Build an Online Community

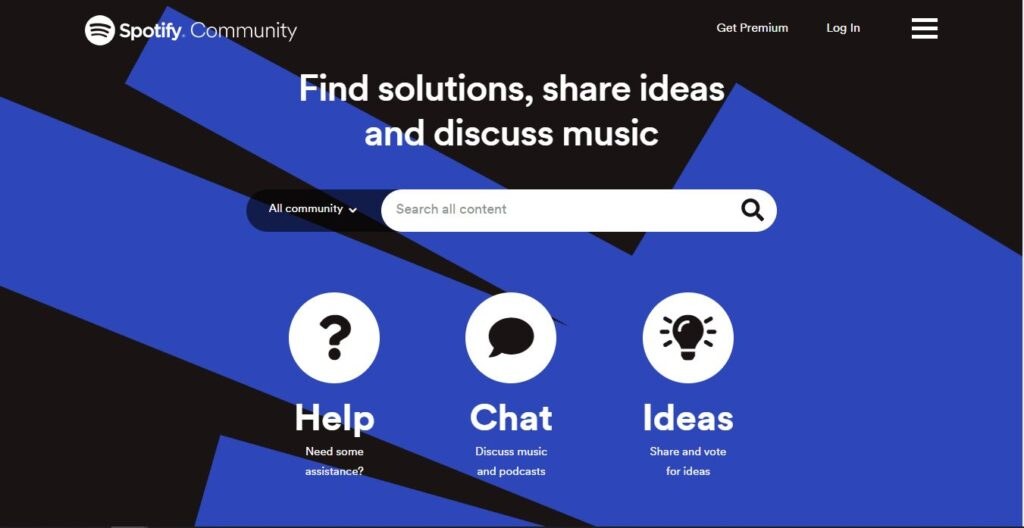
If you look at any large company, there's almost always a thriving online community associated with it. Spotify, for example, has been very successful in building an impressive group of followers.

Spotify has achieved this through its online forums, shareable playlists, and its Stars Program:

online community for scaling and growing your brand

One benefit of an online community is that it can minimize work for you. For instance, minor customer support issues can be discussed among community members in an online support forum. Furthermore, healthy communities tend to help spread the news about your brand for free.

To begin building a community, the first step is to create the platform itself. You'll need to decide between a more exclusive membership community and an open group. Then, you'll want to promote your new community to customers and any other potential members.

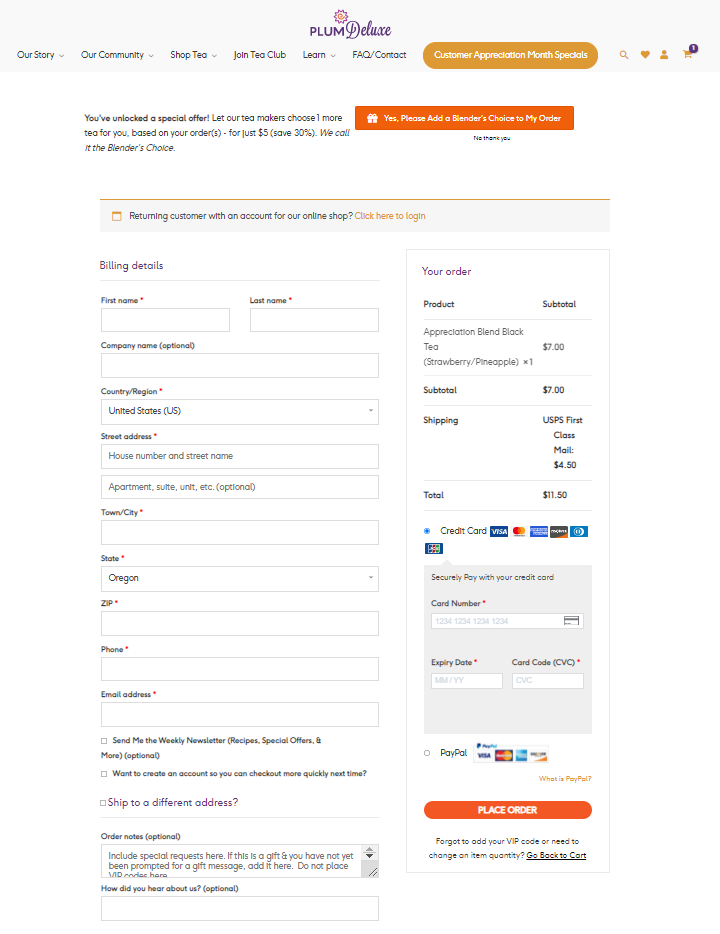
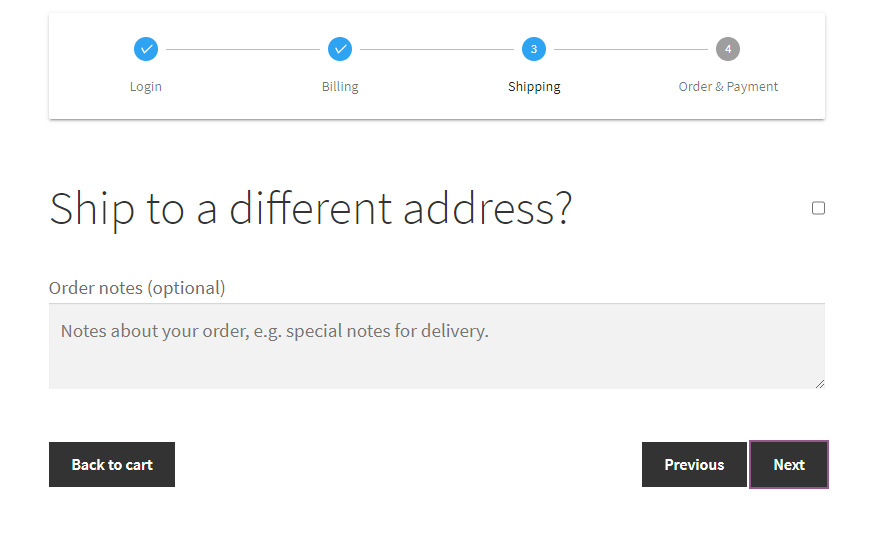
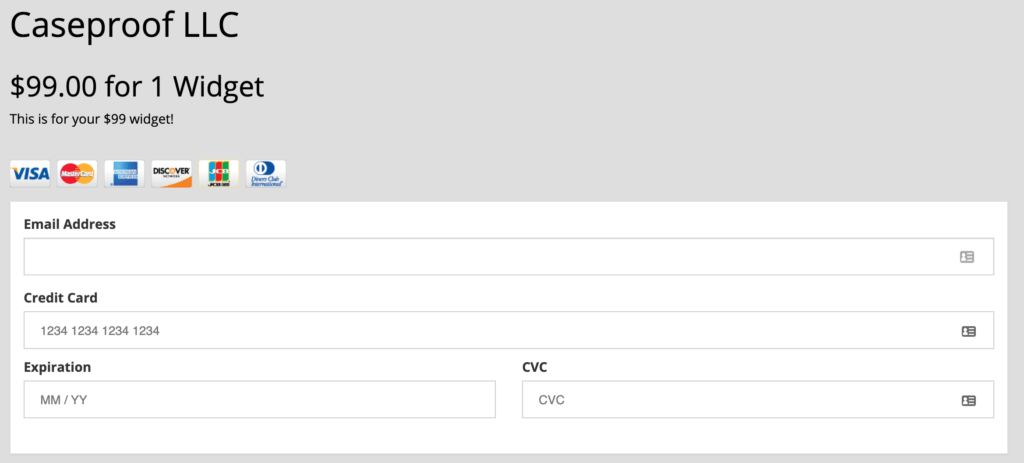
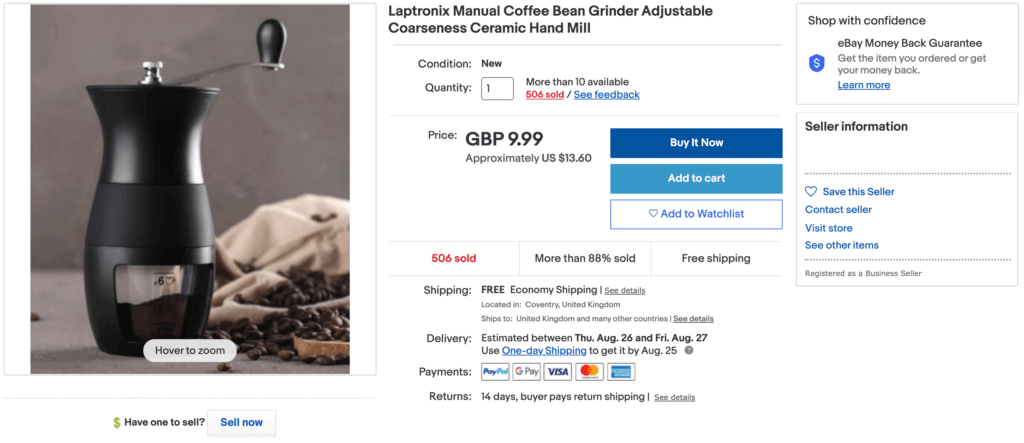
5. Design a Flexible Checkout Process

Creating a flexible checkout process is another excellent way to ensure that your business survives any rapid growth spurts. That's because a lengthy or confusing checkout process can clog up your sales pipeline.

Simplifying your checkout can prevent this. Furthermore, allowing customers to pay how they want and when they want will likely lead to more conversions.

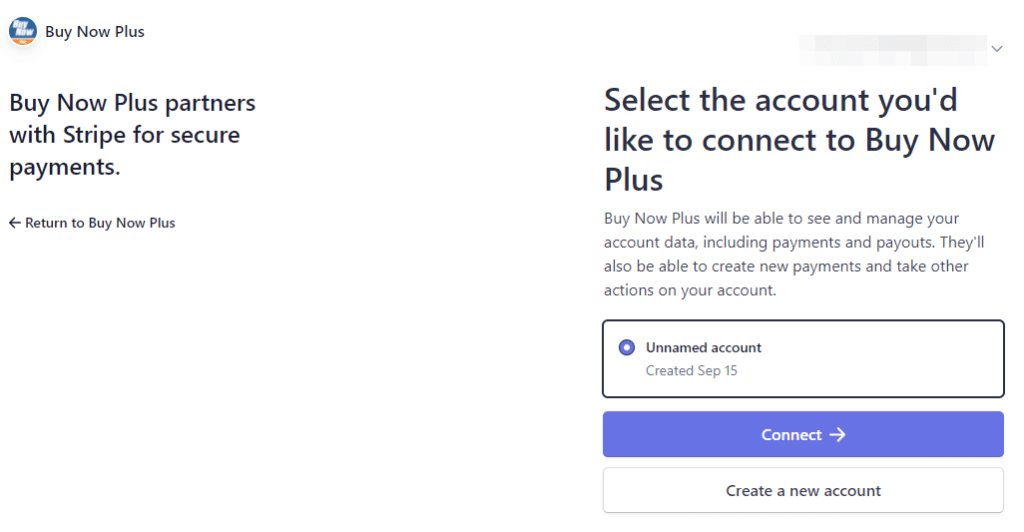
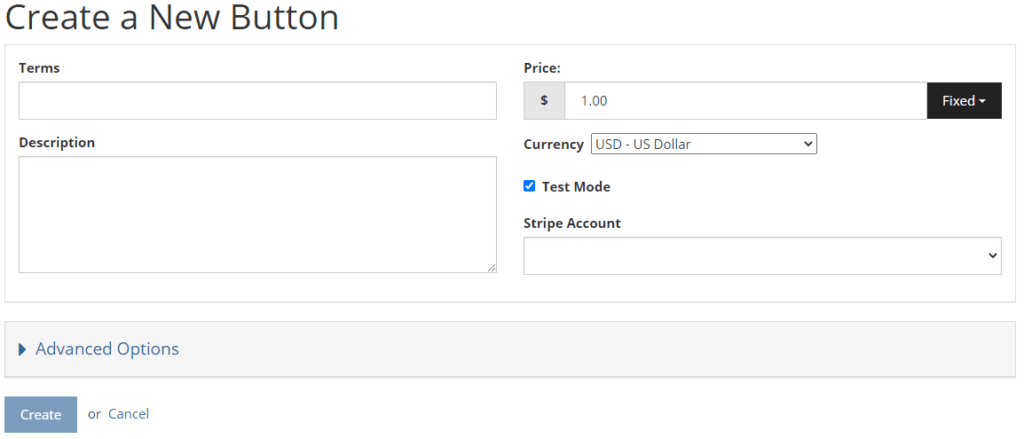
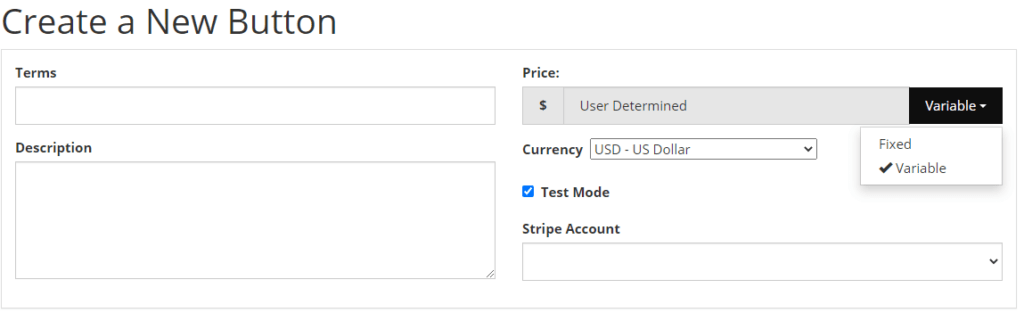
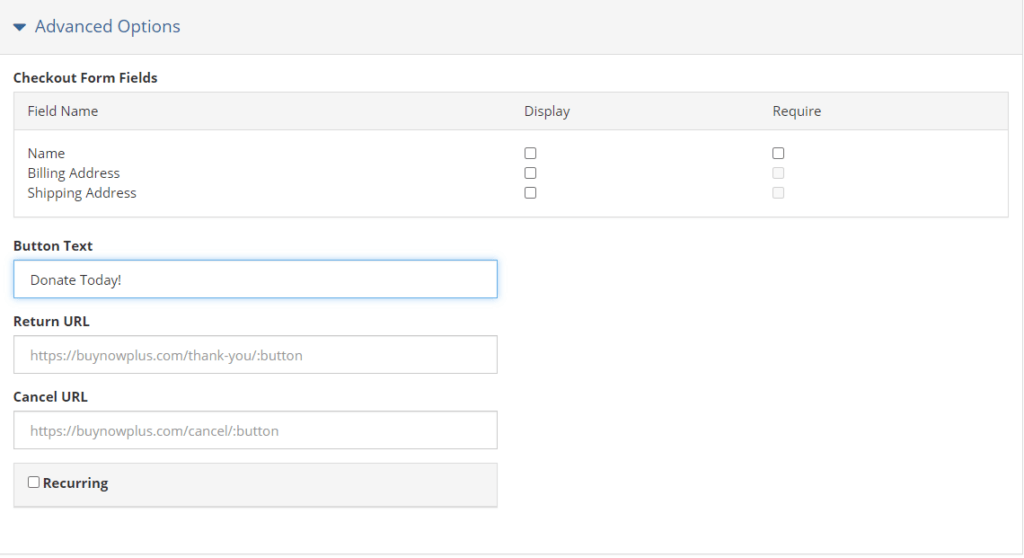
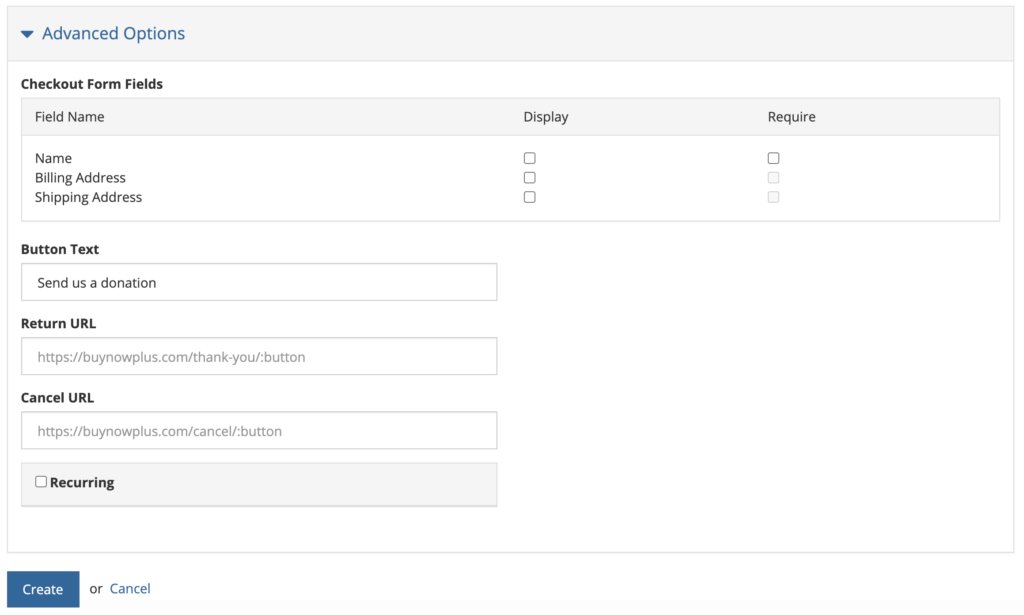
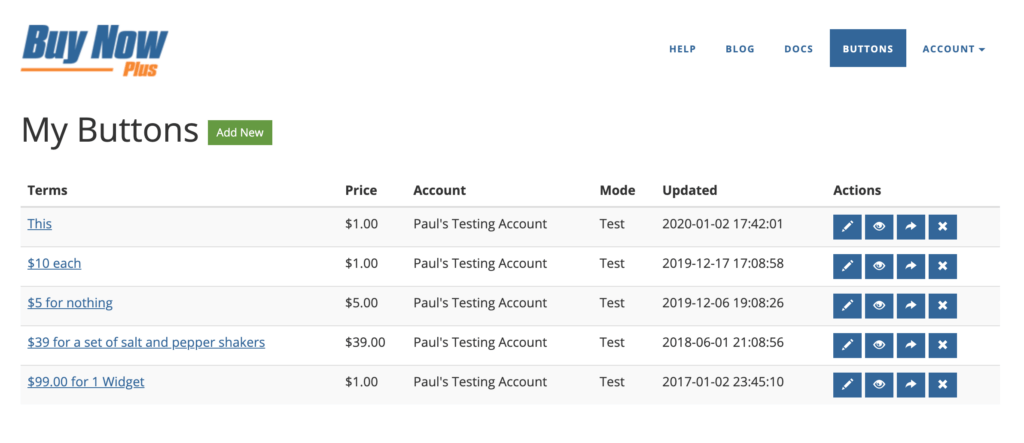
With our tool, Buy Now Plus, you can make buy now buttons for an easy checkout experience:

Buy now buttons for scaling brands

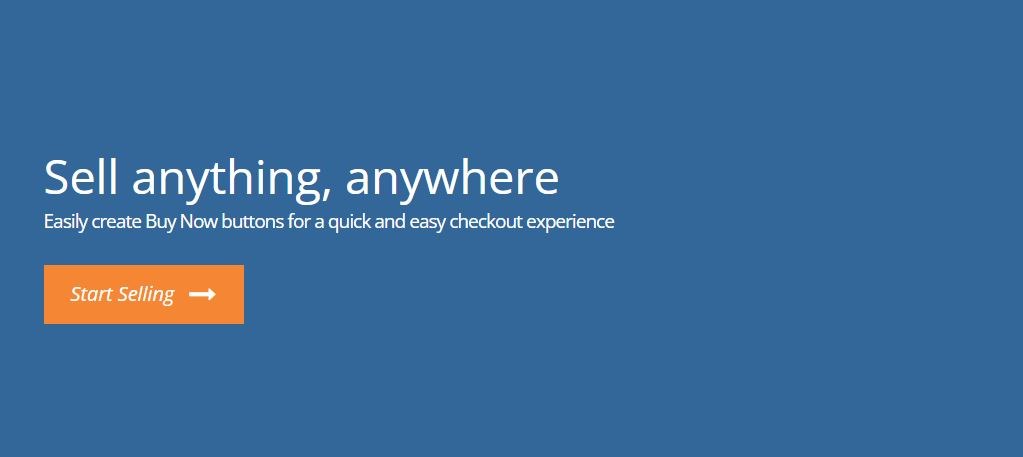
Buy Now Plus allows you to securely accept credit card payments virtually anywhere. You don't even need a website to set it up.

Also, you can fully customize your buy now buttons and checkout. This means you can tailor it to your market and create a positive user experience for your customers.

Conclusion

Growing and scaling a brand can be a complicated task if you haven't set up clear workflows and strong documentation. Establishing a foundation is crucial if you want to enable your business to grow smoothly with your customer base.

To recap, here are 5 key tips for growing and scaling your brand:

  1. Have a clear vision and mission.
  2. Optimize your workflows with templates and style guides.
  3. Streamline your social media content.
  4. Build an online community.
  5. Design a flexible checkout process with Buy Now Plus.

Do you have any questions about growing and scaling your brand? Let us know in the comments section below!

If you liked this post, be sure to follow us on Twitter, Facebook, Pinterest, and LinkedIn.

5 Cheap Marketing Strategies that Work (And How to Use Them)

To stand out in today's crowded online environment, it's important to take strategic measures to distinguish yourself from the competition. However, when you're an entrepreneur or own a small business just starting out, you likely won't have a huge budget and will look for cheap marketing strategies.

Fortunately, you don't necessarily need one. There are plenty of cheap marketing strategies that you can utilize to help spread brand awareness, increase engagement, and, ultimately, drive conversions.

In this post, we'll provide you with a list of five cheap marketing strategies that actually work. For each, we'll discuss what makes them beneficial and some tips for getting started. Let's jump in!

1. Encourage Customers to Leave You Reviews

One of the best ways to market your business is finding ways to help increase customer trust and loyalty. To do that, you need social proof. This is evidence you show consumers that your company is valuable and trustworthy.

Encouraging customers to leave you reviews can help other consumers form favorable impressions of your brand. Seeing real people leave positive feedback can make your business seem more credible and trustworthy.

Customer reviews are also forms of User-Generated Content (UGC). This type of content is organic and can be excellent for Search Engine Optimization (SEO) purposes.

There are a handful of tools that make it easy for your customers to leave you reviews, too. For example, if you want them directly on your website, you can use a plugin such as WP Customer Reviews:

The WP Customer Reviews plugin.

If you have a physical company location, we also recommend signing up for Google My Business:

The Google My Business website.

This platform lets your customers leave you reviews directly on Google, translating to ratings on Google Maps. It can also be great for local SEO purposes and attracting consumers in your area.

2. Run Social Media Contests and/or Giveaways

Another cheap marketing strategy you can use is running a contest or giveaway on social media. This method is also another way to encourage UGC.

Giveaways are effective because you can run them for relatively cheap. For example, you can offer your own product, a coupon or discount, or a gift card. You could even partner with another brand to help cross-promote businesses.

The contest could be something as simple as a photo caption contest. In this scenario, you could ask users to create the funniest caption for one of your Instagram posts.

Alternatively, you could use the contest as an opportunity to generate leads by asking participants for their email addresses to enter the giveaway:

An example of a giveaway email form.

To get started, you could try using a plugin such as RafflePress:

The RafflePress website.

This tool makes creating and managing contests and giveaways incredibly straightforward. It comes with a drag-and-drop builder as well as pre-made templates to help you get started.

3. Create, Publish, and Share Valuable Content

Content marketing is one of the most cost-effective forms of advertising available. It lets you share your knowledge and expertise, which can help build credibility and authority. At the same time, marketing can boost engagement among your target audience.

Getting started with it is easy, too. You can begin by publishing blog posts on your website. This can also be a powerful way to boost your SEO rankings. Google tends to favor sites that regularly publish high-quality content.

To get started with a list of keywords and topics to target, you can use the Google Keyword Planner:

The Google Keyword Planner website.

With this free tool, you can start with a basic topic such as “web design”. Then you can find relevant keywords and phrases to include in your content.

Remember that, to be considered valuable, your content needs to be relevant to your audience. Therefore, it's wise to base your material around answering questions your customers already have.

In addition to your blog, you can also publish content across your social media channels. You can help reach a wider audience by using hashtags, tagging other businesses and partners, and consistently engaging with users in the comments.

4. Start an Email Marketing Newsletter

Email marketing is another cheap marketing strategy that you should consider incorporating into your arsenal. It is incredibly flexible and allows you to target new audiences and engage your existing customer base as well.

To make it as effective as possible, we recommend building your campaigns for specific customer personas. Doing this will make it easier to create highly targeted messaging that appeals to certain kinds of shoppers.

To help build your subscriber list, we also suggest including a signup form on your website:

An example of an email signup form.

To make a form, we recommend using an all-in-one email marketing solution such as Mailchimp:

The Mailchimp WordPress plugin.

This tool lets you create and manage all aspects of your email newsletters and campaigns in one place. It also comes with a WordPress plugin so you can seamlessly integrate your account with your website.

5. Conduct Surveys

Rounding off our list of cheap marketing strategies is conducting surveys. Asking your customers and audience for their feedback directly is one of the most inexpensive yet valuable tactics to improve your offerings.

Using surveys can provide you with relevant, essential data to use in future marketing campaigns. Furthermore, it can also make your customers feel heard and appreciated. It's an excellent way of letting them know that you care about their opinions.

Plus, creating and distributing surveys is incredibly cheap. For example, you can get started using a tool such as WPForms:

The WPForms plugin.

This is a freemium plugin that you can use to create contact forms and surveys. Then you can publish your content across the channels of your choosing, including your website, social media, and email platforms.

Conclusion

As a business owner, promoting your brand is a pivotal aspect of your success. However, you may be working with a tight budget. If that's the case, you might need to get a little creative with your marketing.

As we discussed in this article, there are five cheap marketing strategies you can use:

  1. Encourage users to leave you reviews.
  2. Run social media contests or giveaways.
  3. Create, publish, and share valuable content.
  4. Start an email marketing newsletter.
  5. Conduct surveys.

Do you have any questions about using these cheap marketing strategies? Let us know in the comments section below!

If you liked this post, be sure to follow us on Twitter, Facebook, Pinterest, and LinkedIn.

How to Accept Donations Online (Everything Nonprofits Need to Know)

Many people prefer to complete tasks online. From scheduling appointments to paying electric bills, if users can't do it virtually, they might not do it at all. This same mentality can hold true when it comes to making donations.

Fortunately, enabling your nonprofit to accept donations from your website is a simple process. In fact, once you're online, you may find it's easier and more effective than using mailers or in-person events.

In this post, we'll explore why you should consider accepting online donations. Then we'll show you how to receive contributions using Buy Now Plus. Let's get started!

Why You May Want to Accept Online Donations

These days, many people prefer online donations and don't always have cash or checks at hand. If you're not able to accept online contributions, you're making it difficult, if not impossible, for these people to support your organization.

Enabling online donations can also help you to reach a wider audience. Rather than relying on more traditional methods, you can share your website across social media and email campaigns.

You'll also make it easier for your followers to share your information with their own networks:

Austin Pets Alive has several donation buttons on its website.

Finally, handling donations online can cut down on your paper usage. You can reduce or eliminate your reliance on paper mailers, saving you money on postage costs.

Accepting online contributions is also a significant first step for transitioning to paperless bookkeeping. As such, this method can be advantageous for environmentally conscious businesses.

How to Accept Donations Online (In 3 Easy Steps)

Now that we've covered the benefits of accepting online donations, let's look at starting the process with Buy Now Plus.

1. Sign Up for Buy Now Plus

When you sign up for Buy Now Plus, you'll be asked to connect your Stripe account. This step provides you and your donors with a secure payment gateway.

If you don't have a Stripe account, you'll be able to create one during the Buy Now Plus setup process:

Signing up for a Buy Now Plus account.

If you already have a Stripe account but would like to create a new one for donations, you can also handle that at this time.

Buy Now Plus enables you to add more than one Stripe account, which could come in handy for organizing your accounting.

2. Design Your Donate Button

Now that you have your Buy Now Plus account ready, it's time to create your first donation button. Start by logging in to your account and navigating to the Buttons page. Then, click on the Add New button.

Here you can add the basic information about your button. This is also where you'll choose which Stripe account to use with it:

How to create a new button in Buy Now Plus

You may want to set the price to Variable using the dropdown menu. This setting enables your donors to choose how much they'd like to give.

Alternatively, you might create a few buttons with preset amounts to encourage donations:

Changing the price option from fixed to variable.

Under the Advanced tab, you can change the text on your button. You can also set a URL that will direct users to a new page once they complete their donations:

How to change the text on a donation button.

Once you're satisfied with your button, click on the Create button to save it.

3. Share Your Button Everywhere

Finally, you can start sharing your button with your network. Buy Now Plus makes it easy to embed your button anywhere you can add a link.

You may want to start by adding the button in a few places across your website. You might include one in your main navigation menu as well as above the fold on your homepage.

It's also a smart idea to create a landing page dedicated to accepting donations.

You can still share your donation button even if you don't have a website. If you're active on social media, that's a great place to start. You can also include a donation button in your email campaigns.

Regardless of where you'd like to place your button, the process is pretty similar. Simply click on the Share button to the right of your donation button. You'll see a pop up with a link and an embed code:

Embed options for Buy Now Plus.

You can also use the social buttons to go directly to the platforms you'd like to share on.

Conclusion

Accepting donations online can be a smart move for any nonprofit. Your donors will likely appreciate the convenience, and it may even save your organization some time and money. Best of all, it's easy to get set up using Buy Now Plus.

Let's recap the three steps to accepting online donations:

  1. Sign up for Buy Now Plus.
  2. Design your donate button.
  3. Share your button everywhere.

Do you have questions about receiving contributions online? Ask us in the comments section below!

If you liked this post, be sure to follow us on Twitter, Facebook, and LinkedIn.

How to Convert One-Time Shoppers into Loyal Customers (5 Tips)

Let's imagine that holiday sales were at an all-time high, and you started the year with a solid first quarter. However, as you scaled back on ads business began to slow considerably.

People are still buying from you, but you're surviving this quarter on a tiny group of repeat buyers.

By improving your brand's reputation and providing your customers with extra value, you can avoid that scenario and attract a larger base of loyal customers who keep coming back again and again.

Over time, this can stabilize sales throughout the year, helping your business get through those seasonal slumps more gracefully.

In this post, we'll share five tips to help you convert one-time shoppers into loyal customers without adding a lot of extra marketing costs. Let's dive in!

1. Start an Email List

Roughly 60% of customers prefer brands to contact them via email. It’s an easy, unobtrusive way to reach people.

An email list shouldn’t be pushy or make users feel like they have to sign up. Instead, you may want to give each customer an incentive to join, such as a discount on their next purchase:

An example of a signup page that offers discounts.

The example above is a simple and clean signup form that asks for nothing but your email address. It also offers a clear benefit – a 10% off code when you sign up.

However, once you gain a new subscriber, you'll need to keep them on your list. Let's take a look at two effective ways to retain subscribers.

Create a “Welcome” Automation

Creating welcome automations might be the best way to convert your time into value. They’re quick and easy to set up, and you can change the content to keep it relevant over time.

Some email list service providers like ActiveCampaign and Mailchimp offer straightforward ways to set up these automations. They also have a wealth of resources for writing welcome emails that convert.

Your initial email should include some information about your brand and what kind of content subscribers can expect from you. You can also add links to resources, flagship products, and your social media accounts.

Offer Discounts to Subscribers

Another effective way to retain subscribers is by offering discounts or freebies. Your discount doesn’t have to be anything big: 10-15% is common. If you’re offering freebies, this might be a test drive of your product or free samples.

Of course, you’ll want to make sure that customers have a reason to remain subscribed to your newsletter.

Follow up with great content they can look forward to, as well as regular offers and goodies. That way, customers are more likely to stick around for the long term.

2. Use Recurring Payments

Recurring payments are a great way to keep customers engaged and deliver their favorite products every month. Therefore, you may want to consider offering subscriptions to your best selling items:

An example of a subscription service

As you can see in the example above, Shaker & Spoon delivers all the mixes and other fixings to help spruce up your drinks. Every drink has a background story, and they’ll teach you how to make it just like the pros.

If you’re looking to introduce customers to new products, you can also provide a subscription box service. For example, if you run an online food shop, you could deliver a mix of snacks or ingredients on a monthly basis.

3. Collect Feedback and Feature Reviews

Reviews can help you gain the trust of new customers and get a holistic picture of the customer journey. You can use this info to improve the customer experience and see if there are any concerns you need to address.

The simple act of asking for feedback shows customers that you care and are dedicated to making improvements. People appreciate being asked for their thoughts, especially if they feel that they’re contributing to your success.

It's important that you make it easy for buyers to leave reviews. For instance, you could include feedback forms on your site, or enable reviews through third-party platforms such as Google My Business:

An example of a feedback form

Surveys are another great way to collect feedback and testimonials. You can email customers a link to a short survey that asks about their shopping experience.

WordPress form plugins like WPForms make creating and managing these types of surveys super easy.

Moreover, you can ask customers if they would be interested in being contacted for a testimonial. You can then feature these testimonials on your website, email copy, or social media pages.

4. Provide a Frictionless Shopping Experience

According to recent studies, shopping cart abandonment rates sit at almost 70%. One of the leading causes of this phenomenon is a long, complicated checkout process.

An easy checkout process can help you drive higher conversions. It can also encourage users to make additional purchases from your store.

Therefore, you want to make sure your site visitors are able to process their orders in a quick and efficient manner, without having to sign up for an account or being directed to other pages.

Fortunately, Buy Now Plus can help you simplify the checkout process with powerful buy now buttons. You can even cut out some extra steps and take users straight to the checkout page to complete their orders.

5. Set Up an Affiliate Program

Affiliate marketing allows publishers and influencers to promote your products for a cut of the profits. For instance, you can give affiliates the option to advertise your products using trackable links or discount codes associated with their accounts:

An example of an affiliate program application

This strategy helps you build a loyal customer base, especially if you’re also offering discounts to affiliates on top of their normal commissions.

It can also help you reach a wider audience, and thus increase your sales.

You can easily set up an affiliate program on your existing WordPress site using a plugin like Easy Affiliate. This tool also enables you to track your conversions, process your program applications, and manage your members more efficiently.

Conclusion

Building a loyal clientele is a long-term game. However, by implementing a few effective strategies, you should be able to convert most of your first-time buyers into repeat customers.

In this post, we shared five tips to help you retain your customers:

  1. Start an email list that introduces your brand and provides additional value.
  2. Use recurring payments for frequently bought products, and offer subscriptions boxes.
  3. Collect and share reviews to help customers connect with your brand and gain their trust.
  4. Provide a frictionless shopping experience by streamlining the checkout process with Buy Now Plus.
  5. Set up an affiliate program with Easy Affiliate and offer discounts to your members.

Do you have any questions on how to convert one-time shoppers into loyal customers? Let us know in the comments section below!

If you liked this post, be sure to follow us on Twitter, Facebook, Pinterest, and LinkedIn.

How to Create a High-Converting Facebook Ad (3 Proven Tips)

As one of the world’s biggest social networks, Facebook Ads is the perfect way to connect with new customers and grow your audience. However, you’ll also face some stiff competition – in 2020, ten million advertisers used Facebook to promote their products and services.

Fortunately, there are tried-and-tested techniques that you can use to create high-converting Facebook Ads. By optimizing your advertisements, you should be able to attract the attention of social media users and convince them to interact with your ads. 

In this post, we’ll explore the reasons why so many businesses are investing billions into Facebook advertising campaigns. We’ll then share three tips for crafting show-stopping ads. Let’s get started!

An Introduction to Facebook Ads (And Why You May Want to Use Them)

With a built-in community of roughly 2.89 billion monthly active users, Facebook is the biggest social network in the world. Today, countless businesses use Facebook to promote their products and services.

Thanks to services such as Buy Now Plus, it’s even possible to sell on this platform directly, with no website required.

If you really want to drive conversions, then you may want to consider running a Facebook Ad. This is paid content that appears in the desktop or mobile version of the News Feed:

An example of a Facebook Advertisement.

Facebook also displays ads in its right-hand column. If you're a mobile app advertiser, then your ad may even appear outside of Facebook, via the Audience Network

When it comes to crafting the perfect ad, Facebook is a flexible platform. You can include everything from text and photos, to videos, special offers, and even events. This enables you to get creative and craft advertisements that will stop Facebook users in their tracks. 

With a huge audience, Facebook Ads can be very beneficial for new stores who are looking to secure their first sales, but also established businesses who want to grow their audience.

With the average internet user spending 145 minutes on social media every day, Facebook can also help keep your customers engaged over the long term.

As an established social network, Facebook has a wealth of information about all of its users. You can leverage this data to create highly targeted advertising campaigns.

This combination of a huge global user base and powerful targeting options makes Facebook Ads an excellent platform for driving sales. To get started, head over to the Facebook Ads Manager:

The Facebook Ads Manager dashboard

In this dashboard, select Create. Then, simply follow the onscreen instructions to craft your first Facebook Ad. 

How to Create a High-Converting Facebook Advertisement (3 Proven Tips)

The Facebook Ads Manager does a good job of guiding you through creating your first ad. However, if you’re really going to smash your goals, then it helps to have some tricks up your sleeve.

Here are three proven tips for creating high-converting Facebook ads.

1. Run Targeted Campaigns

Your typical Facebook user shares a lot of information. You can put this data to good use by creating targeted ads. This can deliver higher conversions, by only serving ads to people who are likely to make a purchase.

When creating your advertisement, you’ll have the option to target users based on their location, age, and gender. You can also target people based on their interests. This includes everything from sports to vegan food, meditation, and even specific hobbies:

Selecting the interests of your target audience in Facebook ads.

You can also target users based on behavior data. This includes their prior purchases, political views, and whether they have an anniversary coming up in the next 61-90 days:

Facebook's targeted audience settings.

Alternatively, Ads Manager has a Lookalike Audience feature. You can use this to reach individuals who are similar to your most engaged existing customers:

Facebook's Lookalike Audience settings.

Lookalikes can be a powerful way to connect with people who are likely to be interested in your business. When creating your Lookalike Audience, you’ll be asked to choose a source audience. Facebook will then search for people who have similar qualities to the people in the provided source.

You can also choose the size of your Lookalike Audience. Opting for a larger audience increases your potential reach, but may reduce the level of similarity between the Lookalike and your source.

By contrast, choosing a smaller audience will more closely match your source, but it may result in fewer people seeing your ads. 

2. Experiment With the Structure of Your Ad

Many businesses choose to structure their Facebook Ads as a single image or video. However, there are other formats available, including carousel ads and collections: 

A carousel Facebook advertisement.

Carousel combines multiple videos or images into a single ad placement. This is ideal if you want to create a showreel featuring all your best products or most popular services.

You can also use this format to display social proof, including multiple customer testimonials or reviews. This can be an effective way to convince new customers to take a chance on your brand. 

Meanwhile, Facebook Collection is a group of items. This can be a dynamic and engaging way to highlight all the features of a particular product, or for displaying multiple items in a single placement. 

When the user clicks this ad, it will expand into a full-screen, scrollable Instant Experience, formerly called Canvas. This also makes Collection a great tool for encouraging new customers to explore your brand and learn more about what you have to offer.

3. Optimize Your Facebook Advertisement With A/B Testing

Creating a high-converting Facebook advertisement can be a challenge. Every target audience is unique, and it isn’t always easy to predict the kind of content that your customers will respond most positively to.

That’s where A/B testing comes in. This enables you to create variations of the same advertisement:

A/B testing in Facebook

You can then monitor the results, and pinpoint the variation that’s delivering the highest conversion rates. For example, you might experiment with different calls to action (CTAs) to see which one achieves the highest click through rate (CTR). 

Then, you can simply deactivate the under-performing variations and invest all of your time and effort (and advertising budget) into the ad that’s providing the best results. Therefore, A/B testing can remove the element of guesswork associated with designing a successful Facebook Ad.

By testing a large number of variations in quick succession, you can quickly build up a detailed picture of your target audience’s advertising preferences. This is an invaluable insight that you can use to improve your future campaigns.

Conclusion 

It’s impossible to overestimate Facebook’s potential for expanding your reach, building brand awareness, and boosting your bottom line.

If you’re not advertising on Facebook, you’re almost certainly missing out on dozens, or perhaps even hundreds of sales.

Let’s quickly recap three proven tips for creating a high-converting Facebook advertisement:

  1. Run targeted campaigns.
  2. Experiment with the structure of your ad.
  3. Optimize your Facebook advertisement with A/B testing.

Do you have any questions about advertising on Facebook? Let us know in the comments section below!

If you liked this post, be sure to follow us on Twitter, Facebook, and LinkedIn.

5 Ways to Improve the Online Checkout Experience

You've got a beautiful website, great products, and buyers who want what you have. They get to the cart and hit the checkout button, only to be met with a complicated process with too many hoops to jump through.

Many may become impatient and leave.

Fortunately, you can make sure your customers don’t leave your site empty-handed and frustrated. By streamlining your checkout process, you can help prevent cart abandonment and increase your conversions.

In this post, we’ll look at some common checkout problems that often lead to cart abandonment. Then we’ll share five tips to help you improve your store’s checkout process. Let’s get started!

Common Checkout Issues That Can Lead to Cart Abandonment 

cart abandonment

According to recent studies, over 69% of online shoppers abandon their shopping carts. Some of the main reasons for this include:

  • A lengthy or confusing checkout experience
  • Forcing visitors to sign up for accounts before they can check out
  • Jarring design that’s inconsistent with the brand
  • Sketchy-looking payment pages that don’t offer a sense of security

If buyers can’t get what they came for quickly, they’re likely to leave your site and do their shopping elsewhere.

Therefore, it's vital to ensure that your checkout process is quick and easy, and that it blends in nicely with the rest of the shopping journey.

5 Ways to Improve the Online Checkout Experience

Luckily, optimizing the checkout process doesn’t have to be complicated and time-consuming. Here are five simple ways you can improve the online checkout experience for your customers.

1. Simplify the Checkout Page

Typically, you’ll only want billing and shipping information on your checkout page. You may also want to gather some additional details, such as email addresses or phone numbers for sending order updates.

However, we recommend that you only ask for the information you need.

Moreover, the checkout page should be clean and distraction-free. If you run ads on your site, you may want to try to keep the order pages clear of them.

Here's an example of a clean and streamlined checkout page:

An example of a simple checkout page

As you can see, this page asks for minimal information. There are no visual distractions, and the process is short enough that it fits on one page.

2. Make Sure Your Checkout is Mobile-Friendly

With more and more customers making purchases on their mobile phones, it’s important to ensure that you have a mobile-friendly checkout.

For instance, you may want to enable payments with digital wallets such as Google Pay and Apple Pay:

Apple Pay homepage

This way customers can use their stored payment details to complete their orders more quickly.

You can also use a buy now button to give customers the option of skipping straight to the checkout page. Especially on mobile devices, people appreciate a fast and easy purchasing process without the extra loading time.

At Buy Now Plus, we help you create high-converting buttons for a quick and easy checkout on any device.

Moreover, you'll be able to use these buttons on other platforms, including your social media pages and newsletters. This means you can accept payments from anywhere online.

3. Eliminate Surprises

A general rule of thumb for user experience (UX) is this: the more predictable your design and flow are, the better. Jarring, surprising experiences are an easy way to drive visitors away.

Therefore, it's a good idea to guide your users through the checkout process. You can use a multi-step checkout, which is excellent for reducing the amount of scrolling buyers have to do.

This enables you to cleanly display everything on a single page using a multi-step form:

An example of a step-by-step checkout process.

There’s another surprise no one likes to see: high shipping costs. Depending on the platform you’re using, it may not be possible to give an exact shipping amount early on.

However, you might want to provide an estimate or make it clear that there will be shipping and handling fees.

If you’re looking to speed up your checkout process a little more, you could offer a guest checkout option. Many customers, especially one-time buyers, don’t want to deal with setting up another account.

4. Keep the Checkout Design Consistent With Your Site

Having a professionally designed site can help you build trust. On the other hand, messy and inconsistent design might make your site look suspicious, scaring customers away.

Your checkout style should be consistent with your site. This means it should avoid any jarring, unnatural transitions.

You never want to make customers feel like they’re being shipped off to someone else to make their payments, unsure if they’re paying you or a third party.

With Buy Now Plus, you can fully customize your buy now buttons so they match your branding. This way, you can keep a cohesive design throughout your checkout process.

5. Include Obvious Security Features

Finally, your checkout process should also show users they can trust you with their payment details. Therefore, you may want to provide secure payment options such as PayPal and Stripe:

The Stripe homepage

Displaying the names and logos of your payment providers can be a great way to offer that additional sense of security. Additionally, you'll want to ensure that these options are placed in a prominent area on your site, so customers are able to see them right away.

You'll be pleased to learn that Buy Now Plus runs on Stripe. This means that, as an online seller, you and your customers will benefit from Stripe's fraud protection and other security features.

Conclusion

A simple checkout experience can mean the difference between customers leaving your site with the products they love, or walking away empty-handed and frustrated.

Fortunately, you don't need to put a lot of effort (or money) into optimizing your customer journey.

In this post, we looked at five effective ways to improve your online checkout experience:

  1. Simplify your checkout page by only asking for information that you need and minimizing visual distractions.
  2. Make sure your checkout process is mobile-friendly and cuts out extra steps, by using a service like Buy Now Plus.
  3. Get rid of surprises like high shipping costs, and let buyers know exactly where they are in the checkout process.
  4. Keep your checkout design consistent with your brand.
  5. Include secure payment methods, such as PayPal and Stripe, so your buyers feel safe when they’re checking out.

Do you have any questions about how you can implement these tips to improve your customers’ online checkout experience? Let us know in the comments section below!

If you liked this post, be sure to follow us on Twitter, Facebook, and LinkedIn.

How to Sell on Social Media – Even Without a Website

With an audience of over 3.6 billion, social media is a popular platform among online sellers. However, many fall into the trap of assuming that, before you can unlock the true power of social platforms, you need a website.

This is far from true. Today, many business owners sell to customers around the globe, without splashing out on web hosting, a domain name, or any of the costs typically associated with running a successful ecommerce site.

In this post, we’ll look at why Twitter, Facebook, and other popular social platforms are revolutionizing the ecommerce industry. We’ll then share three ways to sell products on social media, with no website required. Let’s get started! 

Why You May Want to Sell Products on Social Media

Social media is a powerful tool for building brand awareness and promoting your products. However, you can take things one step further and sell products directly on social platforms – even if you don’t have a website. 

There are several reasons to use social media as your primary ecommerce channel. First, you can sign up for all of the major social media platforms for free.

Even if you have zero budget, you can create a Facebook account and promote your products to 2.80 billion active users.

By contrast, launching an online store requires you to purchase a domain name and invest in web hosting. You may even need to enlist the services of professional designers and developers. 

In addition, social platforms often come with built-in analytics and tools. This includes Facebook Audience Insights:

Facebook Insights can help you sell products on social media.

By using these tools to continuously analyze and evaluate key metrics, you can identify the content and activities that deliver the highest conversions. You can then use this data to optimize your future social media strategies and secure even more sales.

When you operate an ecommerce site, you’ll often have to invest time and effort into implementing third-party analytics. For example, many website owners use Google Analytics with their WordPress website:

The Google Analytics dashboard.

This setup requires time and effort. Depending on the tool you choose, you may even need to purchase a license or pay a subscription fee. 

In addition, social media is a time-sensitive platform, which makes it ideal for encouraging impulse purchases.

Someone scanning social media may spot your product and decide to purchase it before it gets lost in their timeline. By tapping into this spur-of-the-moment decision making, you may be able to boost your sales.

How to Sell Products on Social Media (3 Ways)

Social media offers an opportunity for online sellers to make more money. However, it’s not enough to simply publish posts about your products.

To help you make the most of this golden opportunity, here are three effective ways to sell products on social media.

1. Post to Facebook Marketplace 

Facebook Marketplace comes with a built-in audience of one billion customers. You can use this peer-to-peer marketplace to sell your products directly on Facebook:

You can sell products on social media using Facebook Marketplace.

Users will see Marketplace ads in their timeline and in their recently viewed items. This gives you a chance to catch the eye of potential new customers, without relying on them to specifically search for your products or brand. 

There’s no fee for listing items on this platform. This makes Facebook Marketplace one of the most affordable options for selling products on social media.

Facebook Marketplace is far from unique, as there are hundreds of online marketplaces to choose from. However, not every customer will feel comfortable purchasing from strangers on sites such as the Craigslist classified ads site.

Some websites even have a reputation for being filled with scammers and people pretending to be someone they’re not.

Here, Facebook Marketplace has a huge advantage. Each buyer and seller is connected to a personal or business Facebook account. This level of transparency can make even the most suspicious of customers feel comfortable making an online purchase.

2. Join an Affiliate Program

It’s possible to sell products without an inventory. By becoming an affiliate partner, you can promote a merchant’s products to your followers and get a cut of every successful sale. 

A quick search will reveal hundreds of affiliate programs that you can join. The key to generating the maximum revenue is finding the affiliate program that’s the best fit for your target audience

To start, it helps to consider the platform’s general user base. For example, 41% of TikTok users are aged between 16 and 24. If you’re planning to post your affiliate links to TikTok, then you’ll need products that appeal to this demographic.

It’s also important to find products that fit with your established brand. This will make your promotions feel more authentic, which can help drive conversions. 

Most of the big platforms have built-in analytics that you can use to learn more about your followers. For example, you can use Twitter Analytics to explore your audience’s locations and interests:

The Twitter Analytics dashboard.

This information can help you find brands and products that resonate with your followers. After enrolling in a program, your merchant will provide affiliate links.

However, these URLs can be long and complex. To make these links more shareable, you may want to consider using a link cloaking plugin such as Pretty Links

3. Add Buy Now Buttons to Your Social Content

Social media is designed to be a rapid-fire tool, where people discuss events and respond to posts in real time. This time pressure already makes social media a great platform for promoting your products.

However, you can increase this sense of urgency by adding buy now buttons to your posts:

An example of a Buy Now button.

You can use our Buy Now Plus service to create a range of cross-platform, social media-friendly buy now buttons. This service integrates with Stripe, so your followers can fast-track straight to a Stripe-powered checkout and complete their purchase within seconds.

Thanks to this integration, you can even accept credit card payments without a website:

The Stripe checkout.

The complexity of the checkout process can have a huge impact on your cart abandonment rates. In fact, 34% of shoppers will abandon their cart if they’re forced to create an account. By helping you simplify the checkout process, Buy Now Plus can also help you boost your conversion rate. 

Conclusion 

We all know that social media is a powerful tool for raising brand awareness and promoting your products. However, you can take this one step further and complete the sales transaction entirely on your chosen social platform. 

In this post, we looked at three effective ways to sell products directly on social media, without having to set up an online store:

  1. Post to Facebook Marketplace (for free!).
  2. Join an affiliate program and promote products to the right audience.
  3. Add buy now buttons to your social content, using a tool such as Buy Now Plus.

Do you have any questions about how to run a successful ecommerce business without a website? Let us know in the comments section below!

If you liked this post, be sure to follow us on Twitter, Facebook, and LinkedIn.

How to Monetize Your Blog (4 Revenue-Generating Tips)

Thanks to the rise of user-friendly content management systems (CMS) such as WordPress, it’s never been easier to create a blog. However, you may want to convert all of that time and effort into cash at some point. 

Fortunately, there are lots of ways to make money as a blogger. If you’re generating a healthy amount of traffic, you’re in a prime position to turn your visitors into revenue. 

In this post, we’ll discuss why so many people are monetizing their blogs. We’ll then share three of our favorite revenue-generating tips. Let’s get started!

Why You Should Consider Monetizing Your Blog

There are many different reasons why people decide to start a blog. You might have dreamed about monetization all along. Alternatively, perhaps you’re knowledgeable about a particular subject and want to share your passion with the world:

An example of a passion blog about growing succulents.

You might even use your posts as part of a content marketing strategy for a related business. 

Regardless of why you started blogging, running a successful blog requires time and effort. At some point, you may want to be reimbursed for all your hard work.

Blogging can also turn into an expensive hobby. While there are plenty of free tools, you’ll usually end up investing some hard-earned cash into your blog. 

Most commonly, these costs include purchasing web hosting and a domain name. However, you can also incur additional miscellaneous fees.

For example, you may pay for specialist training to help grow your audience. Alternatively, you might run advertising campaigns on popular platforms such as Facebook, Twitter, or Google.

By monetizing your blog, you can recoup some of these costs and perhaps even turn a profit.

While blogging is a hugely competitive industry, it’s still possible to convert a popular site into an additional revenue stream. You might even achieve the ultimate dream and trade your job for a career as a full-time blogger.

How to Monetize Your Blog (4 Revenue-Generating Tips)

If your blog has an audience, there are many ways to convert those visitors into revenue. Here are three ways to earn money from blogging.

1. Use a Paywall Plugin

As with any product, one of the easiest and most straightforward ways to make money off your content is to sell it.

If you have a WordPress site (and what blogger doesn't?), a high-quality paywall plugin is your best bet. The most popular one out there is MemberPress – and for good reason.

The MemberPress homepage.

The plugin is super easy to use, requires no coding, and lets you do things like…

  • Create a new paywalled site
  • Add subscriptions to your existing site
  • Use super customized paywalling with flexible sampling (lead-in, metered, and hard paywalls) like The Wall Street Journal or The New York Times, for example
  • Create and sell online courses
  • Build a dedicated community
  • Accept credit cards and digital wallet payments right on your site

The real beauty of MemberPress is in its Content Protection Rules and Memberships functions.

Through Content Protection Rules, you can really drill down how you monetize your content. You can protect…

  • All content – Your entire website
  • Posts categorized and posts tagged – All content under a specific category or tag
  • Single posts – Any individual post
  • All posts – All posts except those you specify as exempt
  • Custom URIs – Specific URLs (super useful if you want to restrict content like ebooks or digital downloads)
  • Custom post types – Any custom post type you create

MemberPress basically makes your blog work like any of the big, fancy online publications out there. And if you run into any issues with the plugin – or your site in general – reach out to the MemberPress wizards over at WP Tech Support.

2. Become an Affiliate Marketer

As an affiliate marketer, you’ll partner with third-party businesses and promote their products and services via your blog. You’ll earn a commission for all sales originating from your unique affiliate links. 

Affiliate marketing is big business. With annual spending estimated at $12 billion, bloggers have a huge opportunity to make money online. 

A quick search will reveal hundreds of affiliate programs that you can join. To help drive conversions, we recommend searching for a partner or products that will appeal to your existing readership.

If you’re unsure about your audience demographics, then you can learn more about your visitors using a tool such as Google Analytics:

The Google Analytics dashboard.

It’s also wise to feature products related to your blog’s content. For example, if you write about your experiences as a parent, it may make sense to promote baby-themed products.

These relevant promotions will make your affiliate links feel more authentic, which can help drive conversions.

While using affiliate marketing is one of the most popular ways to generate money from blogging, affiliate URLs aren’t always pretty.

These links are often long and complex with obvious tracking codes. They can be off-putting to your readers, who may even wonder whether these odd-looking URLs are spam.

For this reason, we recommend simplifying your affiliate URLs using a link shortener such as the Pretty Links plugin:

Monetize your blog using the Pretty Links plugin.

With Pretty Links, you don't have to worry about lengthy URLs scaring your readers away. Simply enter the target link into the dashboard. Then, the plugin will generate a shorter, neater alternative, ready for you to post to your blog.

3. Enrol in an Advertising Network

Many businesses, including blogs, generate revenue by selling advertising space. There are various ad networks, but Google AdSense is one of the biggest platforms. In fact, it is used by over 38 million blogs and websites.

All of Google’s ads are mobile-responsive, so you can earn revenue regardless of whether readers are using a desktop, smartphone, or tablet.

Google even tailors these adverts based on the visitor’s geographical location, which is great for driving conversions.

There are multiple ways to display Google advertisements on your blog, but WordPress users may want to check out Site Kit. This plugin adds a range of popular Google services to your WordPress dashboard, including Google AdSense:

The Google Site Kit plugin.

After activating and configuring this plugin, you’ll need to wait for Google to approve your blog. However, as soon as you get the go-ahead, it will start displaying ads across your site.

Site Kit will even optimize your advertisements automatically by determining their optimal sizes, types, and placements. With this tool, you can avoid alienating your readers by displaying intrusive or irrelevant adverts. 

4. Add Buy Now Buttons to Your Blog Posts

Some of the biggest websites in the world use buy now buttons to encourage visitors to make a purchase. These buttons simplify the purchasing process by enabling customers to jump straight to checkout:

An example of a buy now button.

Although they’re commonly associated with ecommerce giants such as Amazon and eBay, you can add buy now buttons to your blog posts. If you sell products or services in addition to writing articles, these buttons can convert your readers into customers.

Alternatively, you can use buy now buttons to promote your affiliate URLs if you're part of an affiliate network. 

Even if you don’t have any products to promote, you can still monetize your site using buy now buttons. Many writers publish blogs for free but ask visitors to donate if they enjoyed the content.

If you create your buttons using a flexible service such as our Buy Now Plus plugin, then it’s easy to transform them into donation prompts: 

The Buy Now Plus dashboard.

By simply changing the button’s label, you can start accepting donations. Buy Now Plus even supports variable pricing, so your readers can choose how much money to send you. This flexibility may result in more contributions. 

Conclusion

Creating a successful blog takes time and dedication. At some point, you may want to be reimbursed for all of your hard work. 

Let’s quickly recap three ways to monetize your blog:

  1. Become an affiliate marketer, using a plugin such as Pretty Links.
  2. Enrol in an advertising network.
  3. Add buy now buttons to your blog posts, with our Buy Now Plus service.

Do you have any questions about how to make money as a blogger? Let us know in the comments section below!

If you liked this post, be sure to follow us on Twitter, Facebook, and LinkedIn.

How to Start Your Own Affiliate Marketing Program (In 3 Steps)

It might seem like influencers are everywhere these days. However, you're not just seeing things – working with these representatives is a popular and effective way to promote a brand.

You might be wondering how to leverage this power by starting your own affiliate marketing program.

Fortunately, the process doesn't have to be difficult. By following a few best practices and focusing on the essential elements, you can build a profitable affiliate program for your brand.

In this article, we'll cover a few reasons you might want to consider starting an affiliate marketing program. Then we'll show you how to create your own in three simple steps. Let's get to it!

Why You Might Want to Start an Affiliate Marketing Program

An affiliate marketing program is a network of influencers. You connect with respected people within your niche, and they promote your products to their followers. In return, you pay them a commission from any resulting sales.

There are many benefits to running an affiliate program. For one thing, it's a simple way to spread the word about your products. You also don't have to pay unless a sale is made, so using influencers is cost-effective.

Influencers also get a lucrative deal. On top of commissions, affiliate links can be a passive and flexible income stream.

That means these marketers can promote your content even if they've shifted to remote work. Additionally, the influencer's audience might appreciate an informed recommendation.

With advantages for all parties, it's no wonder that affiliate marketing is a booming business. Statistics show that this market is expected to reach a value of nearly $8.2 billion by 2022. That means getting started now will be an investment in your brand's future.

How to Start Your Own Affiliate Marketing Program (In 3 Steps)

We'll now use this simple guide as a kickstart for affiliate marketing. If you're interested in promoting your business with affiliate marketing, chances are you already have a website up and running.

If not, you'll need a basic WordPress site ready before you get started with the Easy Affiliate plugin, which we'll be using in this tutorial.

Step 1: Install and Activate Easy Affiliate

Starting an affiliate marketing program can be a bit complex. It can be hard to juggle links, payments, and ads.

That's why we highly recommend you use an affiliate program management product, such as Easy Affiliate, to take care of everything for you:

Easy Affiliate homepage.

Easy Affiliate enables you to host your affiliate program on a WordPress site. It's a simple way to integrate referral marketing infrastructure into your page.

Some other powerful features that you'll unlock with Easy Affiliate include:

  • Detailed progress reports to help you perfect your approach
  • Email marketing to spread the word about your program
  • One-click payouts to make commissions easy for you and your influencers

Additionally, Easy Affiliate doesn't charge any transaction fees. Once you purchase your plan, there are no additional hidden costs. The only per-transaction fee you'll pay is to PayPal, which the plugin uses to process payments.

The program also carries a 14-day money-back guarantee, so it's safe to give it a try if you're on the fence.

First you'll want to decide on your pricing plan. The options are Basic, Plus, and Pro. We suggest starting with Basic if you're new to affiliate marketing. However, Plus and Pro might also be worth considering if you have a few sites.

After you've made your choice, download Easy Affiliate. Be sure to grab your license key as well, because you'll need it to receive crucial plugin updates. Then install and activate the plugin.

You might also want to take some time at this point to consider your strategy. Understanding the essential elements for affiliate beginners can set you up for success.

Step 2: Customize Your Main Settings

Before you get started, there are a few settings you'll want to adjust. We'll take you through the most important ones. However, you might want to thumb through Easy Affiliate's helpful articles for more information.

Let's begin with the basic settings. You can find them in your WordPress dashboard under Easy Affiliate > Settings. Your screen will differ slightly depending on your plan:

The main settings for Easy Affiliate.

If you'd rather use the built-in setup wizard, simply scroll down to the bottom of the page to find that option. You can also add elements such as your basic business info.

If you keep scrolling, you'll find an option to decide which pages will act as your affiliate pages. These pages will generate automatically when you add Easy Affiliate. However, you can also edit them from this area.

Next up, we'll take a look at the Commissions tab:

The Easy Affiliate commissions tab under settings..

Here you'll decide on your affiliate program commission structure.

You can choose to pay out commissions as a percentage of sales or as a fixed rate. Your payout settings are also in this tab. Feel free to take your time here – payments are essential for both you and your influencers.

If you want to add integrations, check out the Ecommerce and Integrations tabs. For example, you can set up one-click PayPal functions under Ecommerce.

Finally, head over over to the Advanced tab:

The Easy Affiliate advanced settings tab.

It has several useful fields, but we'll focus on the essentials for now. We encourage you to set up email notifications to keep affiliates in the loop.

Additionally, you'll need to adjust international settings if you work on a global level.

Step 3: Prepare Resources for Your Affiliates

Finally, let's get to the heart of your program: your affiliates! Supporting your influencers is the best way to help them succeed.

On top of showing them how to do things like accept credit cards without a website, you can also provide other resources.

Remain on the page from the last step. This time, navigate to the Affiliates tab:

The Affiliate tab for Easy Affiliates.

First up is Registration Type. This is where you'll determine whether affiliates can join automatically, will need to apply, or will need direct administrative approval.

For your first program, we recommend requiring an application. This will help you screen for the best candidates directly.

The Form Fields section enables you to decide what information you'll collect from influencers. You can also make it so that users are automatically added as affiliates – which is perfect if you've built your WordPress site solely for your program.

Finally, you can change the affiliate dashboard. We suggest that you take the time to add your brand's colors and a custom welcome message. Doing so is a simple yet essential part of any new website branding checklist.

Next up, we'll change gears. Easy Affiliate enables you to expand your brand with professional-looking links and banners. Go to Easy Affiliate > Creatives > Add New:

The creative creation screen for Easy Affiliates.

Simply fill in the fields to create your new link. If you'd like to add a visual element, choose Banner from the Type drop-down menu. You'll then see an option to upload an image.

Try to make several links and banners. This can help make your marketing varied yet consistent. Once you've made a few creative assets, you can provide them to affiliates so they can advertise your business in places such as their social media accounts.

Conclusion

Affiliate marketing spending is on the rise. That means there's a lot of potential for using influencers to advertise your company. Fortunately, starting your own affiliate marketing program can be simple with the right tools.

In this article, we showed you three steps to begin your affiliate program:

  1. Choose and install a pricing plan from Easy Affiliate.
  2. Customize the main settings, such as the commission structure.
  3. Help your influencers succeed with a clear structure and dynamic assets.

Do you have any questions about starting your own affiliate marketing program? Let us know in the comments section below!

If you liked this post, be sure to follow us on Twitter, Facebook, and LinkedIn.

How to Keep It Simple and Keep Your Customers (3 Tips)

In today’s always on, always connected world, you have more opportunities than ever to communicate with your customers. However, you also have more chances to overwhelm and even alienate your target audience.

With the typical internet user suffering from information overload, you may be able to stand out from the crowd by doing less. By stripping your marketing down to its essentials, you can help even the most overwhelmed shopper make a smart purchasing decision and inspire customer loyalty. 

In this post, we’ll discuss why keeping it simple may be the key to retaining your customers. We’ll then share three tips on how to do less while achieving more. Let’s get started! 

Why Keeping It Simple May Be the Key to Retaining Your Customers

When trying to appeal to today’s tech-savvy consumer, more isn’t always better. There’s a misconception that the more content you provide, the greater your chances will be of holding the customer’s attention.

It’s easy to fall into the trap of believing that a constant stream of marketing campaigns is the only way to grow your audience. However, this may not always work.

For many shoppers, the sheer amount of online content can be completely overwhelming. If you bombard people with even more information, you may be putting them off rather than drawing them in.

With this in mind, it makes sense to focus on decision simplicity. This is where you provide your customers with just enough data to make an informed purchasing decision – and no more.

For people who are already feeling overwhelmed, this can make your business far more appealing than a competitor who is pumping out content 24/7. 

How to Keep It Simple and Keep Your Customers (3 Tips)

While it’s tempting to try and wow the customer, information overload is a very real phenomenon. By taking a less-is-more approach, you can cut through all of the noise and help your audience make stress-free purchasing decisions.

Let's take a look at how to keep it simple and keep your customers, in three easy steps. 

1. Personalize the Customer Experience

When you’re trying to appeal to your entire customer base, it’s easy to overwhelm the individual with irrelevant information. Instead of taking a one-size-fits-all approach, you may want to focus on delivering a personalized experience.

This can help minimize the amount of content the visitor has to deal with, which can simplify the purchasing decision. 

If you want to provide a personalized shopping experience, it might make sense to offer customers a membership service. This is often essential for creating a complete record of the individual’s preferences, habits, and behavior.

All of this data is invaluable for delivering a highly personalized, highly persuasive customer experience.

There are a number of membership plugins available for WordPress, but MemberPress is leading option

Keep your customers, using a membership plugin such as MemberPress.

You can use this plugin to display different content depending on the shopper’s role and capabilities. This can be a quick and easy way to hide information that’s irrelevant to the individual, and prioritize the content that’s more likely to make them convert. 

Meanwhile, if you’re using the popular WooCommerce ecommerce platform, there are a number of add-ons that can help you tailor your website to each user. This includes WooCommerce Customer History:

The WooCommerce History add-on can help you keep your customers.

The Customer History add-on records how each visitor browses your store, and maintains a full purchase history log. You can then use this information to strip out all the unnecessary content and create a more streamlined purchasing journey. 

2. Simplify the Purchasing Journey

By reducing the number of screens the shopper has to navigate, you can reduce the amount of information they come into contact with. This is where a buy now button can be your secret weapon. 

These call to action (CTA) buttons promise to simplify the purchasing journey by transporting the customer directly to the checkout page. You can quickly and easily create this button using our free Buy Now Plus service.

Simply connect Buy Now Plus to your existing Stripe account, or create a new free Stripe account right in the Buy Now Plus setup process. Then you’re ready to create a wide range of high-converting buy now buttons:

The Buy Now Plus dashboard.

After creating a button, you can even deploy it across multiple platforms. This helps you provide a consistent and seamless experience regardless of whether the customer is making a purchase from your website, social media accounts, or marketing emails.

By providing this kind of omnichannel shopping experience, you can make the purchasing process feel effortless and intuitive across multiple platforms. This can help you improve your customer retention rates. 

3. Segment Your Email Campaigns

According to Adobe’s Email Usage Study, Americans spend over five hours a day checking their emails. That’s a huge window of time where you could be promoting your products.

However, most businesses are fully aware of this opportunity, so your typical shopper is probably already drowning in marketing emails. If you add to the pressure, it’s unlikely to end well. The consumer might ignore your messages or unsubscribe from your email list.

Therefore, it’s important to minimize the number of times you contact the customer, while still using email marketing to drive conversions. The best way to achieve this tricky balancing act is by using segmentation. 

A segmented email campaign is where you send targeted messages to your subscribers based on their characteristics or actions, such as their purchase histories. This enables you to replace multiple generic messages with a single email that speaks to the individual shopper’s needs. 

Even if the customer is feeling swamped, highly-targeted messages can still spark a positive reaction. In fact, segmented email campaigns experience 74.53% higher click rates compared to non-segmented campaigns, and companies report a 760% increase in revenue from segmented emails.

All of the major email automation programs support segmentation. Many WordPress plugins also have built-in support for targeted emails, including the free MailPoet plugin:

The MailPoet plugin can help you send targeted emails.

MailPoet comes with an easy-to-use newsletter builder and a selection of responsive templates. It also enables you to send automatic WooCommerce emails.

For instance, you can welcome your new customers, send emails to shoppers who purchased a particular product, and reach out to those who abandoned their carts.

Conclusion 

When it comes to selling your products, the customer needs just enough information to make an informed purchasing decision – and not a single word more.

While it’s tempting to try to dazzle your audience, your typical internet user is already suffering from information overload and won’t thank you for adding to it.

Let’s quickly recap how you can avoid overwhelming your customers: 

  1. Personalize the shopping experience by creating a membership site with MemberPress.
  2. Simplify the purchasing journey by using buy now buttons with Buy Now Plus.
  3. Segment your email campaigns by using a WordPress plugin like MailPoet.

Do you have any questions about how to keep it simple and keep your customers? Let us know in the comments section below!

If you liked this post, be sure to follow us on Twitter, Facebook, and LinkedIn.

css.php