5 Popular Payment Gateways Customers Will Appreciate on Your Site

Do you need a payment gateway for your online business? Here’s a list of our top picks of 2022 with tips for how to choose the right one!

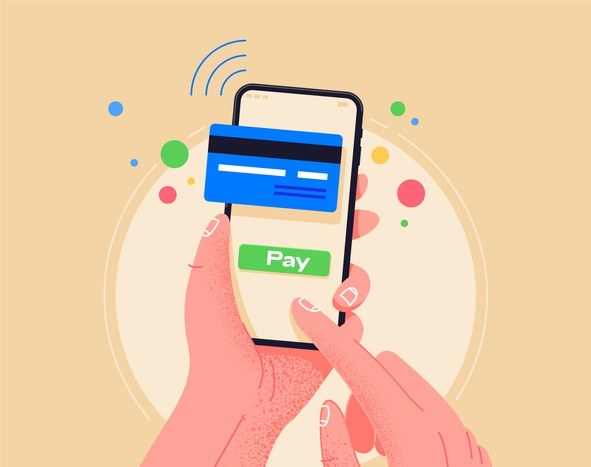
If you want to start selling online, you probably already know that a payment gateway is a must. Yet with so many options to choose from, how do you make sure you pick the right one for your business?

The right payment gateway can increase conversions by providing customers with a user-friendly and transparent experience. Once you understand what each option has to offer, you'll be well-placed to choose a platform that's suited to your goals and niche.

In this post, we'll explain what a payment gateway is and how to choose the right one. Then we'll explore our 5 top picks, including the pros, cons, and pricing of each.

Let's jump right in!

How to Choose the Right Payment Gateway for Your Online Store

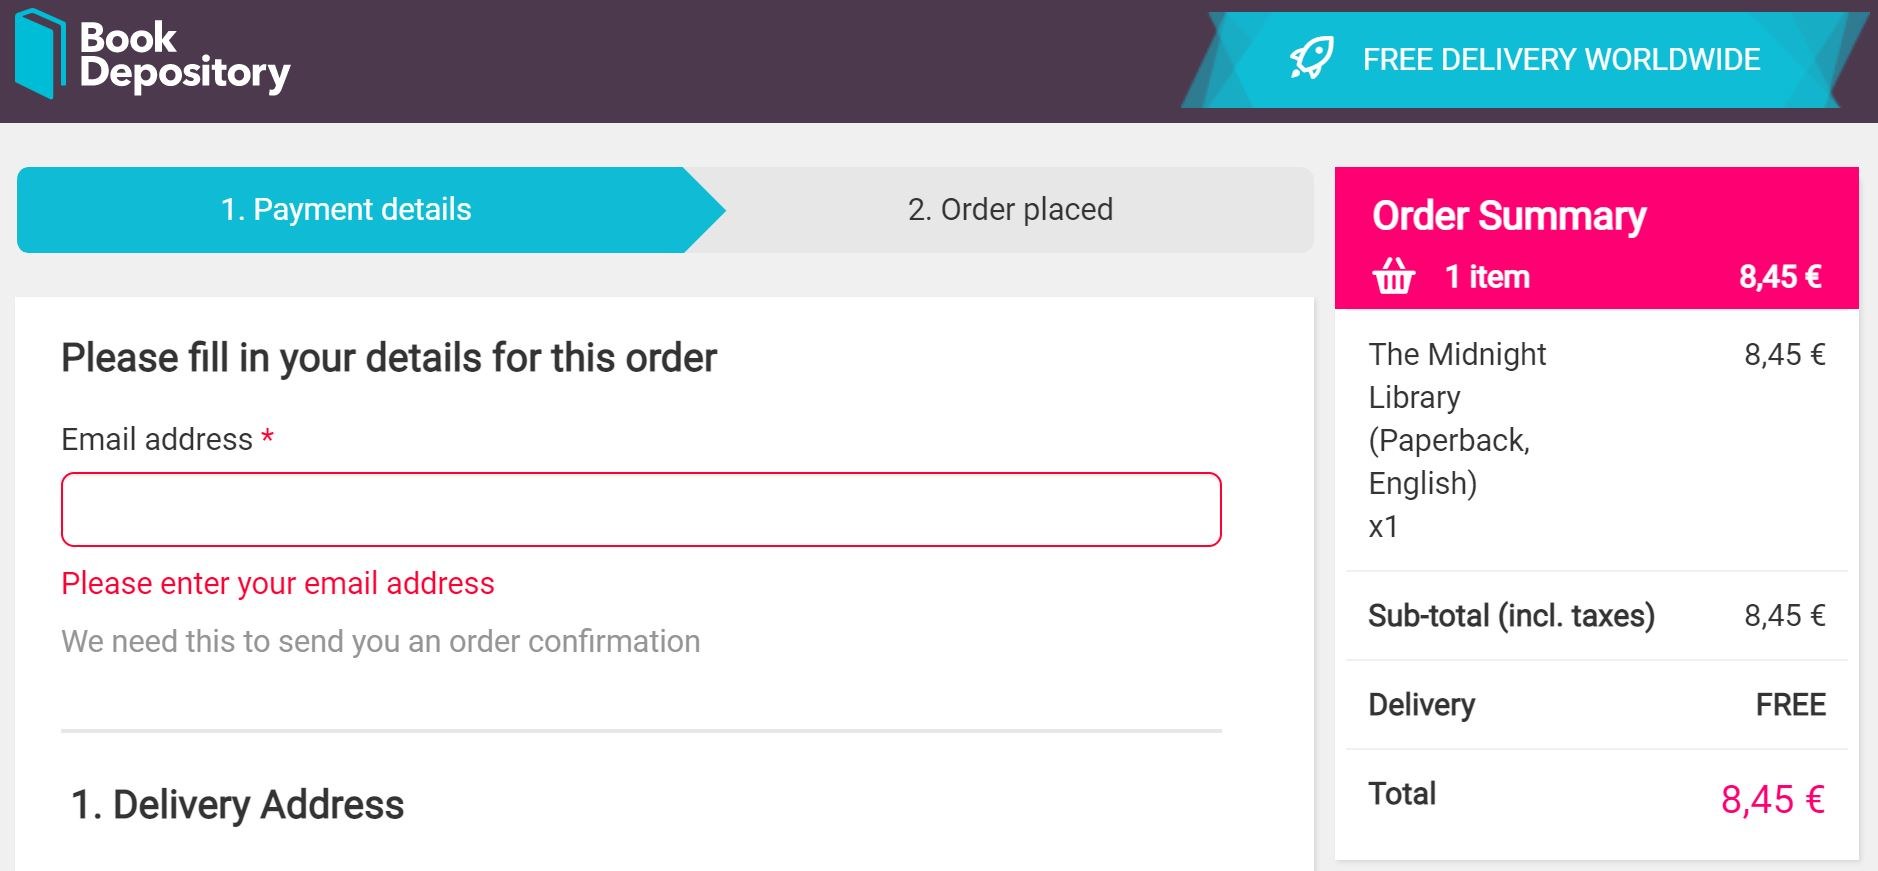
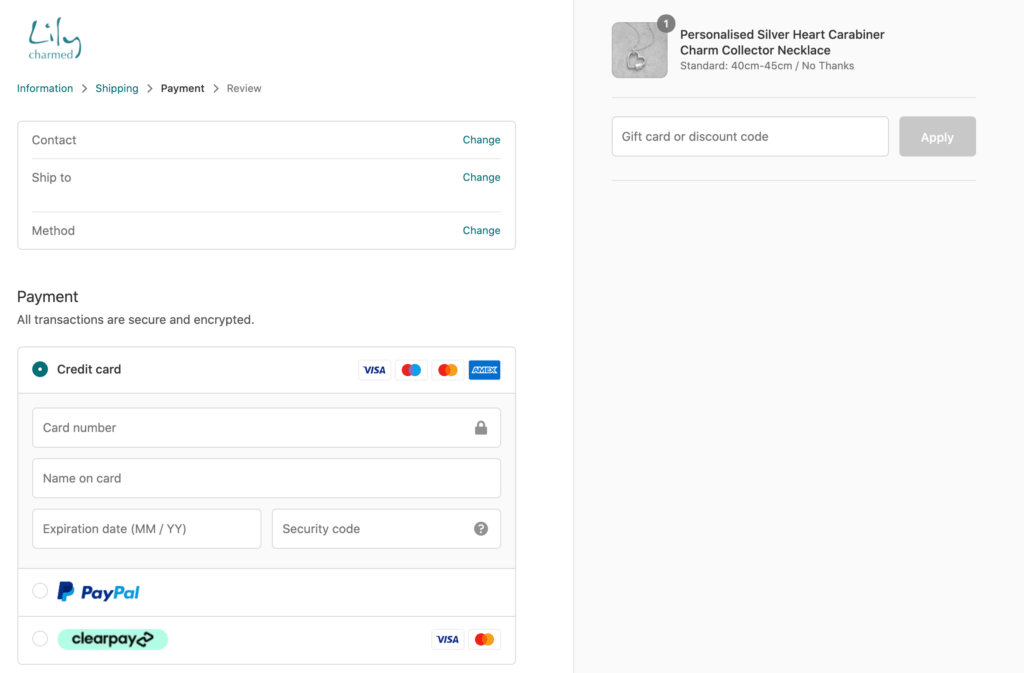
A payment gateway is simply a platform for processing payments. It collects payment data from a customer (such as credit card details), then processes and approves the transaction.

If you want to accept payments through any method besides cash and checks, you'll need to work with at least one payment processor. Often, it's smart to provide your customers with multiple options:

Payment method options

The right payment gateway makes buying online secure, quick, and easy. However, what works for one online business might not be ideal for yours. So it's important to consider your needs and target market before making a decision.

When choosing a payment gateway to work with, you'll want to consider:

  • The payment types and currencies you want to support.
  • The cost of using the processor, based on the transaction volume you expect.
  • Integration options for your website's ecommerce platform, and any POS systems and other third-party tools you use.
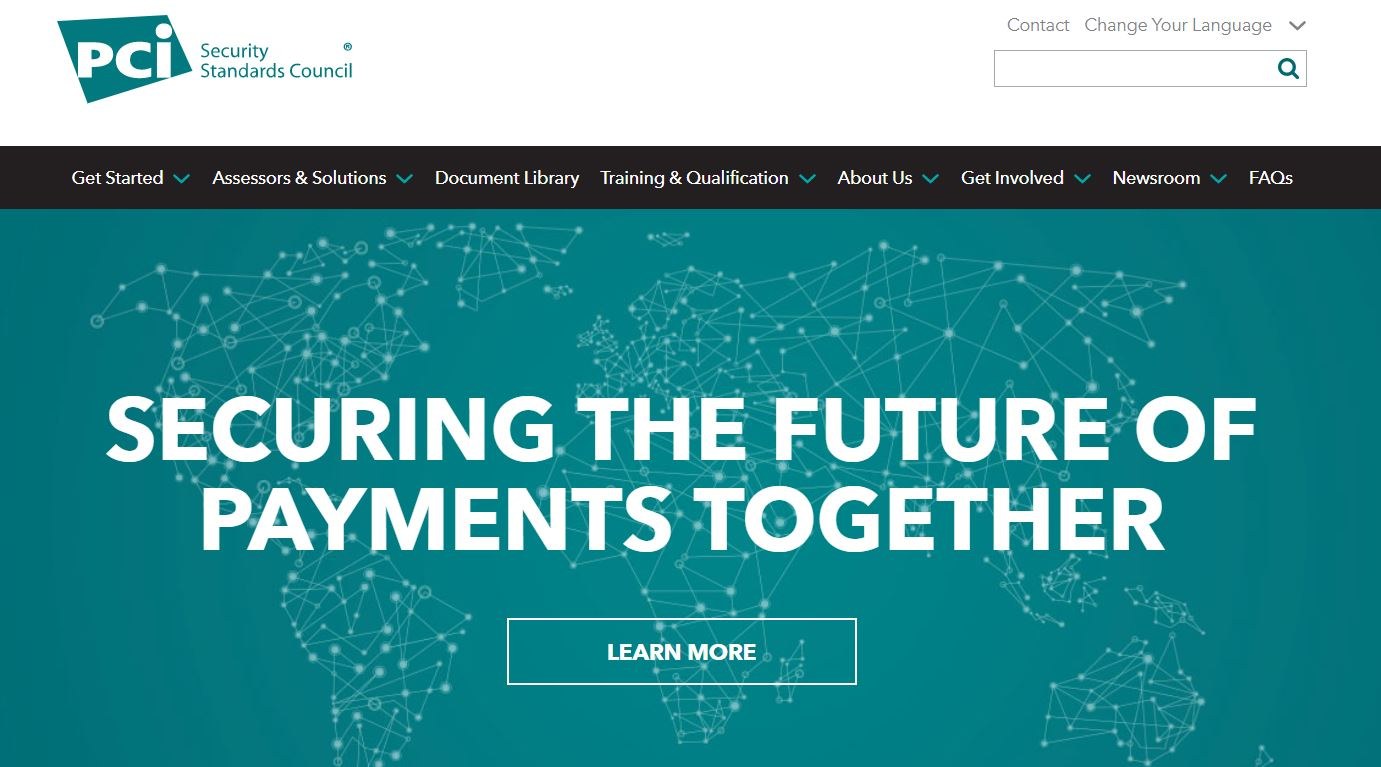
  • Whether a payment processor has a strong reputation and positive reviews, as well as PCI and DSS compliance.
  • Customer support, so you can resolve any issues quickly.

As you might expect, there's no one platform that's perfect for every use case. It's important to do plenty of research and consider all of the available options before settling on your top choice(s).

5 Payment Gateways Your Customers Will Love

Now that you know what you're looking for, let's take a peek at 5 of the top payment gateways available for WordPress websites.
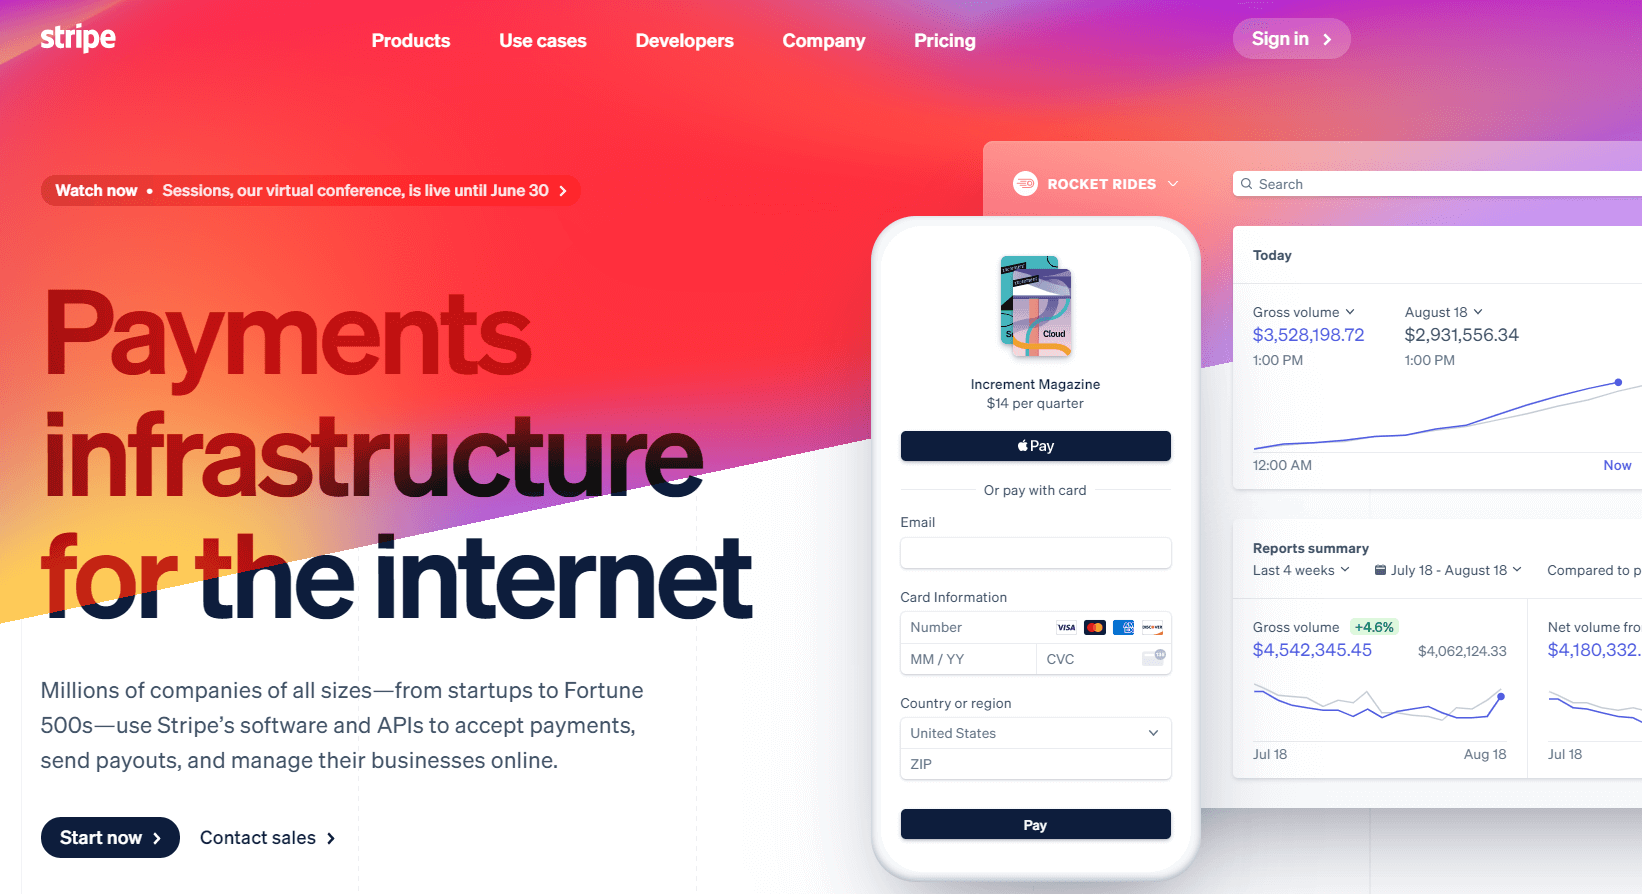
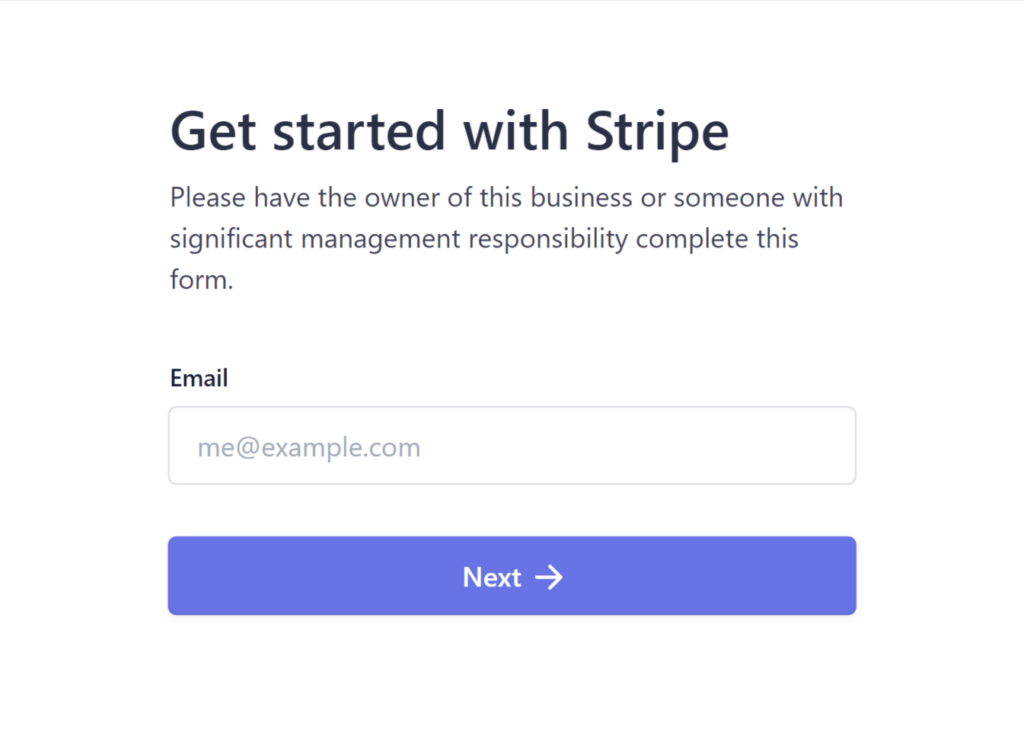
1. Stripe

Stripe homepage

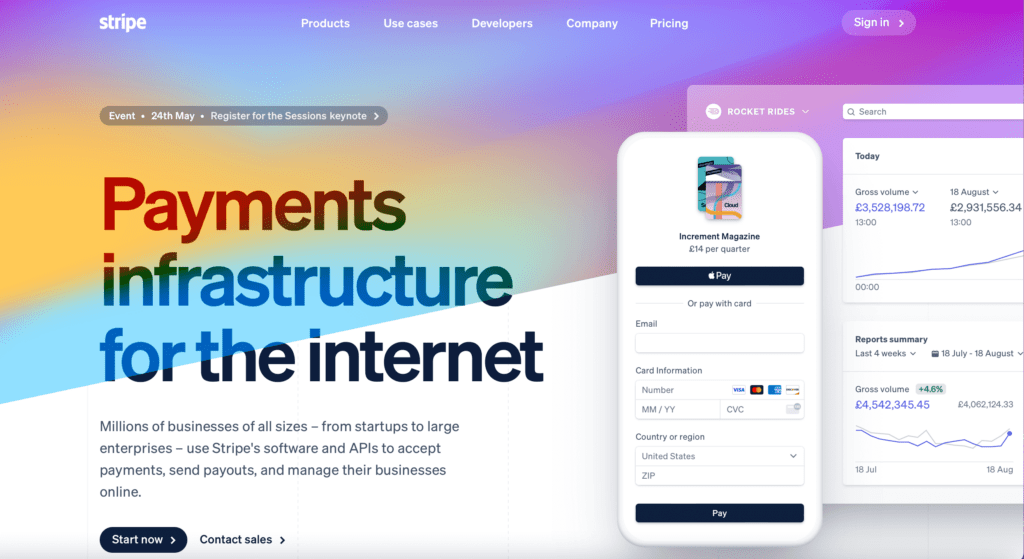
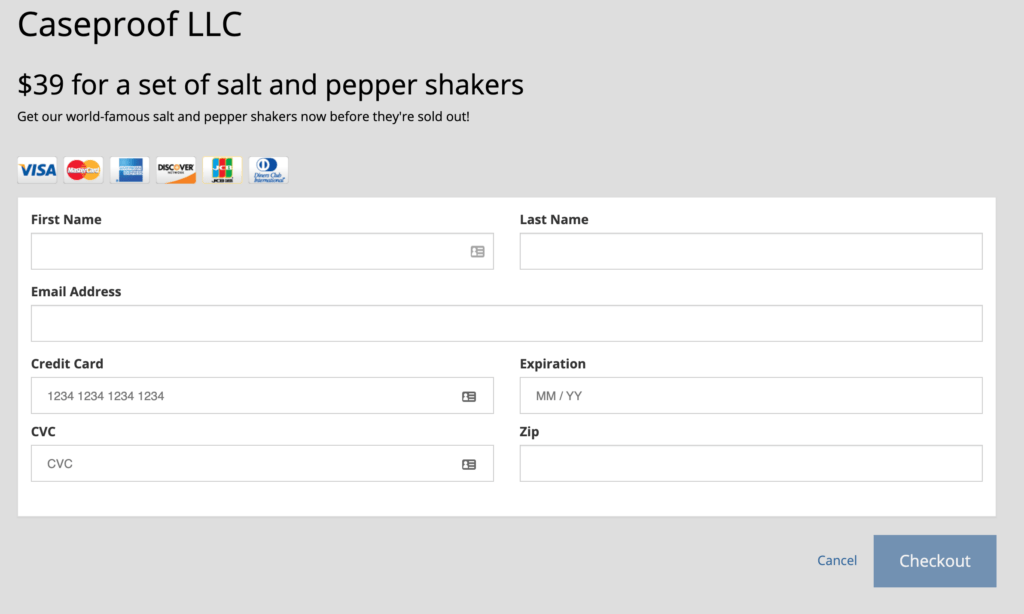
Stripe is one of the most popular gateways thanks to its unique approach to payment processing. It provides a range of tools to customize the payment process, giving you full control over your payment pages to create an excellent shopping experience for your customers.

Pros:

  • Feature-rich payment gateway
  • Many integrations with third-party platforms
  • Extensive wallet payment and local payment support
  • Accepts over 135 currencies
  • 24/7 customer support
  • Particularly useful for European businesses, as the transaction fees are smaller

Cons:

  • Customer service isn't as prompt and reliable as it could be
  • No card machine for in-person payments, so it's not ideal for merchants who are also running physical stores

Price:

Setup fees: None

Monthly fees: None

Transaction fees: 2.9% + 30¢ per successful card charge

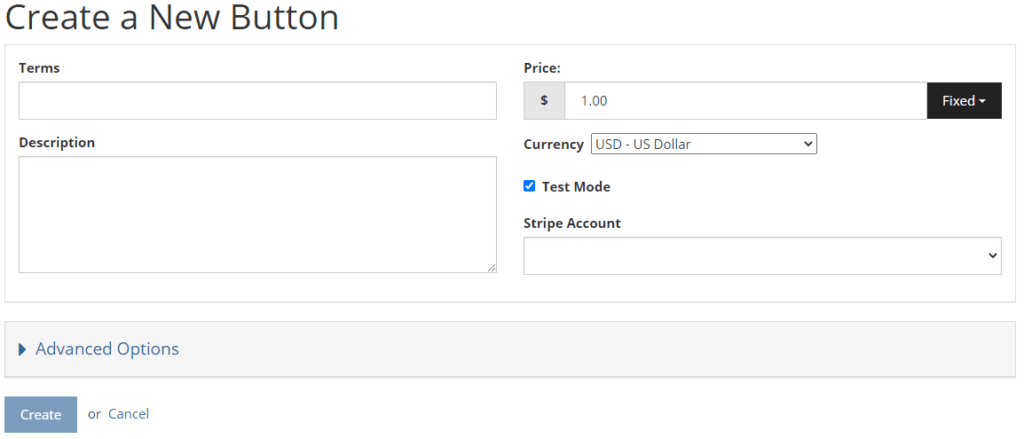
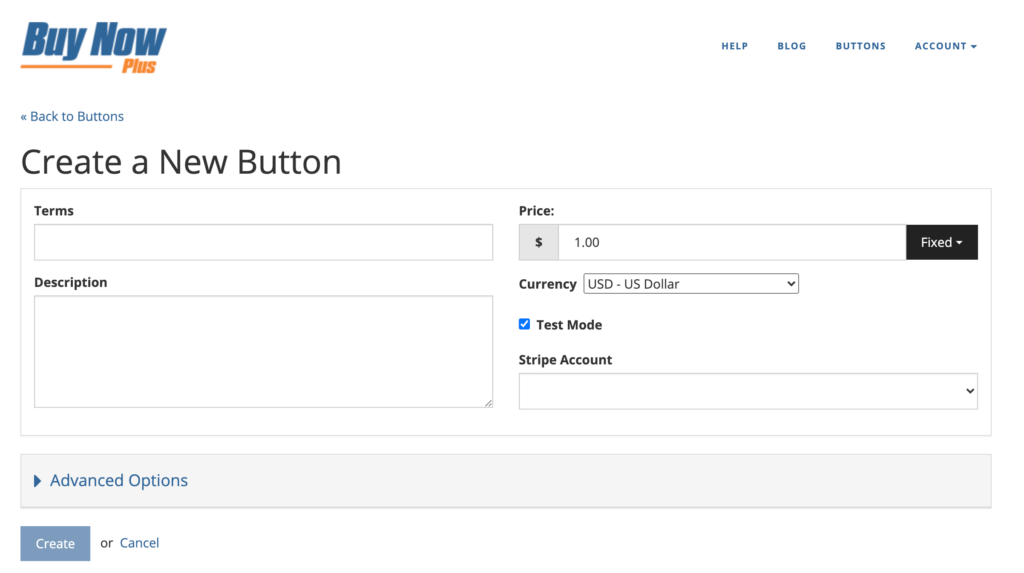
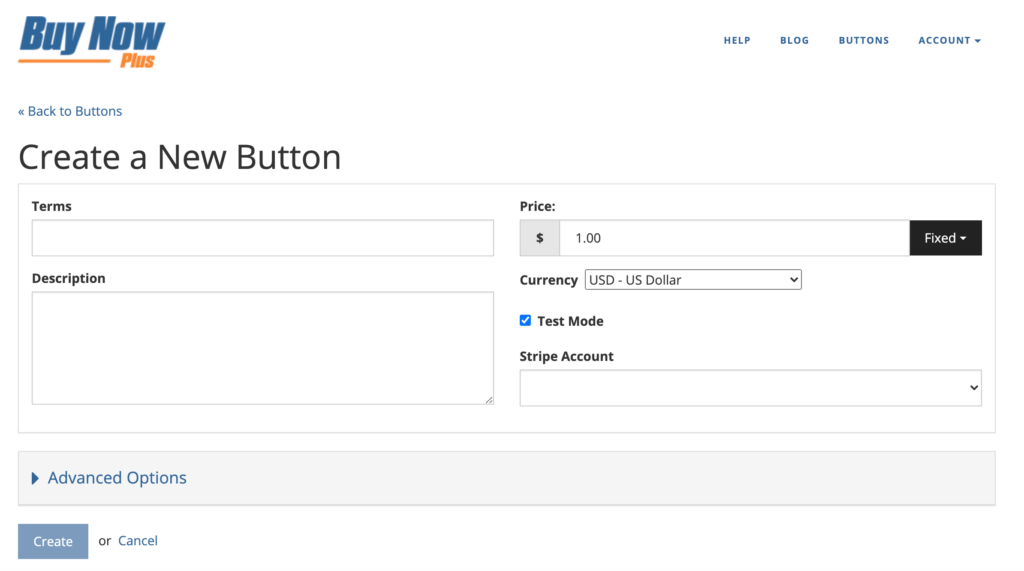
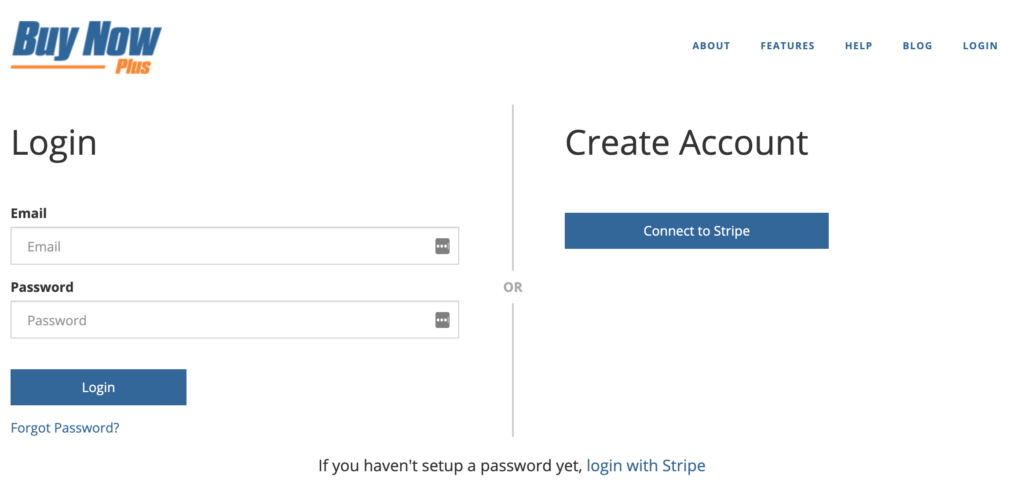
The simplest way to start accepting credit card payments via this gateway is with our own Buy Now Plus service. It's built on top of Stripe, and is beginner-friendly, free, and easy to get started with.
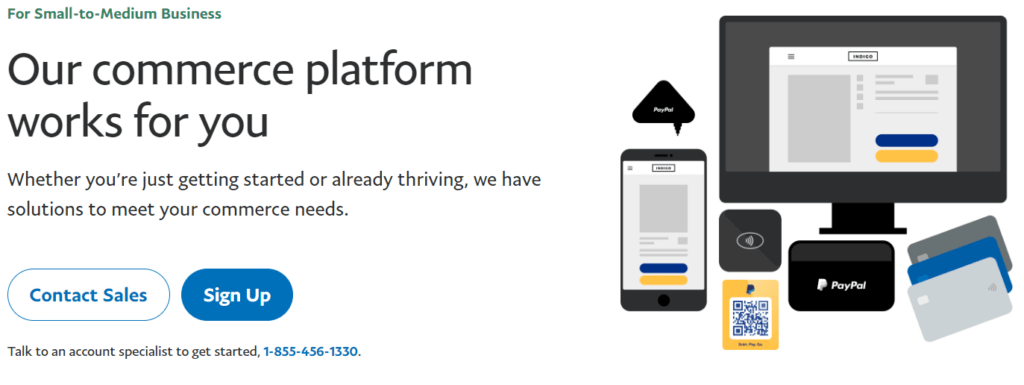
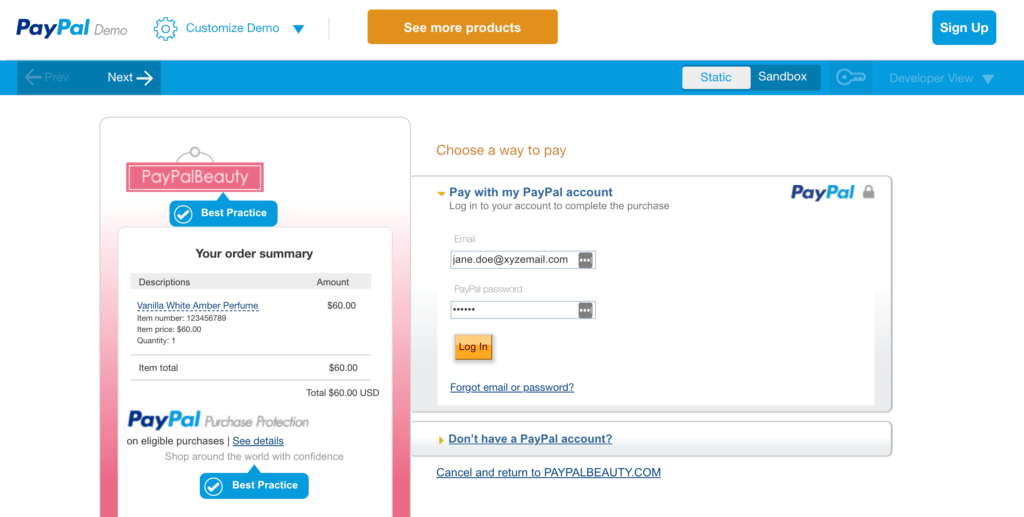
2. PayPal

PayPal homepage

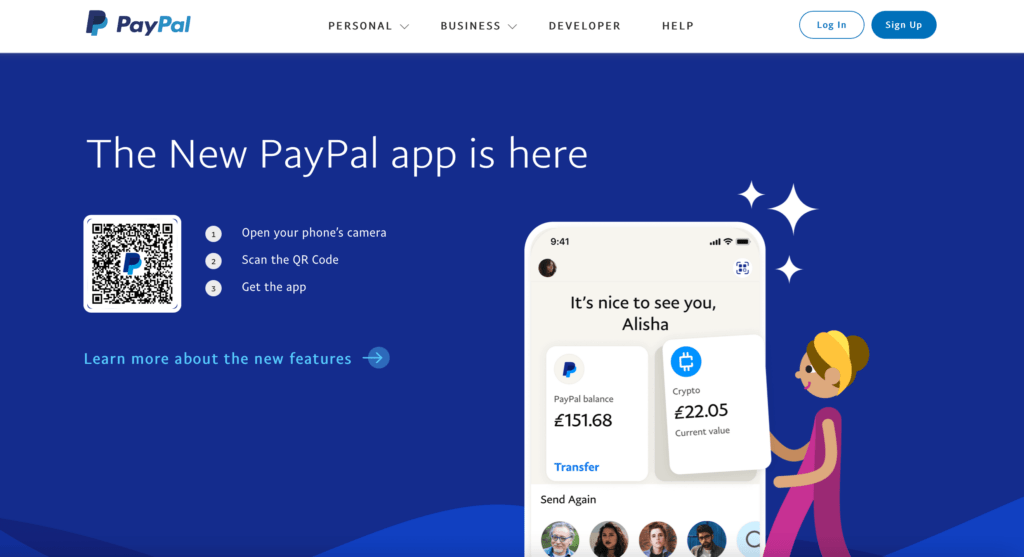
PayPal is one of the easiest payment options to add to your site, and one of the most trustworthy because it's so well-known. PayPal claims that offering this option to customers can increase checkout conversions by up to 44%. It also has quick transfer rates, making it an ideal choice for online businesses.

Pros:

  • Simple to add as a payment option
  • Flexible option that supports credit and debit cards, mobile devices, QR codes, and contactless payments
  • Offers PayPal Credit, the option to spread payments out over time
  • Provides a consistent User Experience (UX)
  • Features predictable pricing

Cons:

  • Provides an off-site checkout experience that involves redirecting users to collect payments, rather than integrating into your website
  • Includes additional cross-border fees, so it may not be the best option if you rely on trade overseas
  • Accounts can be shut down immediately without any justification

Price:

Setup fees: None

Monthly fees: None (although the Premium version costs $30)

Transaction fees: Vary based on transaction type

3. Ayden

Ayden homepage

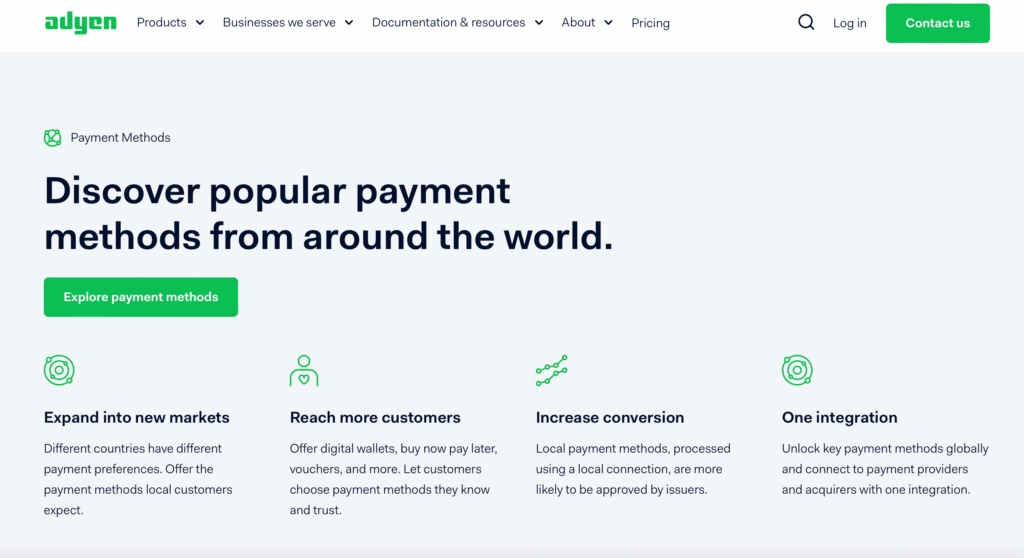
Next on our list, Ayden is a widely-known payment gateway used by Spotify, Uber, Microsoft, and eBay. It's a strong option if you prioritize security and compliance, and it has the added bonus of allowing you to learn about your consumer behavior patterns.

Pros:

  • Used by major companies, so it has a strong reputation
  • Accepts 250 payment methods and 150 global currencies
  • Features built-in tools to manage risks and track results
  • Relieves you of the burden of self-validation and compliance

Cons:

  • Not the best customer reviews
  • Limited features for brick-and-mortar businesses
  • Complex pricing structure, which is determined by payment method

Price:

Setup fees: None

Monthly fees: None

Transaction fees: Fixed processing fee of $0.12 + a fee determined by the payment method

4. Authorize.net

Authorize homepage

Owned by Visa, Authorize.net is one of the most established payment gateways available. It offers a range of options to suit your business, and works with almost any merchant account – and all over the world.

Pros:

  • Streamlines the payment process, making it a great choice for firms of all sizes, both online and brick-and-mortar
  • Easy to set up and use
  • Works with nearly any merchant account
  • Accepts more payment types than most of the alternatives, and is one of the very few gateways to accept PayPal

Cons:

  • Requires your business to be registered in the UK, Europe, US, Canada, or Australia
  • Charges a monthly fee, making it less ideal for smaller businesses or startups

Price:

Setup fees: None

Monthly fees: $25

Transaction fees: All-in-one option: 2.9% + $0.30. Payment Gateway Only option: 10 cents per transaction, 10 cents daily batch fee

5. Square

Square homepage

Last but not least, Square features an extremely versatile software that essentially transforms your customers' devices into portable POS terminals. It is a fast-growing payment gateway that centers around simplicity, making it perfect for smaller businesses and brick-and-mortar stores. It provides everything you'll need to accept payments and manage your business in one centralized system.

Pros:

  • A great option for merchants with physical stores as well as online businesses
  • Accepts all major credit cards and payment types (although not PayPal)
  • Extremely easy setup process, requiring users to download a free app and take payments using a mobile credit card reader that Square supplies free of change
  • Provides a smart, slick checkout UX
  • Allows you to sell easily on social media, integrating with Facebook and Instagram

Cons:

  • Has been known to withhold funds or accounts with little notice or justification
  • Limited customer support hours

Price:

Setup fees: None

Monthly fees: None (although Premium is $72)

Transaction fees: 2.9% + 30 cents per transaction for online payments

Conclusion

A well-optimized ecommerce store, top-quality products, and excellent marketing can bring lots of customers your way. However, if you don't provide them with familiar and easy-to-use ways to pay, you risk losing them before they make those final conversions.

To sum up, here are 5 of the best options for your payment gateway:

  1. Stripe: A feature-rich option with many tools to offer.
  2. PayPal: A popular and reliable gateway that supports many payment methods.
  3. Ayden: A more advanced choice with excellent security features and analytics.
  4. Authorize: An easy-to-use and streamlined option that’s a good all-around choice.
  5. Square: A gateway that’s quick to get started with and very user-friendly.

Do you have any questions about payment gateways? Let us know in the comments section below!

If you liked this post, be sure to follow us on Twitter, Facebook, Pinterest, and LinkedIn.

How to Accept Donations Online (Everything Nonprofits Need to Know)

Many people prefer to complete tasks online. From scheduling appointments to paying electric bills, if users can't do it virtually, they might not do it at all. This same mentality can hold true when it comes to making donations.

Fortunately, enabling your nonprofit to accept donations from your website is a simple process. In fact, once you're online, you may find it's easier and more effective than using mailers or in-person events.

In this post, we'll explore why you should consider accepting online donations. Then we'll show you how to receive contributions using Buy Now Plus. Let's get started!

Why You May Want to Accept Online Donations

These days, many people prefer online donations and don't always have cash or checks at hand. If you're not able to accept online contributions, you're making it difficult, if not impossible, for these people to support your organization.

Enabling online donations can also help you to reach a wider audience. Rather than relying on more traditional methods, you can share your website across social media and email campaigns.

You'll also make it easier for your followers to share your information with their own networks:

Austin Pets Alive has several donation buttons on its website.

Finally, handling donations online can cut down on your paper usage. You can reduce or eliminate your reliance on paper mailers, saving you money on postage costs.

Accepting online contributions is also a significant first step for transitioning to paperless bookkeeping. As such, this method can be advantageous for environmentally conscious businesses.

How to Accept Donations Online (In 3 Easy Steps)

Now that we've covered the benefits of accepting online donations, let's look at starting the process with Buy Now Plus.

1. Sign Up for Buy Now Plus

When you sign up for Buy Now Plus, you'll be asked to connect your Stripe account. This step provides you and your donors with a secure payment gateway.

If you don't have a Stripe account, you'll be able to create one during the Buy Now Plus setup process:

Signing up for a Buy Now Plus account.

If you already have a Stripe account but would like to create a new one for donations, you can also handle that at this time.

Buy Now Plus enables you to add more than one Stripe account, which could come in handy for organizing your accounting.

2. Design Your Donate Button

Now that you have your Buy Now Plus account ready, it's time to create your first donation button. Start by logging in to your account and navigating to the Buttons page. Then, click on the Add New button.

Here you can add the basic information about your button. This is also where you'll choose which Stripe account to use with it:

How to create a new button in Buy Now Plus

You may want to set the price to Variable using the dropdown menu. This setting enables your donors to choose how much they'd like to give.

Alternatively, you might create a few buttons with preset amounts to encourage donations:

Changing the price option from fixed to variable.

Under the Advanced tab, you can change the text on your button. You can also set a URL that will direct users to a new page once they complete their donations:

How to change the text on a donation button.

Once you're satisfied with your button, click on the Create button to save it.

3. Share Your Button Everywhere

Finally, you can start sharing your button with your network. Buy Now Plus makes it easy to embed your button anywhere you can add a link.

You may want to start by adding the button in a few places across your website. You might include one in your main navigation menu as well as above the fold on your homepage.

It's also a smart idea to create a landing page dedicated to accepting donations.

You can still share your donation button even if you don't have a website. If you're active on social media, that's a great place to start. You can also include a donation button in your email campaigns.

Regardless of where you'd like to place your button, the process is pretty similar. Simply click on the Share button to the right of your donation button. You'll see a pop up with a link and an embed code:

Embed options for Buy Now Plus.

You can also use the social buttons to go directly to the platforms you'd like to share on.

Conclusion

Accepting donations online can be a smart move for any nonprofit. Your donors will likely appreciate the convenience, and it may even save your organization some time and money. Best of all, it's easy to get set up using Buy Now Plus.

Let's recap the three steps to accepting online donations:

  1. Sign up for Buy Now Plus.
  2. Design your donate button.
  3. Share your button everywhere.

Do you have questions about receiving contributions online? Ask us in the comments section below!

If you liked this post, be sure to follow us on Twitter, Facebook, and LinkedIn.

How to Keep Your Ecommerce Customers Safe (4 Tips)

If you own an ecommerce business, chances are the threat of a data breach is never too far from your mind. This is no surprise, considering how serious the consequences can be when information falls into the wrong hands.

While the possibility of exposing user information is a scary one, you're certainly not powerless to keep your customers safe.

You can significantly lessen the chances of a data breach by processing payments securely and following other safety best practices.

In this post, we'll look at why protecting personal information is so important for ecommerce businesses. Then, we'll share four tips for keeping your customers safe. Let's go!

Why Protecting Customer Information is Crucial

Perhaps now more than ever, data privacy has become a central concern for anyone who spends time online. Unfortunately, this wariness is in response to a rising number of data breaches, which has been trending upwards since 2005.

Ecommerce sites may be especially attractive to bad actors as they're likely to store payment details as well as personal information.

Stolen data is not only a concern for the owners of the information, but it can also have serious consequences for your business.

The financial impact can be especially devastating, as the cost to recover can be pretty high. In 2020, the global average cost per data breach was $3.86 million.

In addition to taking a financial hit, you could lose the trust of your existing customers, who may take their business elsewhere. These customers may also warn their networks against doing business with you, resulting in further losses.

How to Keep Your Ecommerce Customers Safe (4 Tips)

Now that we've discussed the seriousness of a data breach, let's look at a few tips you can use to keep your business and customers safe.

1. Process Payments With Buy Now Plus

Since payment information is especially sensitive, you may want to make protecting it your first priority.

Using a tool like Buy Now Plus will not only make the buying process easier for your customers, but it will also provide additional security as it's built on top of Stripe:

Buy Now Plus uses Stripe to keep payments secure.

Stripe is a very secure payment solution. All transactions processed through it are Secure Socket Layer (SSL) protected to keep data safe while it's being transmitted. Moreover, credit card numbers are encrypted and kept secure in Stripe's data center.

Getting started with Buy Now Plus is quick and easy, even if you don't have a Stripe account yet. To get started, click on the Connect to Stripe button on the Buy Now Plus login page.

Then, you'll be prompted to enter the email associated with your Stripe account. If you don't have one, any email will do:

The login screen for Buy Now Plus.

On the next screen, you'll create a password for your Stripe account. You'll then need to secure your account using a mobile number. Enter the code that you'll receive via text to continue.

At this point, you can either connect to an existing Stripe account or create a new account to use with Buy Now Plus:

Connecting a Stripe account to Buy Now Plus.

Next, you'll need to enter some details about your business, as well as some personal information.

When you're ready, you can connect your new Stripe account to Buy Now Plus.

2. Control Access With Strong Passwords

Chances are you protect sensitive information with passwords, so you'll want to be sure they're up to the task. Your best strategy for this is to follow some simple password best practices:

  • Never use the same password for more than one account.
  • Ensure that passwords are both long and complex.
  • Change passwords regularly.
  • Avoid sharing passwords.
  • Never write passwords down.

You might also consider implementing Multi-Factor Authorization (MFA). MFA adds an additional security challenge after an individual has entered this password.

This challenge could be answering a security question, entering a pin, or using a one time password (OTP) provided via text or email.

If you'd like to add this functionality to your WordPress site, you can use a plugin called WP 2FA:

The WP 2FA plugin which adds two factor authorization.

This free plugin is easy to set up and supports several OTP-generating apps. You can also configure it to force users to set up MFA immediately or give them a grace period.

3. Collect Only the Information You Need

Simply put, hackers can't steal information that you don't have. For this reason, it's best that you only collect the information needed to provide an efficient service. Remember that you can always ask for additional details later.

Aside from security concerns, asking for too much data up front can contribute to a poor customer experience. The last thing you want is to be losing customers during your signup or checkout process.

If you've already collected information you don't need, you might want to delete it now.

You'll not only keep your customers safer, but this can also help you comply with the General Data Protection Regulation (GDPR) and the California Consumer Privacy Act (CCPA).

Take the time to carefully consider what information you truly need. You may want to develop guidelines for the collection, storage, and eventual deletion of customer data.

Firm policies are beneficial if you work with a small team to ensure that everyone is on the same page.

4. Keep Your Software Up to Date

Outdated websites and software make desirable targets for hackers. Once word gets out about a vulnerability, it will likely be exploited quickly.

To keep your website safe, it's important to be vigilant about any updates developers release for the software and tools you use.

You'll want to be especially aware of any emergency patches which are often issued in response to a potential threat.

You can be even more proactive about this by regularly checking your software vendors' websites for any updates you may have missed. Ensuring that all of the plugins on your site are updated on a regular basis can help keep your site safe.

Conclusion

As the owner of an ecommerce business, you have an obligation to your customers to keep their private information secure. Fortunately, there are ways to protect both your customers and your company.

Let's recap the four tips we shared for protecting user data:

  • Process secure payments with Buy Now Plus.
  • Control access with strong passwords.
  • Collect only the information you need.
  • Keep your software up to date.

Do you still have questions about keeping your customers safe? Let us know in the comments section below!

If you liked this post, be sure to follow us on Twitter, Facebook, and LinkedIn.

How to Choose the Right Payment Gateway for Your Online Business

A recent survey shows that 68% of online shoppers abandon their carts. As a business owner, you may be looking for an effective way to encourage more users to complete their orders in your ecommerce store. 

Fortunately, the right payment gateway can help you increase your conversions. By choosing an efficient platform for online transactions, you can provide a better User Experience (UX) and a safer checkout process.

This may, in turn, help reduce your cart abandonment rate.  

In this post, we’ll take a closer look at payment gateways and the different options available. We’ll also cover the key factors to consider when choosing a payment solution for your store. Let’s get started!

An Introduction to Payment Gateways

A payment gateway enables online transactions between shoppers and merchants. Typically, this service requires a user to enter their details to finalize a purchase:

An example of a payment gateway

The gateway then verifies this information and processes the payment. This facilitates the secure transfer of funds from the buyer’s account to the seller’s account.

There are different types of payment gateways available to online sellers. Let’s take a look at the most popular ones. 

Classic vs. Modern Payment Gateways

Some sellers use classic gateways such as Worldpay and Authorize.net to process credit card payments. They tend to have lower transaction fees than other available options. Moreover, they enable buyers to complete a purchase without leaving the merchant’s site.

However, classic gateways normally require store owners to open a merchant account with a bank. They can also be a bit difficult to set up. 

Meanwhile, modern payment gateways such as PayPal provide more efficient service and are very easy to set up. Sellers don’t need to create merchant accounts for these gateways – they can simply integrate them with existing bank accounts.

The downside is that these gateways tend to direct customers to their own platforms, which can harm your conversions.

Moreover, they normally charge higher fees per transaction, so they might not be the most cost-effective choices for larger businesses. 

Hosted vs. Non-Hosted Gateways

As we have seen, a payment gateway can be hosted on a third-party site or integrated into your own store.

A hosted gateway takes care of the entire transaction process. It also has measures in place to prevent fraud and ensure data protection. Thus, it offers both sellers and merchants peace of mind.  

However, some users may be wary of being directed to platforms that they’re not familiar with. This may result in them abandoning their purchases and doing their shopping elsewhere. 

On the other hand, if you enable shoppers to enter their payment details directly on your site, you may experience higher conversions.

A non-hosted gateway can blend seamlessly into your store, projecting a more professional image and helping you build trust with your customers. 

However, using one of these gateways means you’re responsible for protecting your customer’s data. You’ll also need to ensure that all transactions are secure and watch out for fraudulent activities. 

How to Find the Right Payment Gateway for Your Business

Every store has its own needs. However, there are some things that every online seller should consider when choosing a payment gateway for their store.

The first is security. For your own safety and that of your clients, you’ll need to ensure that your chosen payment method follows the Payment Card Industry Data Security Standard (PCI-DSS):

The homepage of the PCI Security Standards Council

Another thing to consider is efficiency. Around 18% of customers who abandon their shopping carts do so due to prolonged and complicated checkout processes. Thus, it’s important to choose a payment gateway that facilitates quick and efficient transactions. 

On the same note, you’ll want to ensure that the payment gateway is accessible and easy to use on different platforms. If most traffic to your site comes from mobile devices, it’s a good idea to choose an option that enables swift transactions. 

For instance, some mobile phone users may feel frustrated if they have to enter their credit card details into multiple small fields. Therefore, you may want to opt for a service that enables customers to complete purchases in just a few clicks. 

Finally, you’ll need to look at the transaction fees. Depending on the size of your business, some solutions may be more cost-effective than others.

For example, classic gateways may be more viable for large companies. Meanwhile, modern gateways might be more suitable for smaller stores. 

3 Popular Payment Gateways

Choosing the right payment gateway for your store can help you reduce your cart abandonment rates and retain your customers. Let’s look at three popular options to consider. 

1. PayPal

PayPal Business homepage

PayPal is one of the most popular payment methods among online shoppers. This platform enables users to purchase using the funds in their digital wallets linked to their bank accounts. 

Pros:

  • It is a secure and trusted platform, which can help you boost conversions.
  • It’s very easy to set up.
  • It supports payments from most countries and currencies.
  • You can use it to set up recurring payments.

Cons:

  • There is limited online support available. 
  • PayPal may freeze or suspend your account if there is suspicious activity.
  • The platform has high chargeback fees.

Transaction fees: 2.9% per transaction on standard credit card payments. 

2. Amazon Pay

Amazon Pay for Business

Another popular option is Amazon Pay. This service provides a quick transaction process by using data stored in the user’s Amazon account to finalize online orders. 

Pros:

  • It enables seamless payments on different platforms.
  • It stores payment and shipping details to make the transactions simpler.
  • The platform includes Amazon fraud protection.
  • It is user-friendly.

Cons:

  • Its accessibility is limited to Amazon users.
  • It has a long signup process for merchants.
  • Amazon Pay may shut down your account on suspicion of violating its terms.

Transaction fees: 2.9% per transaction, plus an additional $0.30. Fees for international transactions go up to 3.9%.

3. Stripe

Stripe homepage

Stripe is a powerful solution for any type of ecommerce site. Besides enabling merchants to process transactions efficiently, it also offers top-notch security and protects businesses against fraud. 

Moreover, you can use Stripe with our Buy Now Plus plugin to create PayPal-style buy now buttons for your store and customize them to match your branding. Additionally, you can sell products directly on social media – no website required! 

Pros:

  • It has an accessible and helpful customer support team.
  • Stripe gives you access to multiple reports and customer data.
  • The interface is user-friendly.

Cons:

  • Its refunds do not include processing fees.

Transaction fees: 2.9% per transaction, plus an additional $0.30.

Conclusion

Choosing the right payment gateway for your online store can help you increase your conversions and reduce your cart abandonment rate. It’s important to opt for a platform that is secure, cost-effective, and easy to use.

One powerful option for ecommerce businesses is Stripe. This popular payment gateway facilitates efficient and secure credit card payments. It also protects merchants against fraudulent transactions.

Moreover, you can connect your Stripe account with Buy Now Plus to add high-converting buy now buttons to your store and social media pages.

Do you have any questions about finding the right payment gateway for your business? Let us know in the comments section below!

If you liked this post, be sure to follow us on Twitter, Facebook, and LinkedIn.

What’s the Best Way to Accept Credit Card Payments?

Credit cards are one of the most popular payment methods for online purchases. Therefore, accommodating these purchases is essential if you want to run your business effectively.

However, there are risks of fraud associated with credit cards, so you'll need to choose your payment providers carefully.

Fortunately, there are a few different ways to accept credit card payments safely. By choosing the best solution for your needs, you can attract and keep customers by making their checkout experiences safe and seamless.

In this guide, we look at the best way to accept credit card payments. We'll also discuss the benefits and dangers of credit cards, and how to choose the best payment method for your business. Let’s get started!

The Benefits of Accepting Credit Card Payments

Credit cards are one of the most common payment methods, especially online. In fact, more than 56% of Americans use this method for online payments. When you consider that more than 365 million Americans had credit cards in 2020, that's a lot of purchases.

If your business doesn't accept these types of payments, you may miss out on a lot of potential sales. Therefore, it's in your best interests to support credit card purchases, and to make the checkout process as easy as possible.

The Dangers of Credit Card Payments

Of course, some customers are wary of using their credit cards to pay online. In 2020, credit cards were the main source of fraud reports for online payments. Additionally, they were the source of 12% of payment data breaches in the same year.

Identity theft and fraudulent payments are dangers for your customers and your business. That's why it's important to choose a secure payment gateway that can protect against these threats.

Credit card payments can also come with transaction and conversion fees. It's vital to know about these fees upfront. Fortunately, there are some payment methods that minimize the fees you're responsible for.

3 Ways to Accept Credit Card Payments

There are multiple ways that you can accept credit card payments online and in person. Each method comes with its advantages and disadvantages, depending on your business' needs. Let's take a look at three of the most popular options.

1. Buy Now Plus

Blue background with an orange button and text describing the Buy Now Plus plugin

Buy Now Plus is one of the easiest and safest ways to accept online credit card payments. You can place buttons on your website that direct customers to a secure payment gateway that works with Stripe.

One of our plugin's best features is that it's free to set up, and only charges you a flat 3% fee for every transaction. Regular credit card merchant fees can be as high as 4-5%, so this can mean significant savings for your business.

Buy Now Plus also offers a very user-friendly interface, and has customizable options. You can set up recurring billing for your customers or process simple transactions. In addition, it uses Stripe, which has reliable anti-fraud protections in place.

However, Buy Now Plus does not accept PayPal payments. You will also need a Stripe account to use it.

Buy Now Plus Fees: 3%

2. PayPal

An advertisement of the PayPal commerce platform

PayPal Commerce is another popular option for small to medium-sized businesses. It's a sophisticated financial platform that enables you to accept and make payments, track your business' growth, and benefit from fraud protection.

The key advantage of the PayPal platform is its streamlined dashboard. There, you can view detailed statistics on your payments and business. You can also access tools that help grow your business and increase online conversions.

PayPal also has sophisticated fraud protection measures. The platform constantly identifies and protects you against payment fraud with its updating algorithms.

However, you should be mindful that PayPal Commerce has higher merchant fees than other credit card platforms. It charges 2.9 percent plus a fixed fee for domestic payments. For international transactions, the amount can be even higher.

PayPal is also not the most user-friendly option. If you do run into issues, it can be challenging to contact the customer service team and receive help promptly.

PayPal Fees: 2.9% + fixed fee for domestic payments

3. EFTPOS

Swiping a card through an EFTPOS terminal
Image credit: Pixabay

Electronic Funds Transfer at Point of Sale (EFTPOS) is a payment option in most physical stores. These machines accept many card types, and charge the customer instantly when they swipe your card and enter their PIN.

EFTPOS can be an excellent option if you have a physical store or the capacity to accept card details over the phone. These machines process transactions quickly, and store details electronically so you can track transactions. They are also very easy to use.

However, you cannot use EFTPOS to accept transactions online. Therefore, this payment method can be restrictive for many businesses.

EFTPOS Fees: 0.5-1%

How to Choose the Best Way to Accept Credit Card Payments

There are a few factors you might want to consider when you choose a credit card payment platform from the above options.

First, if you have an online business, Buy Now Plus and PayPal Commerce are the most viable options. EFTPOS works via a physical machine, so it's better suited to physical shopfronts. Both PayPal and Buy Now Plus have excellent fraud prevention measures in place to protect your business.

If you want to minimize the fees you pay, Buy Now Plus is the more affordable option. It is also more streamlined and user-friendly, so it could be suitable for users with less technological expertise.

PayPal might be the correct choice for you if you want access to its analytics and business growth tools. These features, when paired with its limited customer service, mean that the platform could suit those with a higher level of familiarity with payment systems.

Overall, we recommend Buy Now Plus for most businesses. Unless you want access to PayPal's analytics, you can benefit more from the lower fees and user-friendly interface.

Conclusion

Credit cards are one of the preferred online payment methods for customers all over the world. If you run a business, you'll need a secure and straightforward way to accept these payments.

The good news is that you have a few different options. If you have a physical store or can accept phone payments, the EFTPOS system can be viable. Otherwise, using Buy Now Plus is one of the easiest and most affordable ways to accept credit card payments.

Do you have any questions about using Buy Now Plus to accept online payments? Let us know in the comments section below!

If you liked this post, be sure to follow us on Twitter, Facebook, and LinkedIn.

3 Easy Ways to Make Your First Online Sale

The digital age has brought a lot of changes for salespeople. Even brick-and-mortar purchases are shifting to the ecommerce stage.

If you haven’t made your first online sale yet, all of these developments might make it hard to know where to start.

Fortunately, the process doesn’t have to be difficult. By focusing on your audience, you can successfully start selling your products online – even if you don’t have a website.

In this article, we’ll look at why you should consider shifting to an ecommerce model. Then we’ll show you three strategies for getting started with your first online sale. Let’s dive right in!

Why Online Sales Are the Wave of the Future

Let’s be honest: ecommerce is here to stay. In fact, recent studies have predicted that U.S. retail ecommerce revenue will grow an annual 12.3% by 2024.

This is a huge opportunity for both brick-and-mortar retailers and newcomers.

Additionally, there are unique benefits to an ecommerce approach. One of these is that online purchases are generally more resistant to circumstances that are hard on physical stores.

For example, the above statistic predicts accelerated growth despite recent COVID-related downturns.

There’s also typically a lower investment for online sales. You don’t need to maintain a storefront or pay someone to stock your shelves.

That means you can use this saved money and flexibility to further develop your business, such as by making it more environmentally friendly.

Finally, there’s substantial demand for online purchases. Up to 60% of consumers who have shifted to online purchases aren’t planning on returning to physical ones. Therefore, you could risk losing customers if you don’t make the switch with them.

How to Make Your First Online Sale (3 Easy Ways)

Fortunately, you can begin selling online quickly by focusing on one key element: your audience. Here are three ways to cater to your shoppers and make your first online sale.

1. Leverage Your Social Media Presence

Social media platforms are already filled with active users. Furthermore, those who have followed your business profile have shown that they’re interested in your products.

That's why social media networks can be an excellent way to directly pinpoint your current fans.

All you have to do is provide these already interested users with an easy way to purchase your offerings online. If you’re searching for the perfect tool to help you, look no further than Buy Now Plus:

A banner for Buy Now Plus, an easy way to make your first online sale.

Our program makes selling online easy. Best of all, you don’t even need to have a website. You can instead provide a buy now button directly on your social media profiles with a simple link.

That means your users won’t need to leave the platform. We’ll process their purchases through our secure servers. So your customers can be confident in the safety of their personal data.

In addition to potential first customers, social media can also help you develop a plan to keep them coming back.

These platforms make it simple to interact with brands and share feedback. You can consider Oreo’s official Facebook page as an example:

An image of Oreo's Facebook page complete with user feedback.

Your profile is the perfect place to start building audience engagement. You might also gain a clearer idea of what your customers love about your products.

With a little bit of outreach, you might even be able to find influencers who will enthusiastically promote your brand.

2. Build an Email List of Potential Customers

Social media has its benefits, but more traditional email marketing still holds a lot of power. Recent figures show that there are about 4 billion email users around the world.

As you can imagine, using these platforms is a reliable way to reach most of your potential consumers.

In addition popularity, using emails also has several other benefits. For example, emails are easier to personalize.

You can address them to individuals rather than groups. This personal touch may encourage recipients to open the messages.

By the same token, this allows you to create more targeted messages. You might decide to make your first online sale by offering a special discount to those who have been customers in your physical store, for example.

Fortunately, there are several ways to start your first email list. For example, you might collect this information from an already popular social media account.

If you have your own website, you can also promote your email list there.

Additionally, email marketing itself doesn’t have to be complicated. Simply providing your recipients with an easy link to access a specific product can be very effective:

A simple example of effective email marketing from Brooks Running.

We also encourage you to build your email list as your customers make more purchases. Consider giving your shoppers the option to sign up for special deals.

Then, you can take advantage of your growing list with some of the best email campaign strategies for maximum effect.

3. Consider Affiliate Marketing

You don’t need to make your first sale alone. On the contrary, using affiliate marketing can be an effective way to launch your online plans.

Affiliate marketing is where you work with individuals in your niche to advertise your brand. Then, if their advertising results in a sale, you pay them a commission.

This process offers several benefits. For one, influencers are often very connected to niche markets. Therefore, they can help you reach potential customers who you may not have even considered.

Additionally, affiliate marketing can be very cost-effective. The commission structure means you only have to pay for marketing that works. This is an ideal arrangement if you’re just starting out and operating on a tight budget.

If you’re looking for a tool to help you kick-start an affiliate marketing program, you can consider our sister plugin, Easy Affiliate:

Easy Affiliate homepage.

Easy Affiliate makes it simple to start a program, even if you haven’t made your first sale yet.

You can begin with a few affiliates and use them to grow your customer base. Then, as your sales increase, you can scale your program to match.

Other powerful Easy Affiliate features can support you as well, such as built-in email marketing and real-time reports to help you refine your approach. If these elements sound appealing, consider checking out how to start an affiliate program.

Conclusion

We won’t lie to you – making your first online sale can be a real challenge. With so many new elements to consider, it’s normal to feel a bit overwhelmed. Fortunately, a straightforward audience-centric strategy can go a long way.

In this article, we covered three ways to reach out to your shoppers and make your first online sale:

  1. Leverage your existing social media following.
  2. Craft an email list of interested customers.
  3. Consider affiliate marketing to expand your reach.

Do you have any questions about shifting to online sales? Let us know in the comments section below!

If you liked this post, be sure to follow us on Twitter, Facebook, and LinkedIn.

4 Ways to Increase Sales That Might Surprise You

When it comes to increasing your sales, you’ll find plenty of advice online. However, the key to grabbing people’s attention is often catching them off guard. Unfortunately, it can be difficult to achieve this when everyone’s using the same techniques.

The good news is there are many ways you can get creative with your marketing, or put a fresh spin on a familiar sales technique.

By stepping outside the box, you can immediately stand out from the competition, and perhaps even secure some additional conversions in the process.

In this post, we’ll share four ways to increase sales that might surprise you. We’ll also discuss tips for implementing each of these techniques, so you can be confident that you’re getting the most out of your marketing activities. Let’s get started! 

1. Monitor Your Competitors on Social Media

With over 2.7 billion monthly active users, Facebook offers an opportunity to promote your products and services to a huge audience. Creating a Facebook Business Page is a great start, but it’s not enough to simply post content and hope for the best. 

To get the maximum return on investment (ROI), you should identify the days and times when your target audience is online. You may also want to look at the type of content that your audience responds most positively to. 

While you could learn from trial and error, you can get a head start by monitoring your closest competitors. Facebook’s Pages to Watch feature can record when your competitors post, how often they post, and their engagement:

Increase sales with Facebook's Pages to Watch feature.

You can then use this data to inform your own social media activities. For example, if content posted on Monday morning generates the most engagement, then it may make sense to publish your own content at this time. 

To start spying on the competition, head over to your Facebook Business Page and select Insights > Overview. Then scroll to the Pages to Watch section: 

Facebook's Pages to Watch feature.

Next, select Add Pages. In the popup, type the first page that you want to monitor and select it:

The Facebook Insights dashboard can help you increase sales.

You can add several brands to your watch list. When you're ready, click on Done. Facebook will now spy on these pages for you, and display all of their activities in your Insights dashboard.

2. Run a User Generated Content (UGC) Contest 

Running a contest is a great way to create buzz around your products. However, to get the maximum ROI, you may want to base your competitions around user generated content (UGC). This is content like product reviews and customer testimonials created by someone outside your business.

There are different ways you can put a competitive slant on UGC. For instance, you could challenge your customers to take the most creative photos featuring your products.

You could ask your social media followers to submit content based on a theme, such as photos of their furry friends on National Pet Day:

A UGC-focused contest.

Alternatively, you could post a photo and ask your followers to come up with a funny caption: 

An example of a caption contest.

This is already a great opportunity to interact with your audience. However, you can take this engagement to the next level by picking a shortlist of potential winners, and then asking your followers to vote by liking, sharing, or commenting on their favorite entries. 

This approach can transform your nominees into temporary brand advocates. That's because they'll probably encourage their friends and family to interact with your content in order to secure more votes.

This exposure and engagement can have a positive impact on your sales. To get started quickly, consider adding a plugin like RafflePress to your site. 

RafflePress plugin homepage

RafflePress makes it super easy to create and manage contests and giveaways. It has pre-built templates and a drag-and-drop builder, so you can quickly build your contest's landing page.

It also has fraud protection, so you don't have to worry about cheating. What's really great is that the free version of RafflePress includes a feature that helps you set up contest rules.

With paid plans, you get more features like email marketing and CRM integrations, viral sharing, polls and surveys, and image submission entries.

3. Generate Large Amounts of Content, Fast

With experts attributing over 40% of revenue to organic traffic, it’s impossible to overestimate the importance of search engine optimization (SEO). Having a publishing schedule is an essential part of an effective SEO strategy.

Content may be king, but it can be difficult to publish a steady stream of new material. Thankfully, there are ways to quickly generate content without compromising on quality. 

In addition to running UGC contests, you could accept guest posts or partner with third parties who can provide you with valuable content in exchange for backlinks.

You could also collect interesting statistics on a subject matter related to your industry, and then publish them as a post.

Data-driven content can be quick to write, and people love to share it:

An example of a statistics blog.

Another option is to interview thought leaders and experts in your industry, then publish this content in multiple formats.

For example, you might post the video to your YouTube channel, include snippets in your podcast, or turn the conversation into an engaging article.

If you already have a library of content, it’s always worth looking for opportunities to refresh and republish old posts.

This might involve updating the information in an article, or adding new images. Putting a fresh spin on older posts can be quicker and easier than creating entirely new content.

4. Leverage the Power of Buy Now Buttons

Just because a customer adds an item to their cart doesn’t mean you’re guaranteed a sale. Every step in the purchasing process is another opportunity for this person to change their mind and abandon their shopping basket. In fact, 69% of customers fail to complete the checkout process.

That’s where buy now buttons come in. These enable customers to jump straight to your checkout page, leaving them with less time to rethink their purchases:

Increase sales with a Buy Now button.

You can create these powerful calls to action (CTAs) using a flexible service such as Buy Now Plus. You'll also be able to post the same button across multiple platforms, including social media.

To get started, simply connect your Stripe account to the free Buy Now Plus service. You can then create a wide range of high-converting buy now buttons without having to write a single line of code:

The Buy Now Plus dashboard.

Buy Now Plus provides everything you need to embed these buttons into your site, add them to your email marketing campaigns, and post them across social media.

For more information on how to drive conversions with buy now buttons, you can check out our complete guide.

Conclusion 

Creativity can change the way people see your brand, which is a huge benefit when you’re trying to make a powerful impression.

By putting a fresh spin on well-worn marketing techniques, you may be able to convince potential customers to choose your business over the competition.

Let’s quickly recap four unique ways to increase your sales: 

  1. Monitor your competitors on social media.
  2. Run a user generated content (UGC) contest.
  3. Generate large amounts of content, fast.
  4. Leverage the power of buy now buttons, using a service such as Buy Now Plus.

Do you have any questions about boosting sales by thinking outside the box? Ask us in the comments section below!

If you liked this post, be sure to follow us on Twitter, Facebook, and LinkedIn.

How to Accept Credit Cards Without a Website

Would you like to accept credit cards from your customers, but you don't have a website? No problem! As long as you have a social media account and a bank account, you can take credit card payments with Buy Now Plus.

In this post, we’ll discuss why accepting credit cards is crucial to running a successful business. Then we’ll show you how easy it is to use this payment method with Buy Now Plus. Let’s get started! 

Why It’s Important to Accept Credit Card Payments

Credit cards are the most popular payment method in the United States. If your business doesn’t accept card payments, then you could be alienating the majority of your audience and losing potential sales.

If your customers can't make a purchase using their preferred payment methods, they may go elsewhere. To maximize your sales, it’s important to support as many different payment methods as possible.

The method we always recommend prioritizing? Credit cards.

Many e-commerce sites accept credit card payments.

Despite the popularity of paying by credit card, some businesses may be reluctant to support card payments due to the associated fees. For every credit card transaction, you’ll have to pay interchange fees, assessment or service fees, and the payment processor’s markup.

These transaction fees can seem off-putting, particularly for small businesses and startups that may be operating on tighter budgets. However, if you don’t accept credit cards, you're shrinking your customer pool.

It’s far better to sacrifice a percentage of a successful sale than to lose out on that sale entirely. Plus, if your checkout process is more accessible, you're more likely to boost your profits, grow your customer base, and secure repeat sales.

How to Accept Credit Card Payments Without a Website Using Buy Now Plus

Buy Now Plus is a free service you can use to accept payments without purchasing and installing SSL certificates. You only get charged if you make a sale. And that charge is only 3% – super low compared to the industry standard for similar services, which is between 4% and 5%.

The best part is that it works right on top of the Stripe payment processor. That means to get set up, all you have to do is head to BuyNowPlus.com, and click the Start Selling button:

Buy Now Plus homepage

Clicking the Start Selling button will open the Getting Started form. If you already have a Stripe account, you'll be able to login and connect it to Buy Now Plus.

If you don't have a Stripe account, just enter your email and click Next to get your free account set up:

Get started with Stripe in Buy Now Plus

On the next page, create a password for your new Stripe account, and click Next:

create a free Stripe account in Buy Now Plus

In the next step, you'll secure your account by adding your cell phone number:

Secure your Stripe account in Buy Now Plus

You'll get a text with a special code, which you'll then enter for verfication:

Enter the code from your device in buy now plus

If verification is successful, you'll get a confirmation that your new Stripe account is secured. The confirmation will also include an emergency backup code you can use if your device is lost or stolen. You'll definitely want to copy that code and keep it in a safe place.

Once you've got your backup code stored away safely, click Next:

Stripe account is secured in Buy Now Plus

In this step, you'll give some basic information about your business. If your business doesn't have a physical address, just enter your home address, then click Next:

Tell us about your business in Buy Now Plus

Now you'll enter a few additional details about your business. The first field asks for your business website. But don't worry. You can enter your social media profile address if you don't have a business website.

Then enter a short product description and click Next:

Business details in Buy Now Plus

Now you'll choose a bank account where your payments will be deposited. First search for your bank in the search field. If it doesn't pop up, you can enter your bank's details manually by clicking the link at the bottom of the screen.

Once that's all set, click Next:

Select an account for Stripe payouts in Buy Now Plus

The next screen will verify that your bank account is linked to your new Stripe account. If everything looks good, click Next:

bank linked verification page in Buy Now Plus

In this step you'll enter your customer support details. One of these details is a “descriptor” that will appear on a customer's credit card statement to help them identify the charge.

For example, if your business name is ABC Plumbing, you could simply enter “ABC Plumbing” in this field. In the shortened descriptor field, you might enter just “ABC” or “Plumbing”.

Now you'll enter your business address and phone number. Again, just use your home address and cell number if that's what you use for business. Then click Next, and your Stripe account will be all set:

customer support details in Buy Now Plus

On the next page you'll configure your Buy Now Plus settings. Just make sure the form includes your name, email, and company name. Then create a password, and click Update:

Buy Now Plus account settings

That's it! On the next page, you'll be able to create your first button and start selling:

Create a new button in Buy Now Plus

After creating your button, you can add it to any compatible platform using the auto-generated embed code.

Conclusion 

Processing credit cards may sound daunting, but it’s also the preferred payment method for the majority of shoppers. If your business doesn't support credit cards, then you may struggle to make sales.

With Buy Now Plus, incorporating this popular payment method doesn’t have to be complicated or expensive.

Do you have questions about how to add credit card support to your business? Let us know in the comments section below!

If you liked this post, be sure to follow us on Twitter, Facebook, and LinkedIn.

How to Create a PayPal-Style Buy Now Button with Stripe (4 Steps)

Most modern payment gateways support PayPal-style buy now buttons. However, adding these powerful call to action (CTA) buttons to your website isn’t always a straightforward process.

Thankfully, there are tools that can help you create high-converting buy now buttons for your ecommerce store, social media platforms, or any other location where you want to drive sales.

If you opt for a user-friendly tool, it’s even possible to create an engaging CTA without having to write a single line of code.

In this post, we’ll show you how to create a buy now button using the popular Stripe payment gateway. We’ll also look at how to further optimize the checkout process by designing an information-packed Thank You page. Let’s get started! 

An Introduction to Buy Now Buttons (And Why They’re Important)

Payment providers such as PayPal and Stripe are hugely popular with merchants who want to offer customers a quick, easy, and secure way to purchase their products and services.

Supporting a range of payment methods is often essential for driving sales. After all, if customers can't send you a payment using their preferred method, they may go elsewhere!

To really drive conversions and reduce cart abandonment rates, it’s smart to support a range of payment methods, and to make these gateways easily accessible via a buy now button. This is a CTA that bypasses multiple steps in the traditional payment process, and typically takes the shopper directly to your checkout page.

Most payment gateways support these powerful CTA buttons. This includes PayPal, which provide a Pay Now button that enables customers to make a purchase in seconds: 

The PayPal demo.

Stripe also offers a similar payment request button. However, implementing both the PayPal and Stripe buttons is a multi-step process that requires you to write some code. 

At Buy Now Plus we believe that creating your buttons should be just as easy as using them. Thanks to our dashboard and Stripe integration, you can create a PayPal-style buy now button for Stripe with ease – and without code!

How to Create a PayPal-Style Buy Now Button with Stripe (In 4 Easy Steps)

Let’s see how easy it is to create a buy now button. We’re going to assume you already have a Stripe account. If you don’t, then you can register for one at the Stripe website.

Step 1: Connect Stripe and Buy Now Plus

To start, head over to the Buy Now Plus login page. You can then either log in or connect to Stripe: 

The Buy Now Plus login screen.

The Buy Now Plus wizard will then walk you through linking your account to Stripe. As part of the registration process, Stripe will ask you to provide a statement descriptor and shortened descriptor.

This information explains charges and payments on bank statements, invoices, and receipts, which can help you avoid chargebacks:

The Buy Now Plus registration process.

Stripe will also ask for some information about your business, and for a mobile phone number. This adds an extra layer of security to your account. 

After registering, you’ll be automatically redirected to your Buy Now Plus dashboard. You can then get started on your buy now button.

Step 2: Design Your Buy Now Button

To create your first button, select Add New. Next, you'll need to enter some text into the Terms and Description fields. This information will appear on your payment screen:

A Buy Now Plus payment screen.

Then you can decide whether these payments should be fixed or variable. For example, you might create a variable purchase button if you’re accepting donations, or if you’re implementing a “pay what you want” model. You can also specify the currency that you’ll receive payments in.

Next, choose the Stripe account where you’ll accept these payments, using the Stripe Account dropdown. You can access some additional settings by clicking to expand the Advanced Options section.

Here, you can set the text that’ll appear on your button, for example Buy Now or Pay with Stripe.  This is all you need to create a simple buy now button. When you’re done, click on Create.

Step 3: Create an Optional Thank You Page

If the customer is unsure whether the payment has been processed correctly, they may contact your customer service desk or send you a duplicate payment. To avoid confusion, you can create a Thank You page where customers will be redirected following a successful payment.

This page is also an opportunity to provide helpful information, including a summary of the customer’s order and their tracking code. This can improve the customer experience, which may put you in a stronger position to secure repeat sales:

A Thank You page, created using a WordPress plugin.

Buy Now Plus can automatically redirect the customer to a page of your choice following a successful payment. This can be any page or post that you create in the WordPress dashboard.

Step 4: Preview and Post Your Buy Now Button

The main Buy Now Plus dashboard will now display the button you just created.  You can see how this CTA will appear to the customer by clicking on the preview icon under Actions:

Create a PayPal-style Buy Now button with Stripe, in the  Buy Now Plus dashboard.

If you’re happy with your button, you can navigate back to the main dashboard and select the share icon under Actions. This will launch a dialog containing an embed code: 

Buy Now Plus' website embed code.

Now, head over to your WordPress website, and find the page or post where you want to add your button. Open the page editor and create a shortcode block at the exact location where you want to display it:

The WordPress shortcode block.

You can now paste your embed code into this block and save your changes. Alternatively, you may want to add this button to your site’s recurring elements, such as the header, footer, or sidebar. 

Conclusion 

Buy now buttons can be a simple but effective tool for boosting your sales. Although most popular payment gateways support the buy now feature, adding this may require writing some code or installing additional tools. Thanks to Buy Now Plus, you can implement these payment buttons more easily. 

Let’s recap how you create a buy now button in four quick steps: 

  1. Connect Stripe and Buy Now Plus.
  2. Design your buy now button.
  3. Create an optional thank you page.
  4. Preview and post your button PayPal-style buy now button.

Do you have any questions about creating a PayPal-style buy now button with Stripe? Let us know in the comments section below!

css.php