How to Accept Donations Online (Everything Nonprofits Need to Know)

Many people prefer to complete tasks online. From scheduling appointments to paying electric bills, if users can't do it virtually, they might not do it at all. This same mentality can hold true when it comes to making donations.

Fortunately, enabling your nonprofit to accept donations from your website is a simple process. In fact, once you're online, you may find it's easier and more effective than using mailers or in-person events.

In this post, we'll explore why you should consider accepting online donations. Then we'll show you how to receive contributions using Buy Now Plus. Let's get started!

Why You May Want to Accept Online Donations

These days, many people prefer online donations and don't always have cash or checks at hand. If you're not able to accept online contributions, you're making it difficult, if not impossible, for these people to support your organization.

Enabling online donations can also help you to reach a wider audience. Rather than relying on more traditional methods, you can share your website across social media and email campaigns.

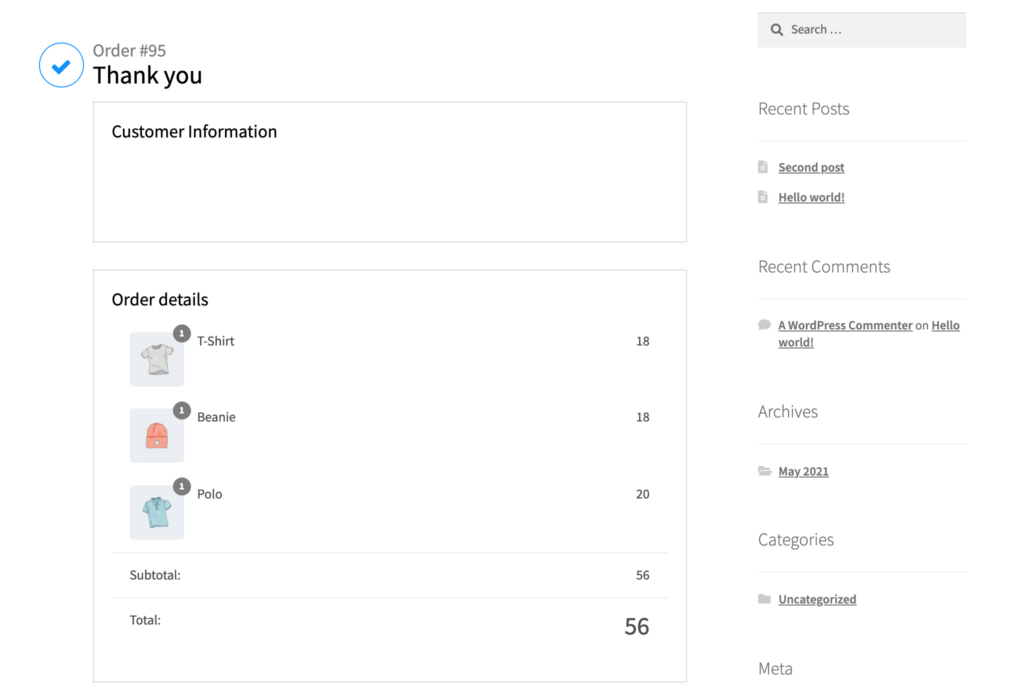
You'll also make it easier for your followers to share your information with their own networks:

Austin Pets Alive has several donation buttons on its website.

Finally, handling donations online can cut down on your paper usage. You can reduce or eliminate your reliance on paper mailers, saving you money on postage costs.

Accepting online contributions is also a significant first step for transitioning to paperless bookkeeping. As such, this method can be advantageous for environmentally conscious businesses.

How to Accept Donations Online (In 3 Easy Steps)

Now that we've covered the benefits of accepting online donations, let's look at starting the process with Buy Now Plus.

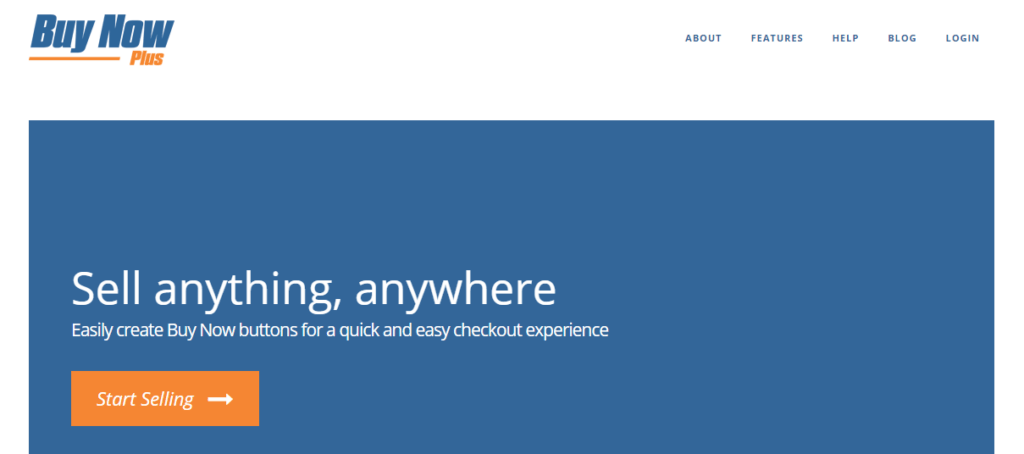
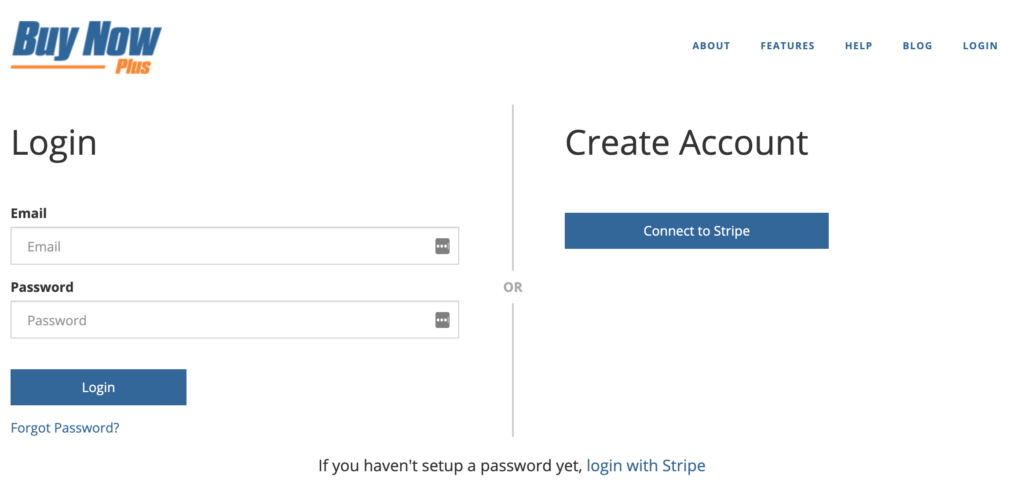
1. Sign Up for Buy Now Plus

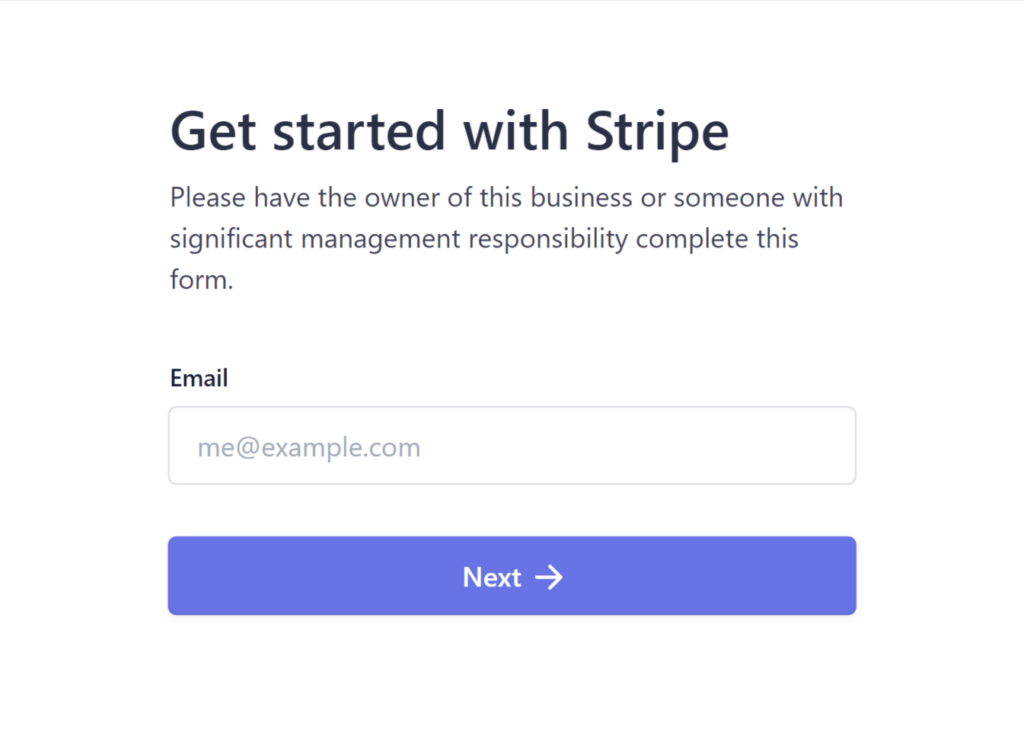
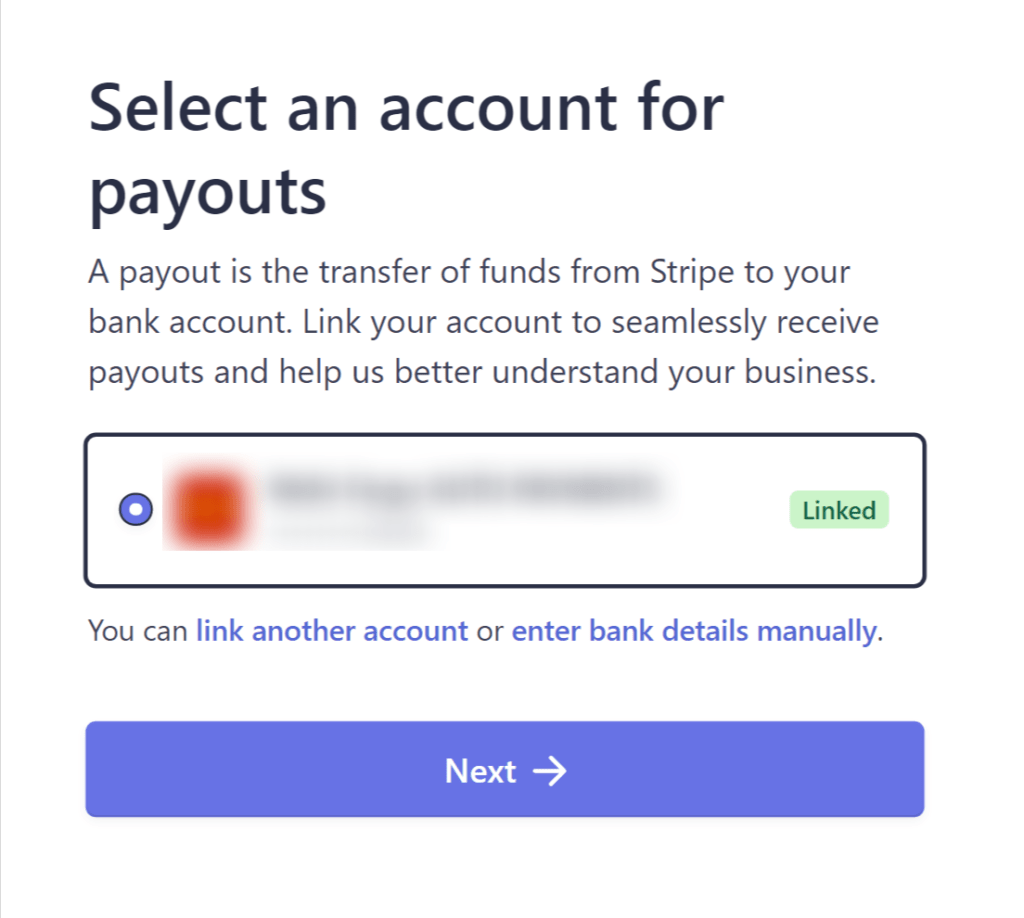
When you sign up for Buy Now Plus, you'll be asked to connect your Stripe account. This step provides you and your donors with a secure payment gateway.

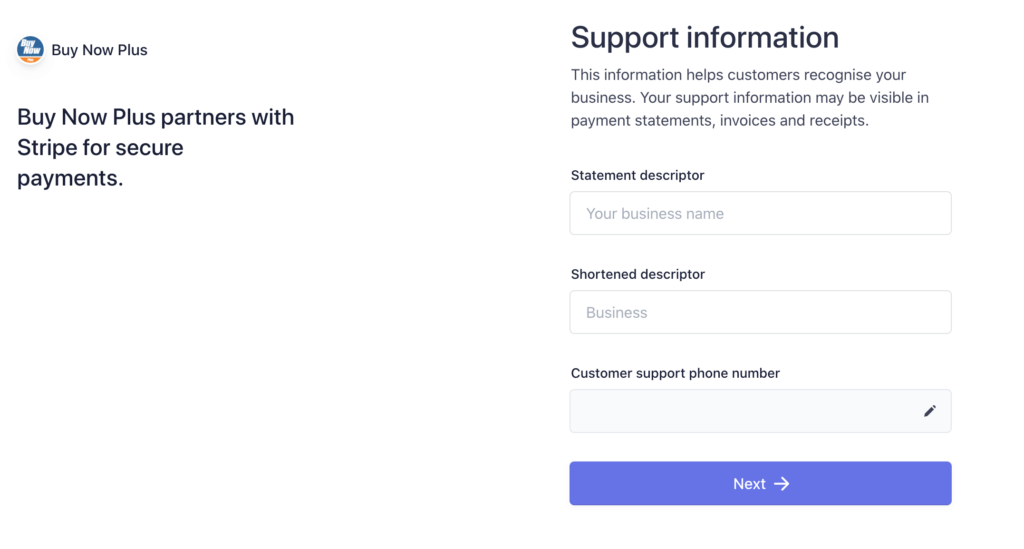
If you don't have a Stripe account, you'll be able to create one during the Buy Now Plus setup process:

Signing up for a Buy Now Plus account.

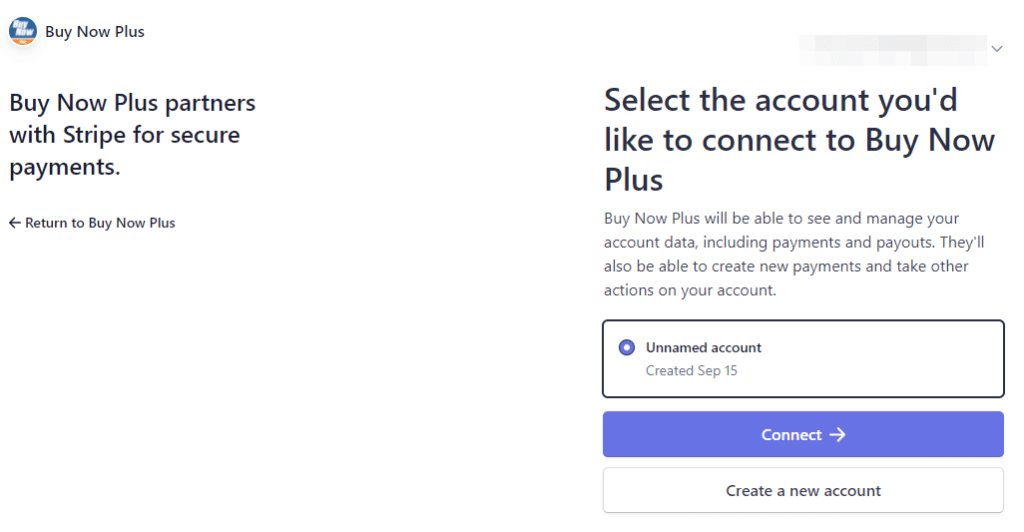
If you already have a Stripe account but would like to create a new one for donations, you can also handle that at this time.

Buy Now Plus enables you to add more than one Stripe account, which could come in handy for organizing your accounting.

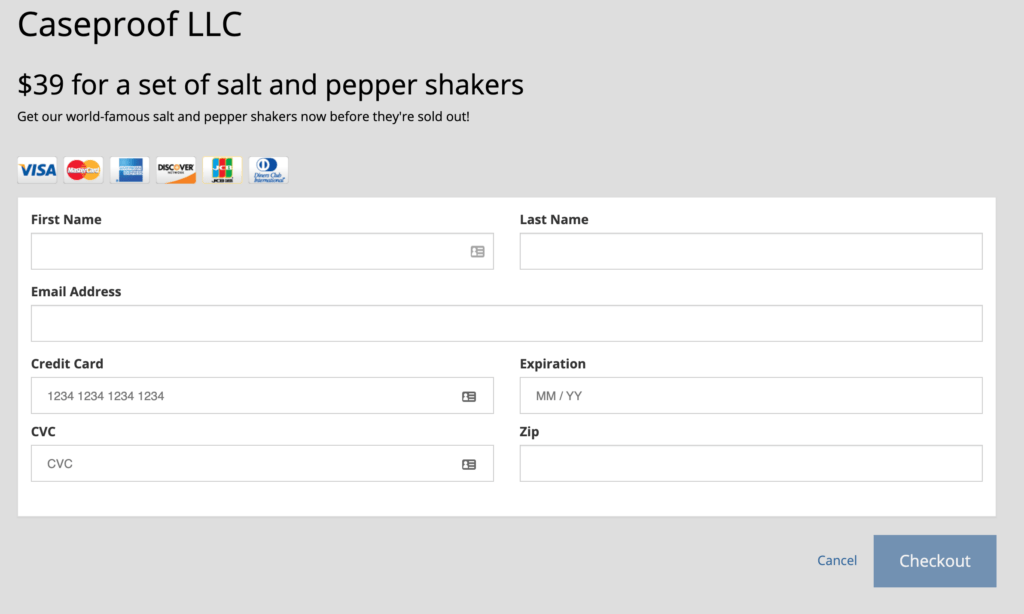
2. Design Your Donate Button

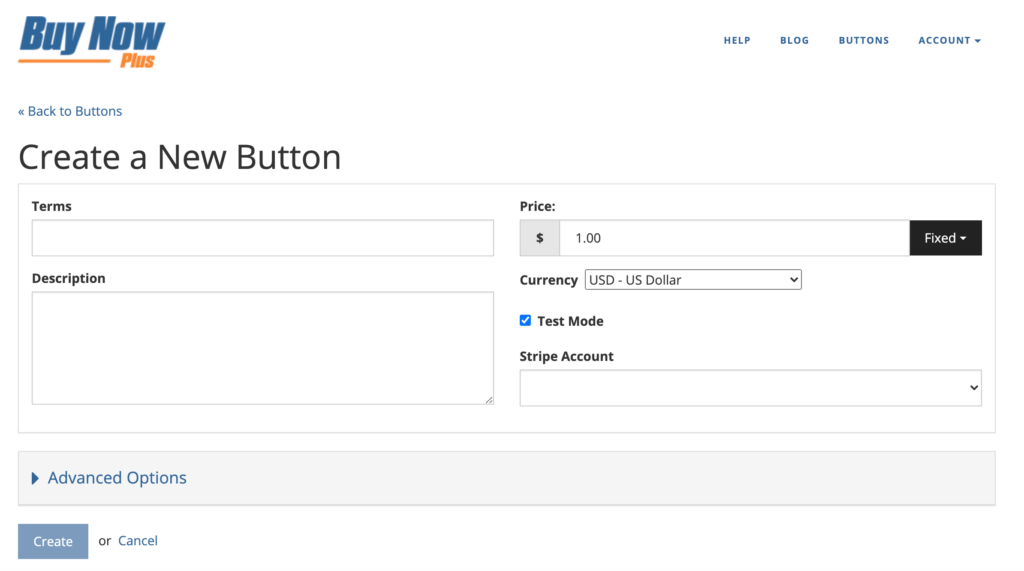
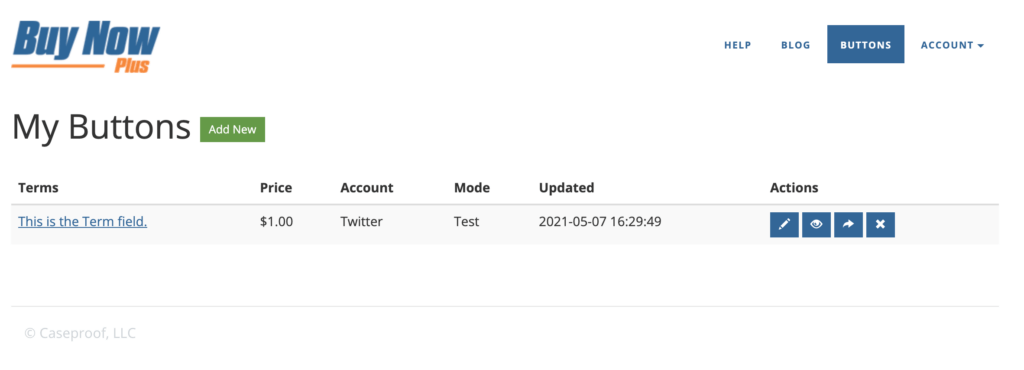
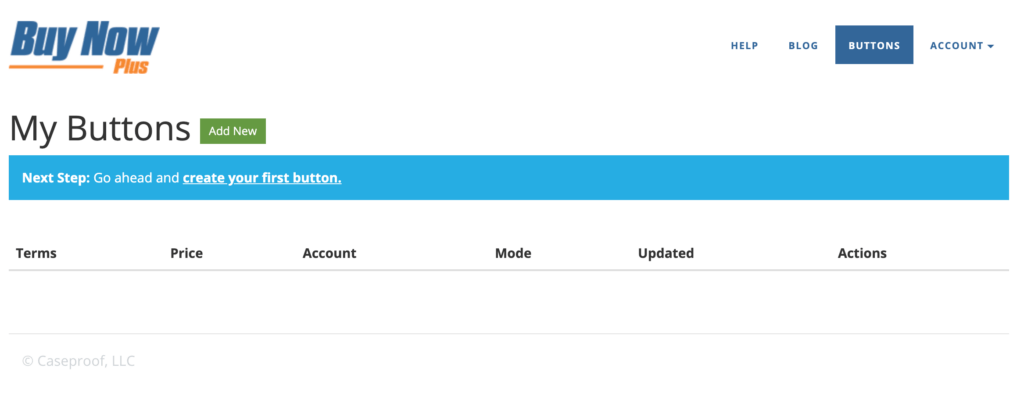
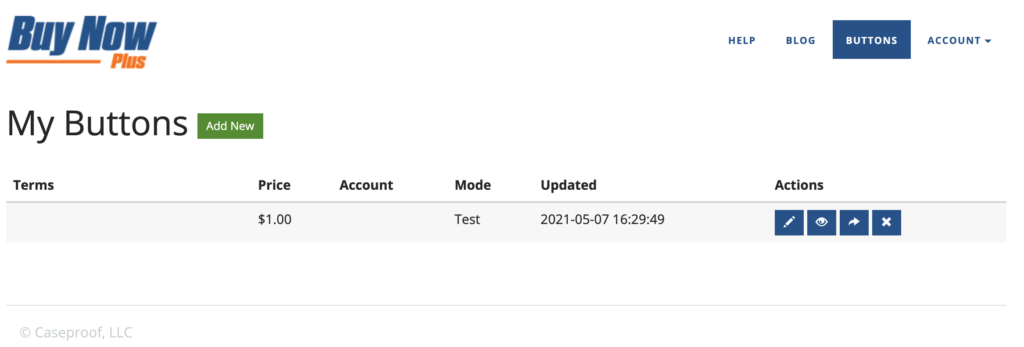
Now that you have your Buy Now Plus account ready, it's time to create your first donation button. Start by logging in to your account and navigating to the Buttons page. Then, click on the Add New button.

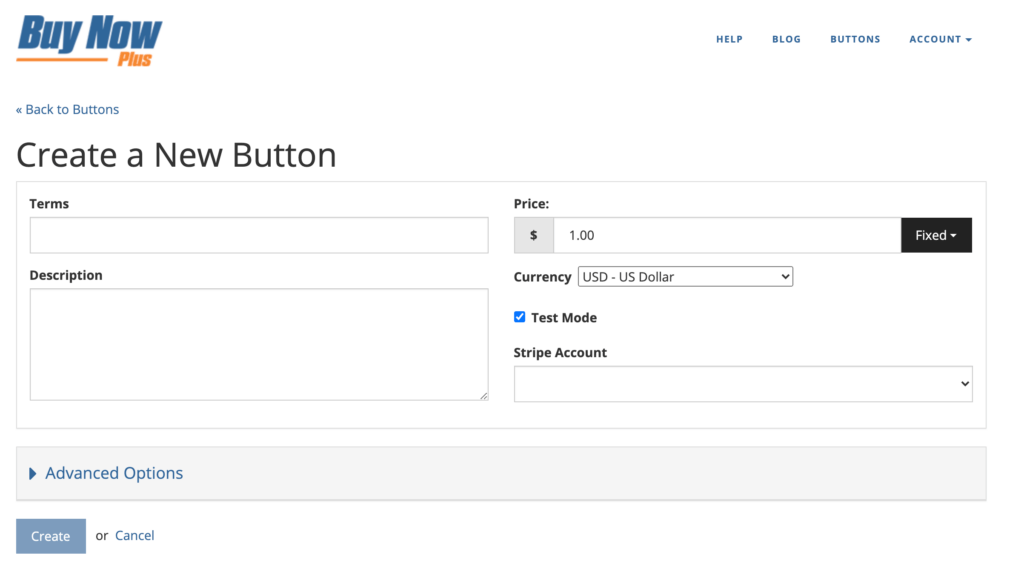
Here you can add the basic information about your button. This is also where you'll choose which Stripe account to use with it:

How to create a new button in Buy Now Plus

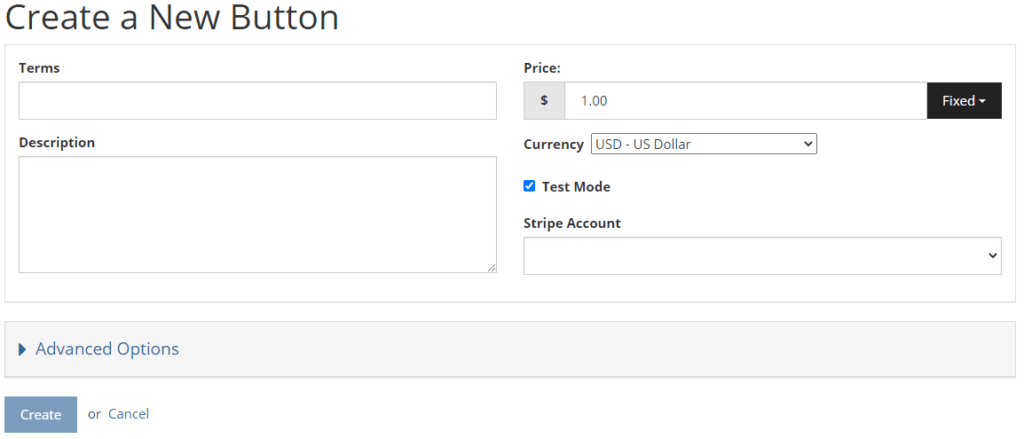
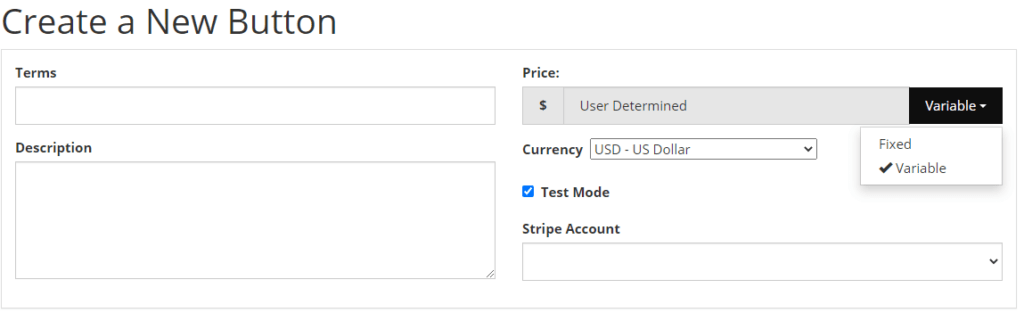
You may want to set the price to Variable using the dropdown menu. This setting enables your donors to choose how much they'd like to give.

Alternatively, you might create a few buttons with preset amounts to encourage donations:

Changing the price option from fixed to variable.

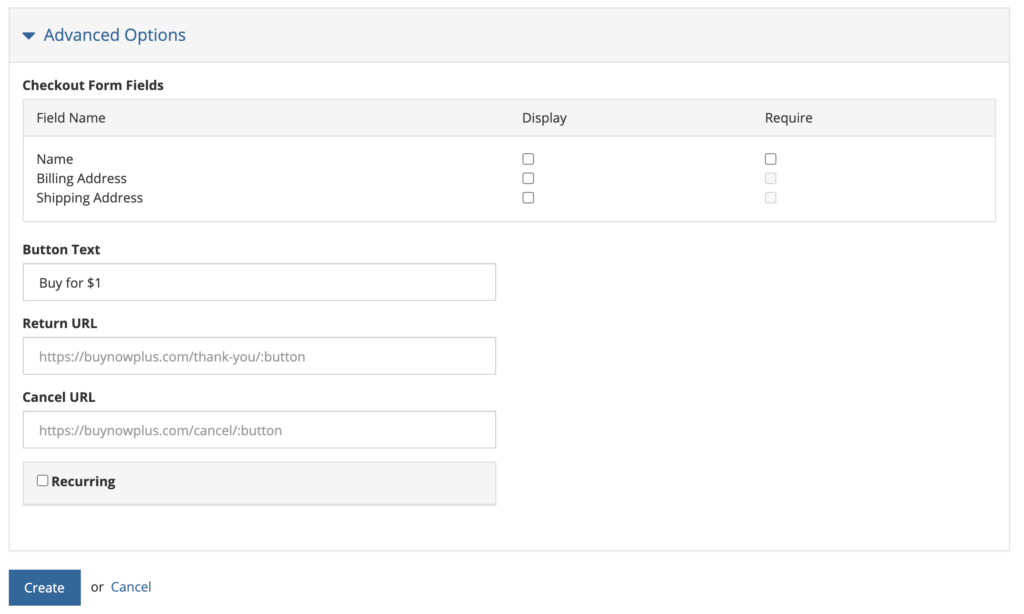
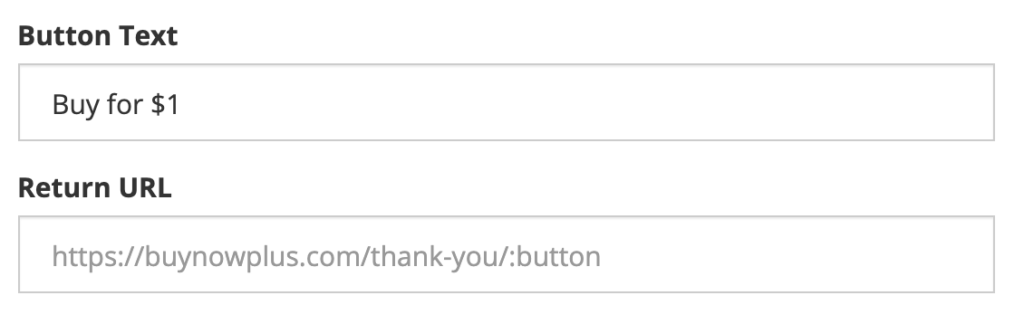
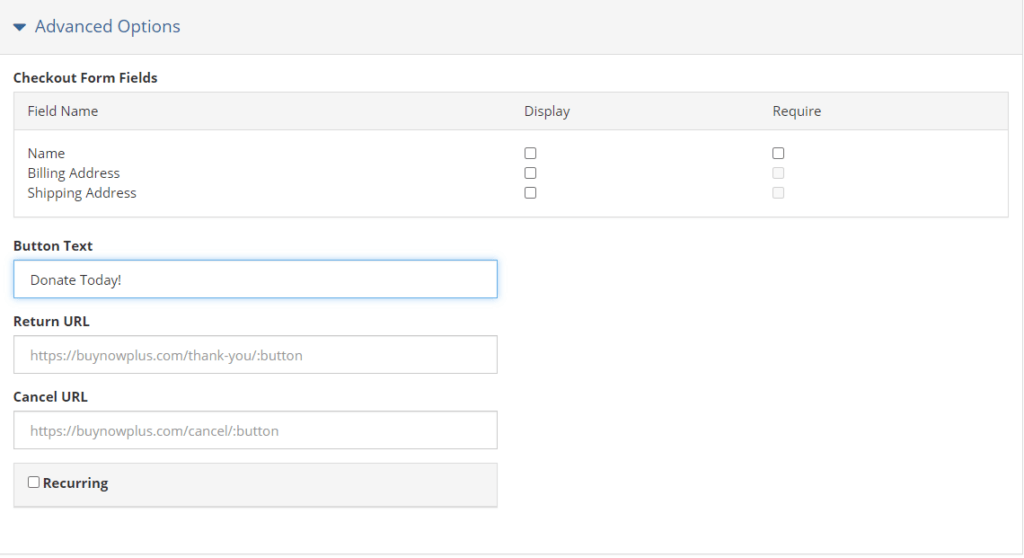
Under the Advanced tab, you can change the text on your button. You can also set a URL that will direct users to a new page once they complete their donations:

How to change the text on a donation button.

Once you're satisfied with your button, click on the Create button to save it.

3. Share Your Button Everywhere

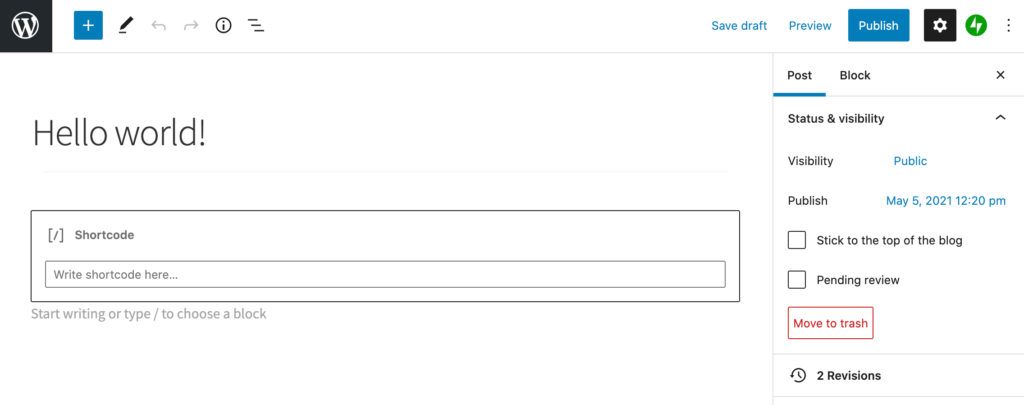
Finally, you can start sharing your button with your network. Buy Now Plus makes it easy to embed your button anywhere you can add a link.

You may want to start by adding the button in a few places across your website. You might include one in your main navigation menu as well as above the fold on your homepage.

It's also a smart idea to create a landing page dedicated to accepting donations.

You can still share your donation button even if you don't have a website. If you're active on social media, that's a great place to start. You can also include a donation button in your email campaigns.

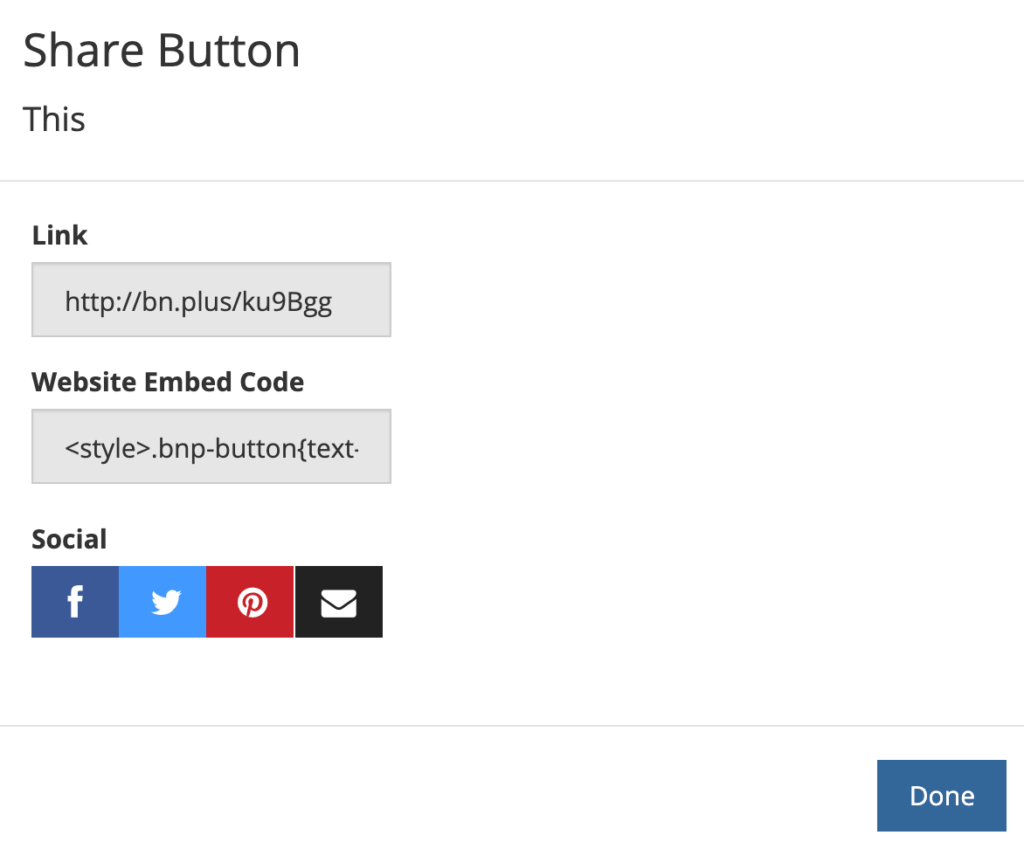
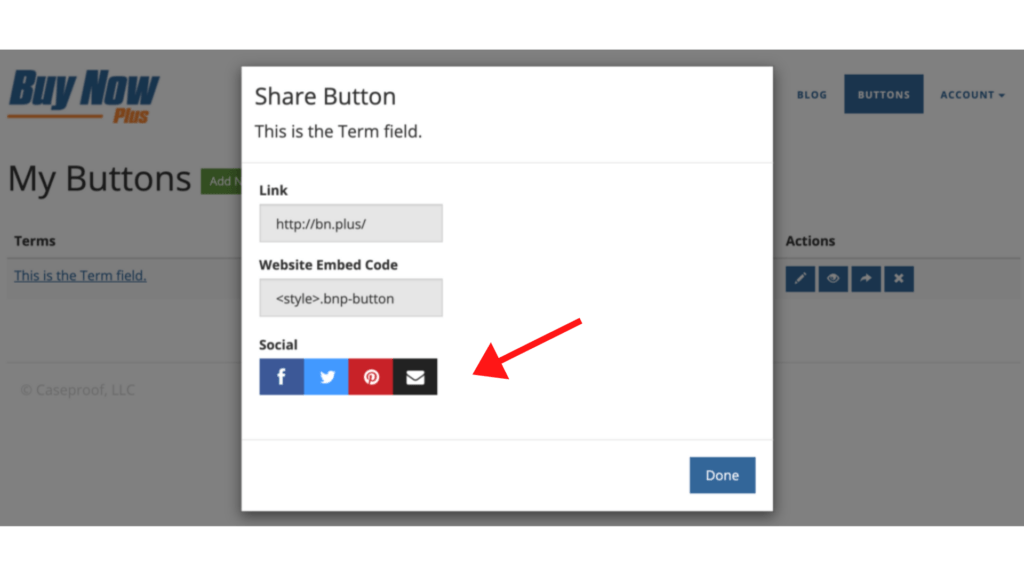
Regardless of where you'd like to place your button, the process is pretty similar. Simply click on the Share button to the right of your donation button. You'll see a pop up with a link and an embed code:

Embed options for Buy Now Plus.

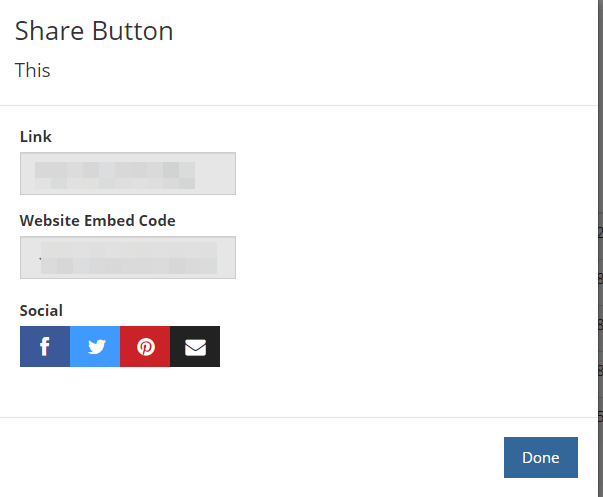
You can also use the social buttons to go directly to the platforms you'd like to share on.

Conclusion

Accepting donations online can be a smart move for any nonprofit. Your donors will likely appreciate the convenience, and it may even save your organization some time and money. Best of all, it's easy to get set up using Buy Now Plus.

Let's recap the three steps to accepting online donations:

  1. Sign up for Buy Now Plus.
  2. Design your donate button.
  3. Share your button everywhere.

Do you have questions about receiving contributions online? Ask us in the comments section below!

If you liked this post, be sure to follow us on Twitter, Facebook, and LinkedIn.

How Stripe Protects You From Fraud (5 Ways)

Enabling debit and credit card payments is one of the most effective ways to sell products online. However, it can also put your business at risk for fraudulent purchases.

Fortunately, you can use a reliable ecommerce platform like Stripe to ensure that you and your customers are safe. Stripe has many checks and balances in place that can help prevent fraud and alert you to suspicious activity.

In this guide, we'll take a closer look at Stripe and how it works with Buy Now Plus. We'll then look at five ways Stripe protects you against fraudulent payments. Let's get started!

An Introduction to Stripe

Stripe is one of the most popular ecommerce payment platforms on the market. It offers a complete suite that enables you to receive payments, send invoices, track your business analytics, and access financing:

Stripe homepage

Stripe is also very flexible, and you can use it with most application programming interfaces (APIs). It has pre-built integrations with leading ecommerce systems, so you can easily adapt it to your business' needs.

Buy Now Plus actually runs on Stripe. That means when you use it, you get access to all of the fraud protection and secure payments Stripe offers. Additionally, Buy Now Plus has a 3% flat fee for transactions and is incredibly user-friendly.

To get rolling, all you need to do is click “Start Selling” on the homepage.

Buy Now Plus homepage

When you enter the signup process, you'll get the option to login to your existing Stripe account, or you can create a new free Stripe account, all from within the BNP signup interface.

Getting back to the point at hand… online payment fraud is unfortunately common. In 2020, ecommerce businesses worldwide lost approximately $17.5 billion due to fraud. In addition, experts predict this amount will increase to more than $20 billion in 2021. Therefore, it's in the best interests of your business to choose a platform with fraud protection, like Stripe.

How Stripe Protects You From Fraud (5 Ways)

As we've seen, Stripe helps protect your business against fraudulent payments. Next, let's look at the strategies that it uses to do this.

1. Stripe Chargeback Protection

Stripe Chargeback Protection can be an essential tool for ecommerce sites. This service can protect your business if a customer issues a payment dispute:

Stripe Chargeback Protection page

For example, a customer may claim that you have falsely charged them or overcharged them. Whether the claim is fraudulent or not, Stripe can cover the disputed amount and any associated fees.

As a bonus, Stripe doesn't require you to submit evidence against chargeback requests. This means that you won't need to waste time or money on resolving these issues.

Stripe can thus protect your business against fraudulent claims. In turn, it can prevent you from losing money on legitimate transactions. You can add Stripe Chargeback Protection by enabling it in your Stripe Checkout.

2. Device Characteristic Signals

Stripe has an in-built fraud detection service called Radar. It uses machine learning to analyze billions of data points on payments made across the globe. By doing so, it can identify potentially fraudulent transactions:

Stripe Radar feature

Device characteristic signals are some of the key data that Radar analyzes. This information refers to signals that come from customers' internet browsers, screens, and mobile devices.

This device characteristic data can tell Stripe what typical browsing behavior is for users. If a transaction and its associated signals fall outside of this behavior, it could signal fraudulent activity.

Radar collects this data continually in order to improve its understanding of consumer behavior. If it notices a high-risk fraudulent purchase, it blocks it automatically. With elevated risk payments, the payment goes into a review process for further investigation.

3. Activity Indicator Signals

Stripe's Radar also analyzes activity indicator signals. This data looks at how long users spend on pages, and how long they take to complete transactions or fill out the information in forms.

For example, a bot can navigate pages a lot faster than the average person, and often inserts card details with the copy-paste function. If Stripe picks up that a potential purchase is being processed too quickly, it can identify that it is a bot and not a real person.

Like with device characteristic signals, Stripe's Radar continually collects and analyzes activity indicator data. In this way, it can identify new patterns and protect your business from fraud.

4. Card Verification Code Checks

Cards have various details that a customer must provide in order to complete a purchase. One of these is the Card Verification Code (CVC), which you can find on the back of a debit or credit card. Customers need to enter this number when they complete a transaction, as well as the card account number and expiry date.

Radar protects against fraudulent purchases by automatically denying any transactions that have the incorrect CVC. Therefore, it can stop payments made from leaked card information.

5. Address Verification Checks

Stripe's Radar also verifies the address attached to a card account. It checks the data held by the card issuer and determines if the postcode and street address are consistent with the account details.

Radar automatically denies payments that don't have the correct postcode. It can thus prevent fraudulent payments with stolen cards.

It may also block legitimate purchases where the customer has entered the address incorrectly. You can opt-in or out of this verification check by enabling or disabling it on your Stripe dashboard.

Conclusion

Stripe is one of the most secure ecommerce platforms available. It has various checks and balances to prevent fraud and notify you of suspicious purchases. Moreover, Buy Now Plus is totally powered by Stripe.

Let's quickly recap the five ways that Stripe can protect your business:

  1. It prevents fraudulent chargebacks with Stripe Chargeback Protection.
  2. It identifies unusual browsing behavior.
  3. It analyzes activity indicators and identifies bots.
  4. It runs CVC checks.
  5. It performs address verification checks.

Do you have any questions about using Stripe with Buy Now Plus? Let us know in the comments section below!

If you liked this post, be sure to follow us on Twitter, Facebook, and LinkedIn.

How to Accept Credit Cards Without a Website

Would you like to accept credit cards from your customers, but you don't have a website? No problem! As long as you have a social media account and a bank account, you can take credit card payments with Buy Now Plus.

In this post, we’ll discuss why accepting credit cards is crucial to running a successful business. Then we’ll show you how easy it is to use this payment method with Buy Now Plus. Let’s get started! 

Why It’s Important to Accept Credit Card Payments

Credit cards are the most popular payment method in the United States. If your business doesn’t accept card payments, then you could be alienating the majority of your audience and losing potential sales.

If your customers can't make a purchase using their preferred payment methods, they may go elsewhere. To maximize your sales, it’s important to support as many different payment methods as possible.

The method we always recommend prioritizing? Credit cards.

Many e-commerce sites accept credit card payments.

Despite the popularity of paying by credit card, some businesses may be reluctant to support card payments due to the associated fees. For every credit card transaction, you’ll have to pay interchange fees, assessment or service fees, and the payment processor’s markup.

These transaction fees can seem off-putting, particularly for small businesses and startups that may be operating on tighter budgets. However, if you don’t accept credit cards, you're shrinking your customer pool.

It’s far better to sacrifice a percentage of a successful sale than to lose out on that sale entirely. Plus, if your checkout process is more accessible, you're more likely to boost your profits, grow your customer base, and secure repeat sales.

How to Accept Credit Card Payments Without a Website Using Buy Now Plus

Buy Now Plus is a free service you can use to accept payments without purchasing and installing SSL certificates. You only get charged if you make a sale. And that charge is only 3% – super low compared to the industry standard for similar services, which is between 4% and 5%.

The best part is that it works right on top of the Stripe payment processor. That means to get set up, all you have to do is head to BuyNowPlus.com, and click the Start Selling button:

Buy Now Plus homepage

Clicking the Start Selling button will open the Getting Started form. If you already have a Stripe account, you'll be able to login and connect it to Buy Now Plus.

If you don't have a Stripe account, just enter your email and click Next to get your free account set up:

Get started with Stripe in Buy Now Plus

On the next page, create a password for your new Stripe account, and click Next:

create a free Stripe account in Buy Now Plus

In the next step, you'll secure your account by adding your cell phone number:

Secure your Stripe account in Buy Now Plus

You'll get a text with a special code, which you'll then enter for verfication:

Enter the code from your device in buy now plus

If verification is successful, you'll get a confirmation that your new Stripe account is secured. The confirmation will also include an emergency backup code you can use if your device is lost or stolen. You'll definitely want to copy that code and keep it in a safe place.

Once you've got your backup code stored away safely, click Next:

Stripe account is secured in Buy Now Plus

In this step, you'll give some basic information about your business. If your business doesn't have a physical address, just enter your home address, then click Next:

Tell us about your business in Buy Now Plus

Now you'll enter a few additional details about your business. The first field asks for your business website. But don't worry. You can enter your social media profile address if you don't have a business website.

Then enter a short product description and click Next:

Business details in Buy Now Plus

Now you'll choose a bank account where your payments will be deposited. First search for your bank in the search field. If it doesn't pop up, you can enter your bank's details manually by clicking the link at the bottom of the screen.

Once that's all set, click Next:

Select an account for Stripe payouts in Buy Now Plus

The next screen will verify that your bank account is linked to your new Stripe account. If everything looks good, click Next:

bank linked verification page in Buy Now Plus

In this step you'll enter your customer support details. One of these details is a “descriptor” that will appear on a customer's credit card statement to help them identify the charge.

For example, if your business name is ABC Plumbing, you could simply enter “ABC Plumbing” in this field. In the shortened descriptor field, you might enter just “ABC” or “Plumbing”.

Now you'll enter your business address and phone number. Again, just use your home address and cell number if that's what you use for business. Then click Next, and your Stripe account will be all set:

customer support details in Buy Now Plus

On the next page you'll configure your Buy Now Plus settings. Just make sure the form includes your name, email, and company name. Then create a password, and click Update:

Buy Now Plus account settings

That's it! On the next page, you'll be able to create your first button and start selling:

Create a new button in Buy Now Plus

After creating your button, you can add it to any compatible platform using the auto-generated embed code.

Conclusion 

Processing credit cards may sound daunting, but it’s also the preferred payment method for the majority of shoppers. If your business doesn't support credit cards, then you may struggle to make sales.

With Buy Now Plus, incorporating this popular payment method doesn’t have to be complicated or expensive.

Do you have questions about how to add credit card support to your business? Let us know in the comments section below!

If you liked this post, be sure to follow us on Twitter, Facebook, and LinkedIn.

How to Create a PayPal-Style Buy Now Button with Stripe (4 Steps)

Most modern payment gateways support PayPal-style buy now buttons. However, adding these powerful call to action (CTA) buttons to your website isn’t always a straightforward process.

Thankfully, there are tools that can help you create high-converting buy now buttons for your ecommerce store, social media platforms, or any other location where you want to drive sales.

If you opt for a user-friendly tool, it’s even possible to create an engaging CTA without having to write a single line of code.

In this post, we’ll show you how to create a buy now button using the popular Stripe payment gateway. We’ll also look at how to further optimize the checkout process by designing an information-packed Thank You page. Let’s get started! 

An Introduction to Buy Now Buttons (And Why They’re Important)

Payment providers such as PayPal and Stripe are hugely popular with merchants who want to offer customers a quick, easy, and secure way to purchase their products and services.

Supporting a range of payment methods is often essential for driving sales. After all, if customers can't send you a payment using their preferred method, they may go elsewhere!

To really drive conversions and reduce cart abandonment rates, it’s smart to support a range of payment methods, and to make these gateways easily accessible via a buy now button. This is a CTA that bypasses multiple steps in the traditional payment process, and typically takes the shopper directly to your checkout page.

Most payment gateways support these powerful CTA buttons. This includes PayPal, which provide a Pay Now button that enables customers to make a purchase in seconds: 

The PayPal demo.

Stripe also offers a similar payment request button. However, implementing both the PayPal and Stripe buttons is a multi-step process that requires you to write some code. 

At Buy Now Plus we believe that creating your buttons should be just as easy as using them. Thanks to our dashboard and Stripe integration, you can create a PayPal-style buy now button for Stripe with ease – and without code!

How to Create a PayPal-Style Buy Now Button with Stripe (In 4 Easy Steps)

Let’s see how easy it is to create a buy now button. We’re going to assume you already have a Stripe account. If you don’t, then you can register for one at the Stripe website.

Step 1: Connect Stripe and Buy Now Plus

To start, head over to the Buy Now Plus login page. You can then either log in or connect to Stripe: 

The Buy Now Plus login screen.

The Buy Now Plus wizard will then walk you through linking your account to Stripe. As part of the registration process, Stripe will ask you to provide a statement descriptor and shortened descriptor.

This information explains charges and payments on bank statements, invoices, and receipts, which can help you avoid chargebacks:

The Buy Now Plus registration process.

Stripe will also ask for some information about your business, and for a mobile phone number. This adds an extra layer of security to your account. 

After registering, you’ll be automatically redirected to your Buy Now Plus dashboard. You can then get started on your buy now button.

Step 2: Design Your Buy Now Button

To create your first button, select Add New. Next, you'll need to enter some text into the Terms and Description fields. This information will appear on your payment screen:

A Buy Now Plus payment screen.

Then you can decide whether these payments should be fixed or variable. For example, you might create a variable purchase button if you’re accepting donations, or if you’re implementing a “pay what you want” model. You can also specify the currency that you’ll receive payments in.

Next, choose the Stripe account where you’ll accept these payments, using the Stripe Account dropdown. You can access some additional settings by clicking to expand the Advanced Options section.

Here, you can set the text that’ll appear on your button, for example Buy Now or Pay with Stripe.  This is all you need to create a simple buy now button. When you’re done, click on Create.

Step 3: Create an Optional Thank You Page

If the customer is unsure whether the payment has been processed correctly, they may contact your customer service desk or send you a duplicate payment. To avoid confusion, you can create a Thank You page where customers will be redirected following a successful payment.

This page is also an opportunity to provide helpful information, including a summary of the customer’s order and their tracking code. This can improve the customer experience, which may put you in a stronger position to secure repeat sales:

A Thank You page, created using a WordPress plugin.

Buy Now Plus can automatically redirect the customer to a page of your choice following a successful payment. This can be any page or post that you create in the WordPress dashboard.

Step 4: Preview and Post Your Buy Now Button

The main Buy Now Plus dashboard will now display the button you just created.  You can see how this CTA will appear to the customer by clicking on the preview icon under Actions:

Create a PayPal-style Buy Now button with Stripe, in the  Buy Now Plus dashboard.

If you’re happy with your button, you can navigate back to the main dashboard and select the share icon under Actions. This will launch a dialog containing an embed code: 

Buy Now Plus' website embed code.

Now, head over to your WordPress website, and find the page or post where you want to add your button. Open the page editor and create a shortcode block at the exact location where you want to display it:

The WordPress shortcode block.

You can now paste your embed code into this block and save your changes. Alternatively, you may want to add this button to your site’s recurring elements, such as the header, footer, or sidebar. 

Conclusion 

Buy now buttons can be a simple but effective tool for boosting your sales. Although most popular payment gateways support the buy now feature, adding this may require writing some code or installing additional tools. Thanks to Buy Now Plus, you can implement these payment buttons more easily. 

Let’s recap how you create a buy now button in four quick steps: 

  1. Connect Stripe and Buy Now Plus.
  2. Design your buy now button.
  3. Create an optional thank you page.
  4. Preview and post your button PayPal-style buy now button.

Do you have any questions about creating a PayPal-style buy now button with Stripe? Let us know in the comments section below!

How to Create a Buy Now Button With Stripe

As an online seller, it’s easy to become fixated on encouraging customers to add products to their shopping carts. However, this isn’t enough to guarantee sales, as there's evidence to suggest that nearly 70% of shoppers fail to complete the checkout process.

Fortunately, it is possible to replace the traditional multi-step checkout with a single Buy Now button. By adding one to your site or social profile, you can often dramatically reduce cart abandonment rates and boost your bottom line.

In this post, we’ll look at why every online business should have a buy now button. Then we’ll show you how to add this simple but effective feature to your own website or social account step by step. Let’s get started!

An Introduction to Buy Now Buttons (And Why You Might Want to Create One)

A buy now button is a call to action (CTA) that usually takes a shopper to either a product page, their cart, or directly to your checkout page. Buy now buttons are useful for bypassing many of the steps typically required to complete a purchase.

This may include time-consuming tasks, such as creating an account. Since you’re streamlining the buying process, Buy now buttons can help drive conversions and reduce cart abandonment rates.

A Buy button created using Buy Now Plus.

Buy Now buttons are most commonly used on ecommerce sites. However, when you create a button using our flexible Buy Now Plus tool, you can use the same CTA across multiple platforms, including email newsletters and social media

This helps you provide a consistent purchasing experience, while also transforming multiple channels into revenue streams. Buy now buttons are particularly valuable in omnichannel marketing, as they help provide a smooth and integrated shopping journey across all of your channels. 

How to Create a Buy Now Button With Stripe

Now that we've discussed why a Buy Now button can be a powerful addition to your ecommerce site, let’s look at how easy it is to create one with Stripe.

Step 1: Sign Up for Buy Now Plus

Buy Now Plus is a free service that allows you to accept payments without the need for SSL certificates. You're only charged if you make a sale. And our fee is only 3% – a very low rate when you consider the industry standard is between 4% and 5%.

What's great about Buy Now Plus is that it works right on top of Stripe. So whether or not you already have Stripe account, just head over to BuyNowPlus.com, and click the Start Selling button:

Buy Now Plus homepage

Clicking the Start Selling button opens the Getting Started form. If you have an existing Stripe account, you'll have to option to login and connect it to Buy Now Plus right then.

If you've never had Stripe, just enter your email and click Next to set up your new free account:

Get started with Stripe in Buy Now Plus

After that, you'll create a password for your new Stripe account, and click Next:

create a free Stripe account in Buy Now Plus

And secure your account by adding your cell phone number:

Secure your Stripe account in Buy Now Plus

Once you get your special code via text message, enter the code for verification:

Enter the code from your device in buy now plus

In a few seconds, you'll receive a confirmation that your new Stripe account is secured. Make sure you the emergency backup code provided, and keep it in a safe place. Then click Next.

Stripe account is secured in Buy Now Plus

Here, you'll enter a few basic details about your business. If you don't operate with a physical address, just use your home address, then click Next:

Tell us about your business in Buy Now Plus

Next you'll add a bit more info about your business. The first field asks for your business website. If you don't have a website, just use the social media profile URL for your business.

Next provide a short product description, and click Next:

Business details in Buy Now Plus

Now is when you'll designate a bank account where your payments will be deposited. Search for your bank in the search field. If it doesn't show up, you can enter the bank's details manually by clicking the link at the bottom of the screen.

Once that's done, click Next:

Select an account for Stripe payouts in Buy Now Plus

The next screen that appears will verify that your bank account is linked to your new Stripe account. Make sure everything looks right, then click Next:

bank linked verification page in Buy Now Plus

Now you'll want to set up your customer support info. One of these details is a “descriptor” that will appear on a customer's credit card statement to help them identify where the charge originated.

For example, if your business name is ABC Upholstering, you could simply enter “ABC Upholstering” in the field. In the shortened descriptor field, you might enter just enter “ABC” or “Upholstering”.

Next you'll add your business address and phone number. Again, just use your home address and cell number if that's what you use for business. Then click Next, and your Stripe account will be all set up:

customer support details in Buy Now Plus

Now you'll get to configure your Buy Now Plus settings. Just make sure the form includes your name, email, and company name. Then create a password, and click Update:

Buy Now Plus account settings

On the next page, you'll be all set to create your first button and start selling.

Step 2: Create a Buy Now Button

For the purposes of this post, we’ll create a simple button that charges customers a flat fee. To get started, select Buttons > Add New:

The Buy Now Plus dashboard.

In the Terms field, enter the text that will appear at the top of your payment screen. For Price, click to open the drop-down menu, then select Fixed. Now, you can specify your flat-fee rate: 

Creating a new button with Buy Now Plus.

Next, you can open the Stripe Account drop-down menu and choose the account where payments will be deposited. After you click to expand the Advanced Options section, you can specify the text to appear on your Buy Now button:

Buy Now Plus' advanced options.

To improve the customer experience, you may want to display a thank you or payment confirmation page following a successful transaction. Similarly, you can redirect customers to an error page if they choose to cancel the transaction.

You can create these pages in your WordPress account, then copy and paste their URLs into the Return URL and Cancel URL fields:

Defining a return URL with Buy Now Plus.

While there are other settings you can customize, this is all you need to create a simple Buy Now button. Click Create to continue. 

Step 4: Embed Your Button

How to Embed on Your Website

On the main Buy Now Plus dashboard, you can see how your button will appear to customers by selecting Preview. If you’re happy with how it looks, it’s time to add it to your website: 

A buy now button created using Buy Now Plus.

On the main dashboard, select the Sharing icon. This will launch the Share Button window containing an embed code:

Embedding your Buy Now Plus button.

Now, head over to your WordPress website and find the page or post where you want to feature your Buy Now button. Open the editor, and insert a Shortcode block at the exact location where you want to insert your button: 

WordPress' shortcode block.

Next, paste your embed code into this block and save your changes. If you check your site, you should see a new Buy Now button!

How to Embed on Your Social Account

If you do business with a social account, simply follow the same instructions above, and click the sharing icon to open the Share Button window.

From the Share Button window, simply click on one of the social buttons. You'll then get a pop up window where you can sign into your account, and your links will be ready to go.

Conclusion 

Cart abandonment is a huge problem for online stores, but Buy Now buttons promise to help you improve those all-important checkout rates. By removing steps from the payment process, your customers will have fewer opportunities to reconsider their purchases, and your conversions should increase as a result. 

Let’s recap how you can create a Buy Now button with Stripe in four easy steps: 

  1. Set up your Buy Now Plus account.
  2. Create a Buy Now button.
  3. Embed your button on your website or social account. 

Do you have any questions about creating a Buy Now button with Stripe? Let us know in the comments section below!

If you liked this post, be sure to follow us on Twitter, Facebook, and LinkedIn.

css.php