How to Grow Your Profits With 3 Sales Tips From Neuroscience

As an online store owner, you’ll find plenty of advice on how to convince potential customers that your products are the best on the market. However, people don’t make purchasing decisions based on logic – they hit that buy now button due to an emotional reaction.

Thankfully, there’s an entire science dedicated to understanding the way people think and feel. By applying cutting-edge neuroscientific principles to your ecommerce site, you can create an experience where the customer feels compelled to make a purchase. 

In this post, we’ll discuss what neuroscience is and the role it can play in boosting your profits. We’ll then share three tips on how to leverage the power of the human brain in order to secure more sales. Let’s get started! 

An Introduction to Neuroscience (And How It Can Boost Your Sales)

There are various ways to gather information about your target audience. For example, you might ask customers for their feedback, perform interviews, or conduct a survey:
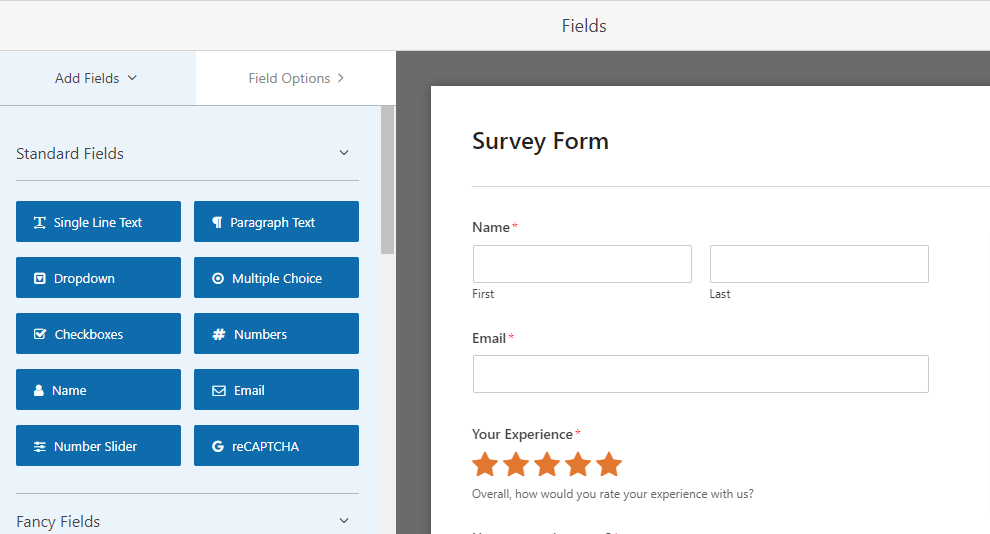
WPForms survey builder
With the WPForms survey builder, you can customize your customer surveys.

However, people have a tendency to seek approval by providing socially-acceptable answers. This can reduce the accuracy and usefulness of your data.

There are also many impulses, emotions, and motivations that happen subconsciously. Since your target audience isn’t aware of how these factors influence their decisions, they rarely feature in the input gathered from surveys and other popular methods of customer research.

This is where neuroscience can give you an advantage over the competition. Neuroscience is the multidisciplinary, scientific study of the brain and its impact on cognitive functions and behavior, including subconscious decision-making.

Essentially, it’s the study of how people think, which makes it a powerful tool for understanding your audience and what truly pushes them to convert.

Neuroscience teaches us that people make decisions emotionally. Armed with this information, you can optimize your marketing strategies in order to inspire an emotional reaction that will encourage conversions and maximize your profits

How to Grow Your Profits With 3 Sales Tips From Neuroscience

Sales is often referred to as an art, but it’s also a science. Using scientific principles in your business strategies can help you tap into powerful psychological and emotional cues.

Here are our top three tips for growing your profits using the power of the human brain. 

1. Become an Influencer 

Humans are wired to make decisions emotionally, and then attempt to justify those decisions with reason. According to Dan Hill in Emotionomics: “Emotions process sensory input in only one-fifth the time our conscious, cognitive brain takes to assimilate that same input.”

This means that the best way to close a sale is to trigger a positive reaction among your target audience.

Influential people tend to inspire more powerful emotional responses. However, this doesn’t mean you need to turn into an Instagram sensation or launch your own YouTube channel (although depending on your brand and your target audience, those things may help).

Instead, we recommend building a reputation as a trusted source by consistently creating useful content

A blog can be a great way to position yourself as an authority in your chosen field. Once you’re regularly publishing five-star content, you can use this to deepen your relationship with your audience.

Responding to blog comments is a good start, but it’s also smart to actively seek out online communities and platforms where your target audience already congregates. 

Different social media platforms appeal to different people. For example 80.9% of LinkedIn users are aged 24 or over. By contrast, 41% of TikTok users are aged between 16 and 24. When you’ve identified which platforms your target audience prefers, you can post your content to those networks:
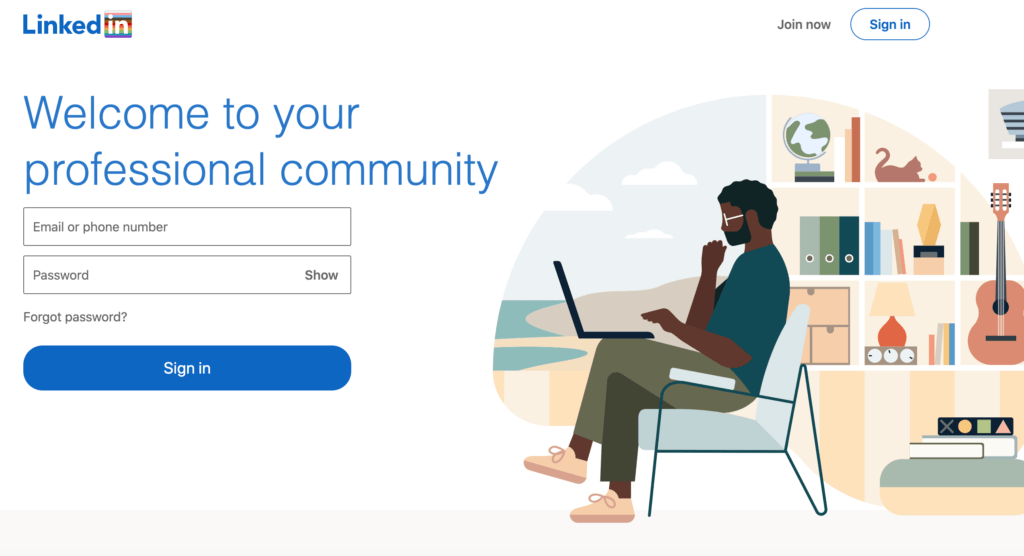
The LinkedIn social network.

By performing these simple actions, you can create the public perception that you’re a helpful, engaged, and approachable business. This can ensure that when your target audience does encounter one of your products or services, their initial reaction is a positive one. 

2. Encourage Impulse Purchases 

The average American spends more than $2,100 a year on impulse purchases. This spending peaks during the holiday season, when one in three purchases are spontaneous. 

Physiologically, humans are prone to buying products and services on a whim. However, cart abandonment rates are also high, with evidence suggesting that 69% of customers fail to complete the checkout process.

Although customers are psychologically primed to add items to their basket, it seems that they’re just as prone to changing their mind.

To capitalize on this psychological phenomenon, it helps to simplify the checkout process. By giving customers fewer opportunities to rethink their purchases, you can harness the full financial potential of impulse buying. 

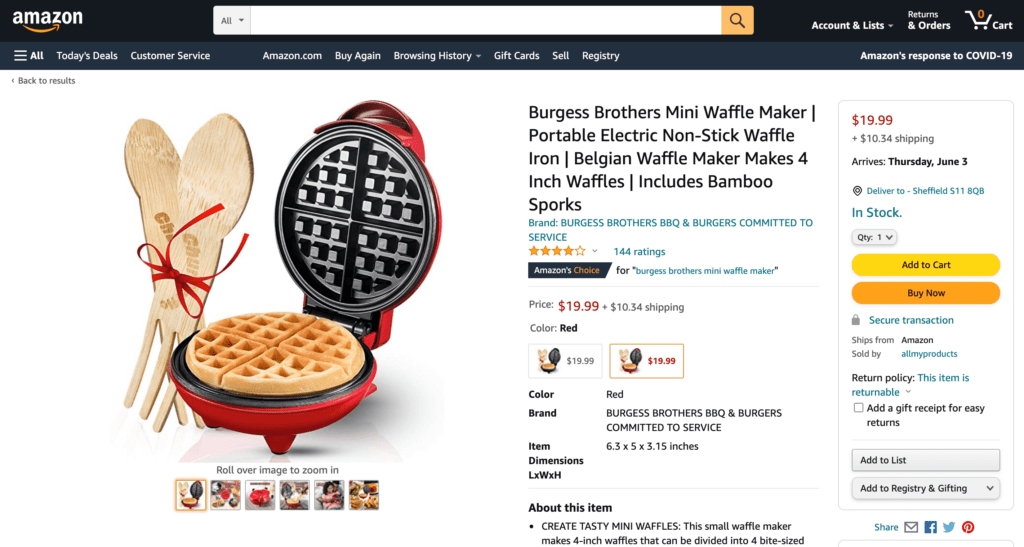
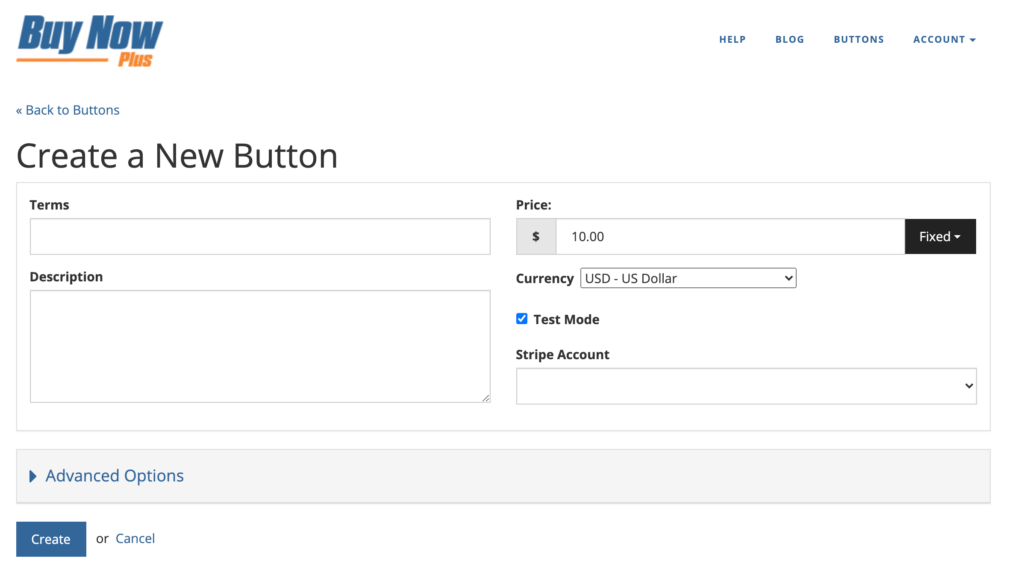
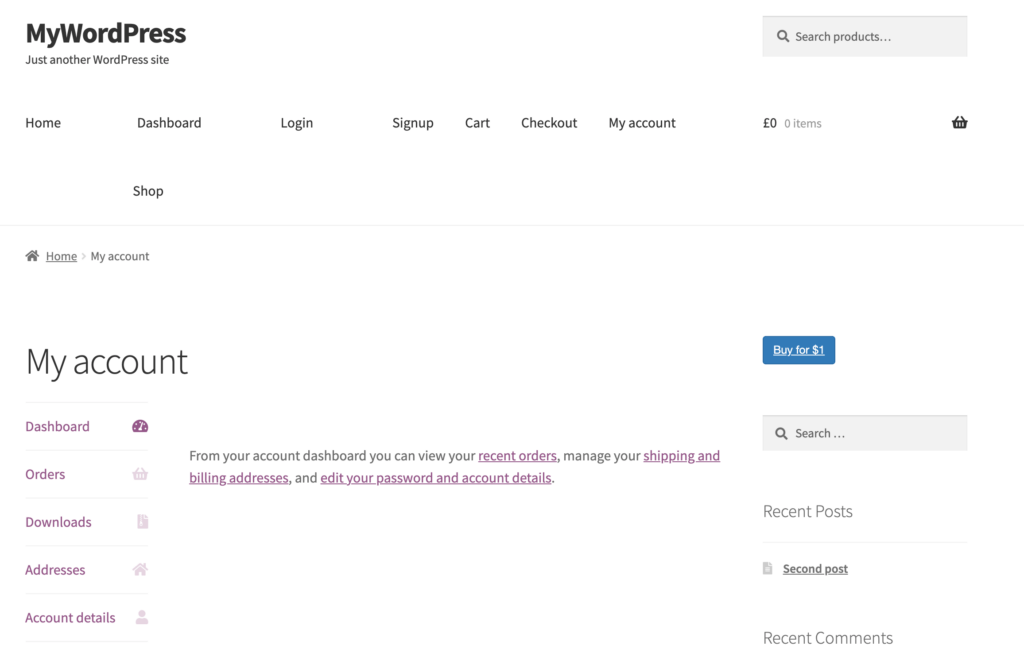
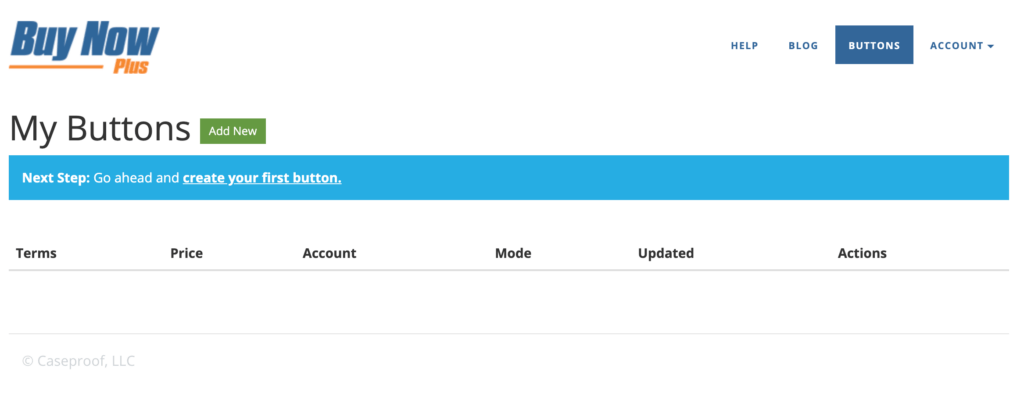
This is where a buy now button can be your secret weapon. You can create high-converting buttons using a service such as Buy Now Plus, and then deploy these buttons across your website: 
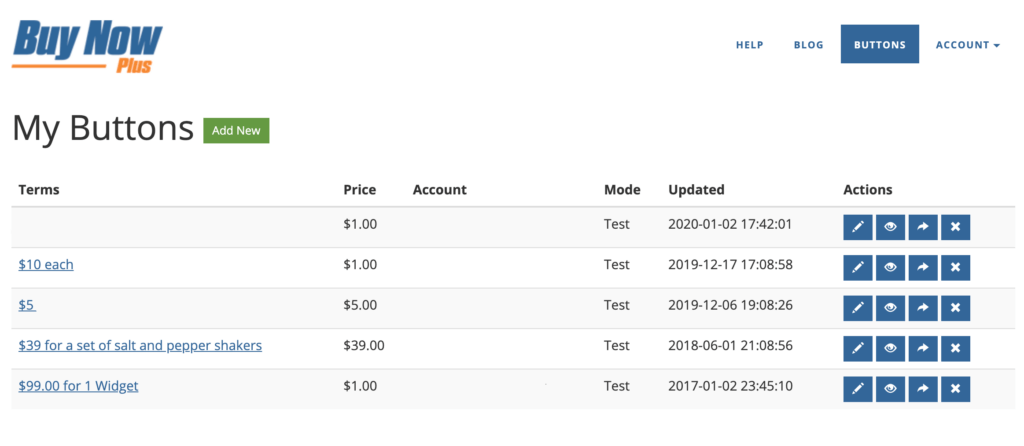
The Buy Now Plus dashboard.

You may even want to add your Buy Now Plus buttons across third-party platforms, using the provided sharing buttons and embed codes. This includes time-sensitive sites such as Twitter, where the additional pressure can further encourage impulse shopping.

3. Sell the Benefits, Not the Features

Many organizations fall into the trap of selling their products and services based on their features. However, as we've previously mentioned, decisions are initially influenced by emotions, not logic.

To trigger a stronger emotional response, it's important to focus on the benefits of your product.

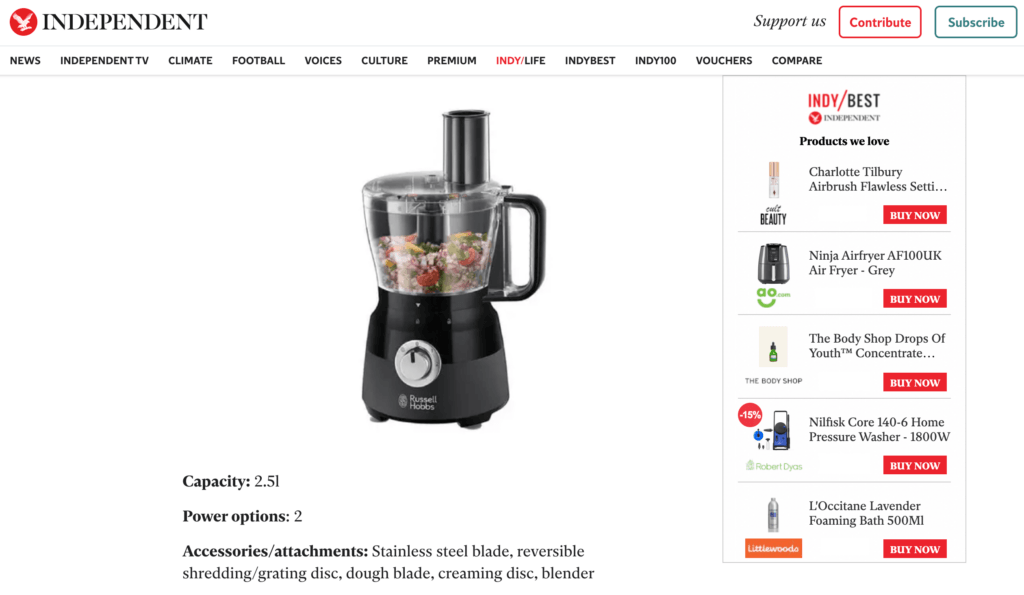
Although benefits and features are related, they aren’t interchangeable. Features are what your product can do. For example, a security camera might automatically upload recordings to the cloud. But the benefit is what the customer can do with the product, such as keep their family safe:
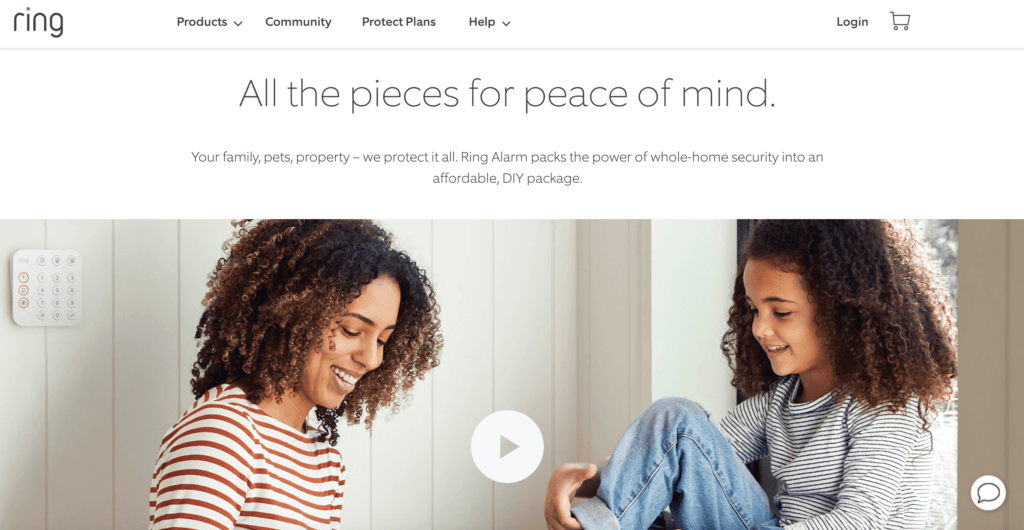
The sales tips from neuroscience encourage you to focus on the benefits.

If you’re unsure which benefits to promote, you can first try to identify your audience’s pain points. Then, you can position your product or service as the solution.

To really tap into those emotional triggers, make sure you emphasize how much better the customer will feel after investing in your product and receiving the associated benefits.

Conclusion 

Neuroscience reveals that people initially make purchasing decisions based purely on emotions, and only later try to justify their choices with logic. By leveraging the power of this subconscious decision-making, you can create a persuasive, high-converting online store. 

To help grow your profits, let’s quickly recap three sales tips taken directly from neuroscience: 

  1. Became an influencer.
  2. Encourage impulse purchases, using a service such as Buy Now Plus
  3. Sell the benefits, not the features.

Do you have any questions about how to boost your revenue with the power of neuroscience? Ask us in the comments section below!

How to Improve Sales With Social Media Content (4 Tips)

Social media represents a huge opportunity for any business owner. After all, there are over 2.7 billion monthly active Facebook users and 69.3 million Twitter users in the US alone. However, if you don’t plan your social activities carefully, it’s easy to let that opportunity go to waste.

Fortunately, there are tried-and-tested methods and tips proven to help improve your sales with social media content. By leveraging this advice, you can ensure that the time you spend on these platforms has a direct, positive impact on your profits.

In this post, we’ll discuss why social selling is more than simply posting your products across Facebook and Twitter. We’ll then share four actionable tips that you can implement today to maximize your profits. Let’s get started! 

An Introduction to Social Selling (And Why It’s Important)

Despite its name, social selling isn’t always about posting your products and services to social media. While it’s smart to keep your followers in the loop regarding new launches, discounts, and other product-related developments, this is only part of a successful social strategy. 

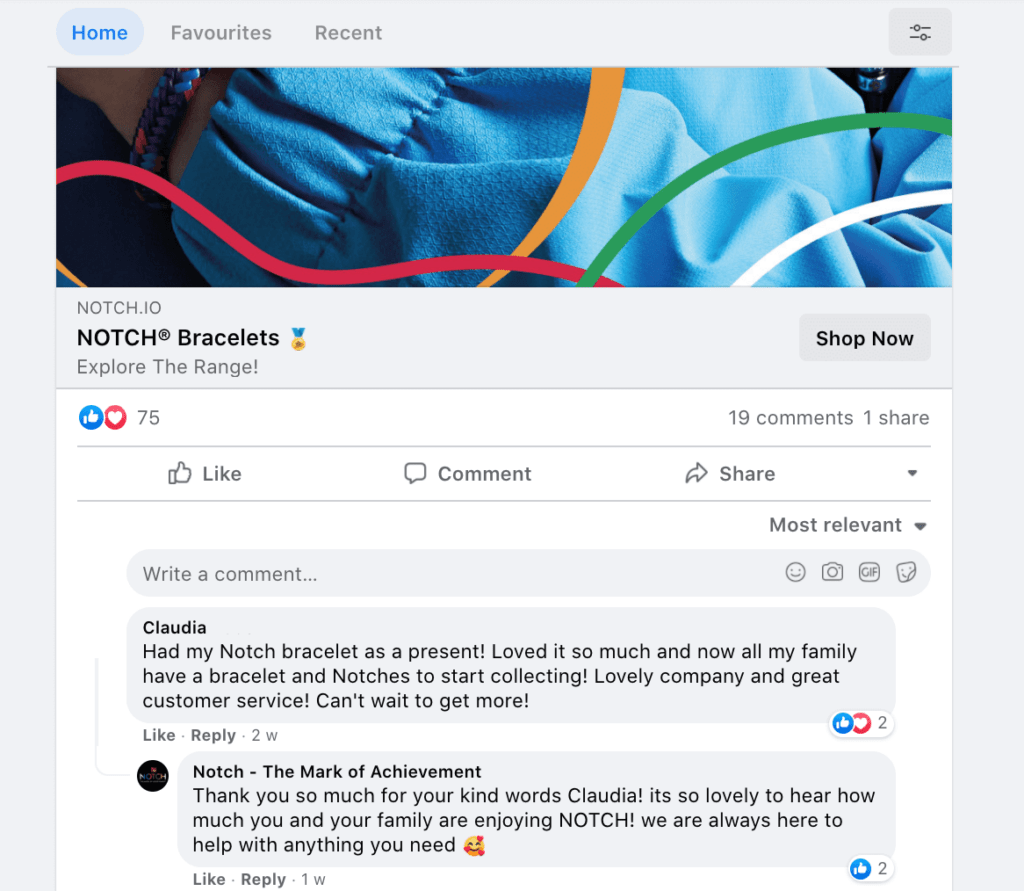
If you really want to smash your sales targets, we recommend using these platforms to build brand awareness and connect with prospects. You can also develop relationships with both new and existing customers by responding to their comments on platforms such as Twitter:

An example of a brand interacting with clients on social media

By actively engaging with your target audience in a positive and helpful way, you can increase the chances that yours is the first company that person considers when they’re ready to make a purchase.

Social selling can also be an effective way to keep existing customers engaged and encourage them to remain loyal to your business, rather than defecting to your competitors. 

How to Improve Sales With Social Media Content (4 Tips)

Social media has grown into a powerful marketing tool. If you’re ready to improve your sales, then here are our top tips for success:

1. Do Your Research

Today, there are countless social media platforms. With so many channels to choose from, it’s difficult to maintain a presence across every single site. 

To achieve the highest number of conversions, it’s smart to focus on the platforms where your target audience is most active. Some platforms are more popular with certain demographics. For example 41% of TikTok users are aged between 16 and 24. By contrast, 80.9% of LinkedIn users are aged 24 or over.

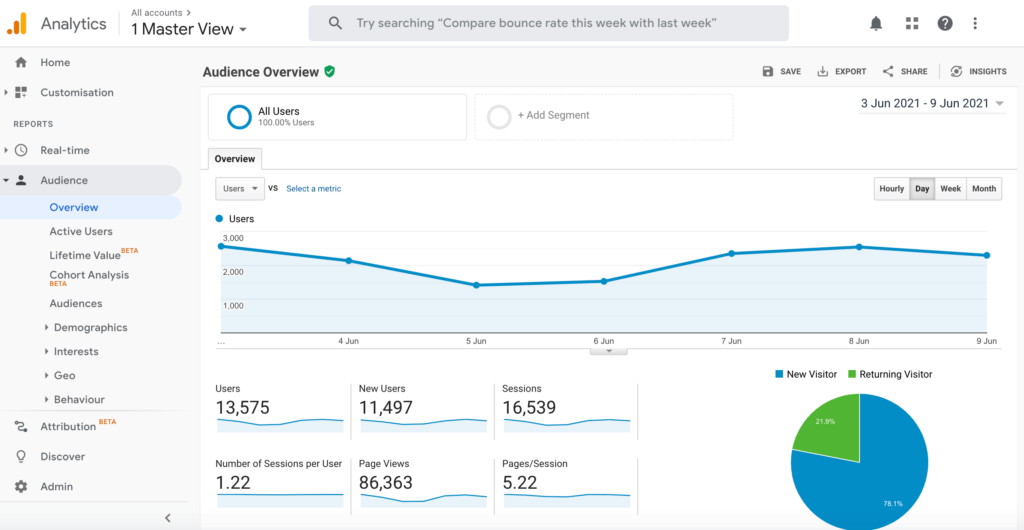
If you’re unsure about your target demographic, you can learn more about the people who are visiting your site and purchasing your products using a tool such as Google Analytics:

The Google Analytics dashboard.

Once you know where your audience is spending the majority of their time, you can focus all of your efforts on those platforms. This should have the greatest impact on your sales.

2. Avoid the Hard Sell

While it may sound counter-intuitive, it’s a bad idea to focus solely on driving sales. If you treat social media as an advertising channel, then you’ll probably struggle to attract a following.

Instead, we recommend building your social strategy around sharing valuable content. Ideally, you’ll already have a company blog.

These posts are great material for your accounts, but you can also create content solely for social media, such as infographics that you post directly to Twitter, Facebook, and other popular sites.

You might also share the occasional third-party resource, such as informative blog posts written by industry experts. 

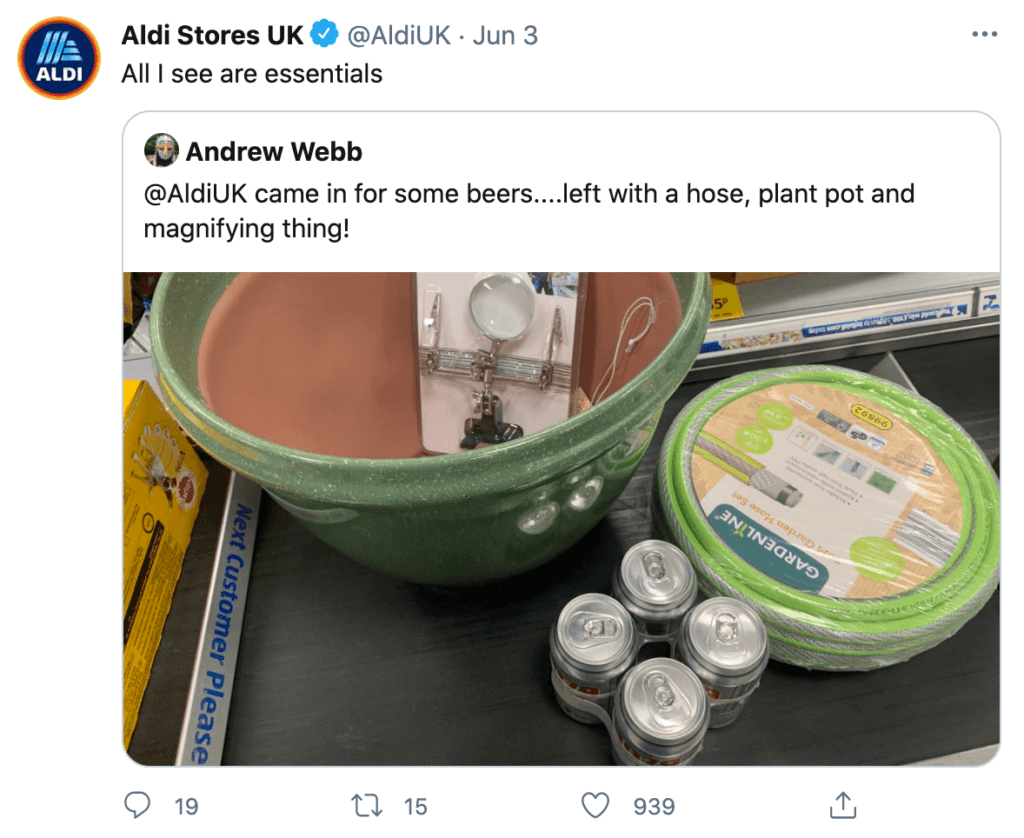
With social media, the clue is in the name. Therefore, it's a good idea to always look for opportunities to engage with your audience. This may involve liking and sharing customers' posts, answering questions, or responding to comments: 

An example of a brand engaging on social media.

All of these activities can position you as a helpful, valuable person to follow on social media. Then, when you do post purely sales-focused content, your audience should be far more receptive to your message. 

3. Partner With Relevant Influencers

An online influencer is someone who has a significant digital following. Similar to a traditional celebrity endorsement, an influencer can promote your business to their fans and followers.

This can be a very effective sales strategy, with around 34% of Instagram users admitting to purchasing something due to an online influencer:

An example of an influencer partnership, which may help improve sales.

The key to a successful partnership is finding the right influencer. Ideally, there will be an overlap between the person’s fanbase and your target audience.

In addition, when there’s a relevant link between the influencer and the content they’re promoting, you can capitalize on the assumption that they only promote products they genuinely like. This can further increase your sales. 

Although it’s easy to get star-struck by the large follower numbers of social media’s heavy hitters, it’s worth noting that micro-influencers often have higher engagement rates.

This is most notable on TikTok, where micro-influencers receive 17.96% engagement, compared to 4.96% for mega-influencers. If you can identify a micro-influencer who appeals to your target audience, then you may be on to a winner.

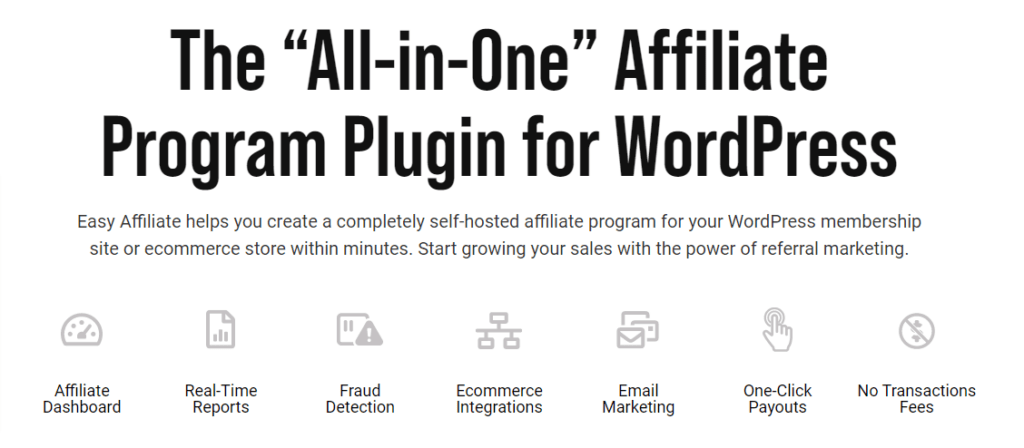
One great way to recruit and manage social media influencers is to start your own affiliate marketing program. There are several tools that allow you to do this easily. One of our favorites is Easy Affiliate, a WordPress plugin that works beautifully with all kinds of membership and ecommerce sites.

Easy Affiliate WordPress plugin homepage

4. Leverage the Power of Buy Now Buttons

Although it shouldn’t form the core of your social content, you’ll want to spend some time promoting your products and services. However, even if a follower decides to make a purchase, they’ll still need to click through to your store in order to start the process. 

This gives the customer plenty of time to change their mind. In fact, studies show that 69% of customers abandon their shopping carts. Therefore, it’s important that you simplify the purchasing process in order to encourage people to complete an order.

This is where buy now buttons come in. When you create a button using a flexible service like Buy Now Plus, you can post them across all major social media platforms:

You can improve sales by posting Buy Now buttons to social media.

Your followers can then access the checkout process directly from their favorite social networks.

To create your first buy now button, simply connect Buy Now Plus to Stripe, then follow the onscreen instructions:

The Buy Now Plus dashboard.

We’ll also provide everything you need to post your buy now button across your social media networks. This includes dedicated Share to Facebook and Share to Twitter buttons. 

Conclusion 

Social media is a powerful platform for promoting your products and services. However, it’s important to use it wisely in order to maximize your conversions.

Let’s quickly recap four ways to improve your sales with social media content:

  1. Choose the right platform for your business, based on your target audience.
  2. Share valuable content and avoid hard selling.
  3. Partner with relevant influencers to reach more people.
  4. Add buy now buttons on your social media pages, using Buy Now Plus.

Do you have any questions about how to improve sales and engage with potential customers on social media? Ask us in the comments section below!

If you liked this post, be sure to follow us on Twitter, Facebook, and LinkedIn.

How to Boost Online Sales Fast (Top 3 Ways)

In the world of ecommerce, speed is essential. This can be particularly true if you're looking for a quick way to boost your online sales. However, marketing can be unpredictable, making this goal a tall task at times.

Fortunately, a customer-focused approach can help. By using strategies that make purchases easier and more fun for your shoppers, you can increase your online sales in record time.

In this article, we'll discuss a few key things to know about boosting your online sales. Then we'll cover the top three ways to increase your revenue in a snap. Let's dive right in!

What You Need to Know About Boosting Online Sales

It's hard to argue that driving online sales is anything but good news. However, how you increase your revenue can make a big difference. Even if you're focusing on speed, you might want to think of the long-term as well.

For example, one study found that customers who have been shopping somewhere for 30 months or more spent 67% more per order than shorter-term consumers. That means you might want to find a strategy that boosts sales now and also lays the groundwork for future profits.

One way to do this is to focus on customer service best practices. Any sales tactics that are misleading or confusing can end up hurting you in the long run. By focusing on serving your shoppers' needs, you can avoid future complications.

Additionally, it's best not to expect sales to balloon overnight. Even speed-focused strategies can take time to work. We recommend that you keep an eye on your analytics plan. This can help you get an idea of what's working for your site and what isn't.

Finally, we suggest that you keep your individual site's needs in mind. Every audience is different. Therefore, an approach that works for a competitor may not work for you. Try to follow your marketing instincts: if a strategy feels off-brand for your site, it might not be the best fit.

Top 3 Ways to Boost Online Sales Fast

If you're ready to get your sales numbers up, consider implementing one of the following effective tactics in your online store.

1. Add Urgency to Your Sales Pitch

A valuable deal can be hard to find. However, your customers may not feel inspired to act on one unless there's a finish line. That's why you might want to consider adding a timer to your sales to add a sense of urgency.

Publicizing the end of a sale can be a powerful way to pique interest. Rather than an abstract end date, shoppers have a hard deadline. This can encourage them to act quicker on their sales rather than putting them off until later.

This can also be an effective strategy when used with a calendar holiday. You can consider a recent Macy's campaign based around Memorial Day as an example:

A banner ad for a Macy's Memorial Day Sale.

Not only does this approach make use of urgency, but it also helps your customers plan. If they can expect a sale around a holiday, they might be more likely to visit your store when that time comes around.

Adding sale deadlines is also a pretty quick process. Simply add a timer to whatever campaign you had planned.

However, it has long-lived potential too. For example, you can consider recruiting influencers to spread the word of your urgent sales in the future. It may take time to cultivate the right ambassadors, but they can help you quickly reach new audiences once they're involved.

2. Send Out Free Promotional Items

Another way to quickly boost sales is to run a giveaway. It can be a physical product, a coupon code, or a small sample. Whatever form you choose, a well-run contest can create tremendous buzz around your site.

Giving away free items is a well-proven strategy too. One study found that millennials are 75% more likely to make a repeat purchase after receiving a free item. Thus, even a small gift can make a big difference.

One popular approach to this is a raffle-based giveaway. Hosting a giveaway can quickly drive traffic to your site. This may lead to more people discovering and potentially purchasing your products.

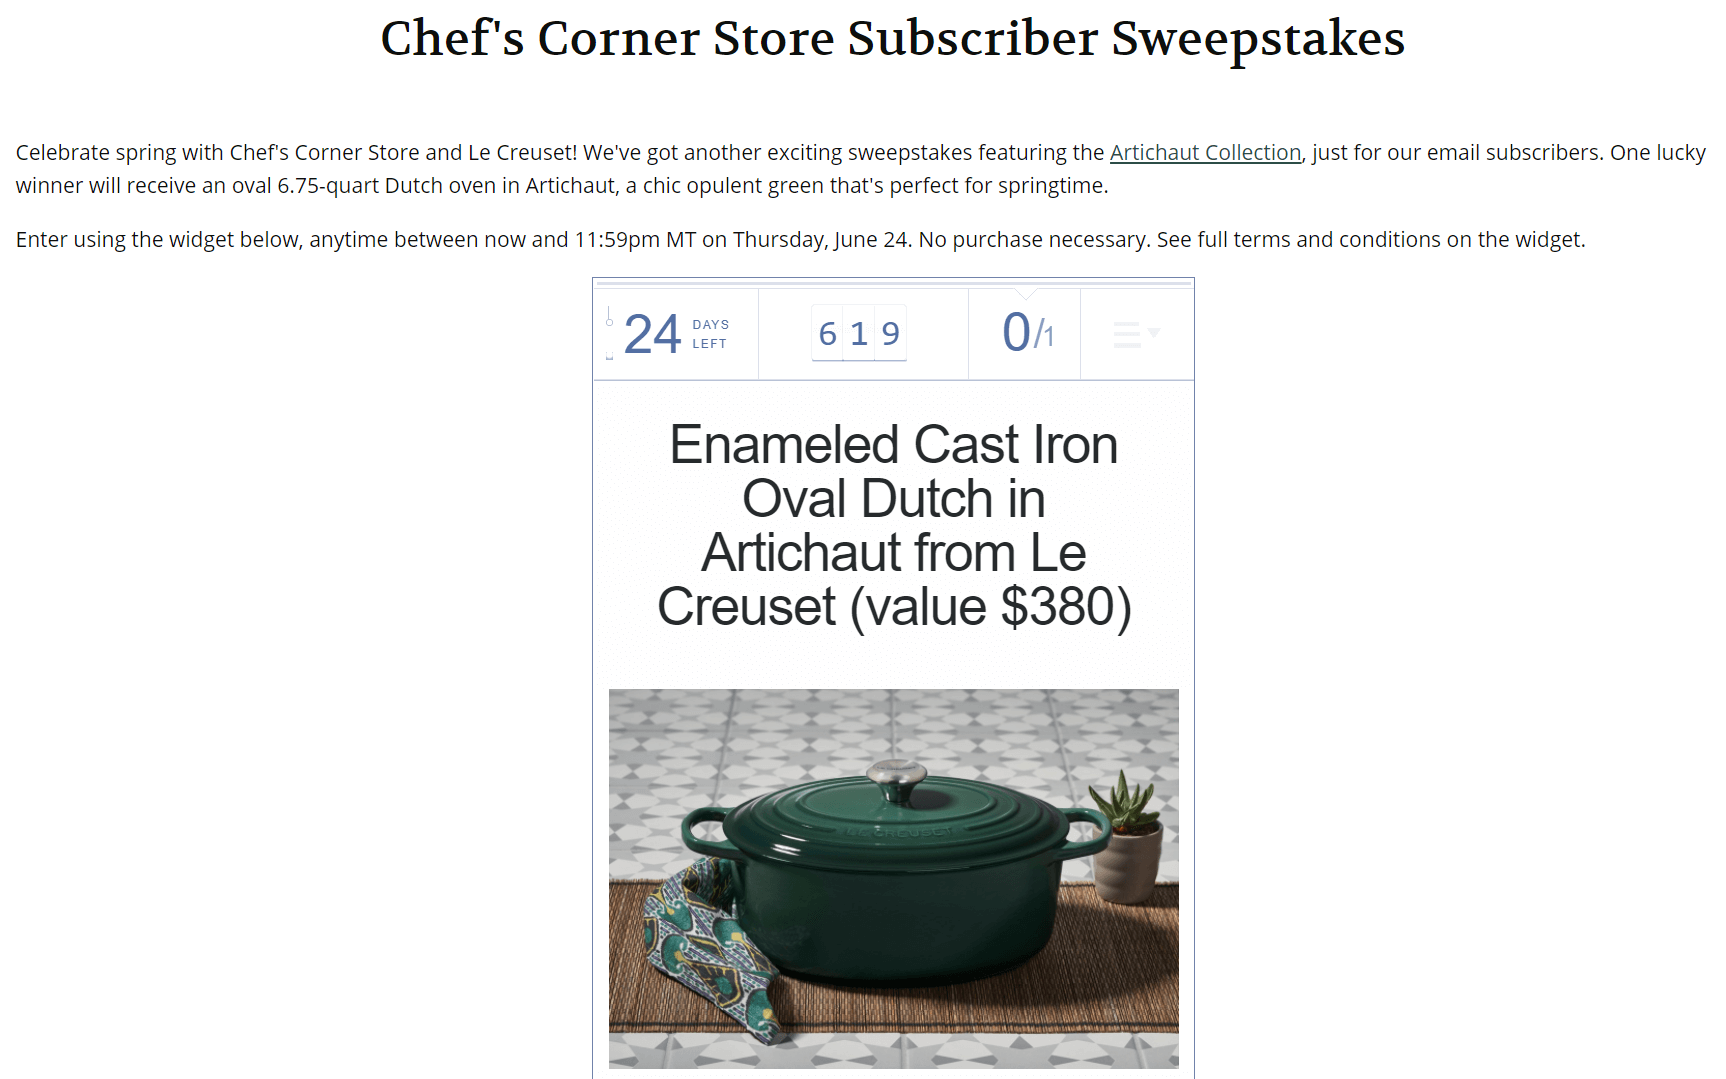
Even users who don't make an immediate purchase will now be aware of your brand. You can consider the recent giveaway from Chef's Corner Store as an example:

A brief entry form for a cooking-themed giveaway, a quick way to boost online sales fast.

A giveaway can also grow your email marketing list for future use. In the above example, users must sign up to an email list to win, making this strategy useful for growing your leads.

As an alternative, you might also change up the ways people can enter to win. For example, you could require users to comment on a post or view a product instead. This can boost your engagement while also helping potential customers explore your site.

3. Make Checkout an Easier Experience

Checkouts can be a maze. Shipping information, payment data, and confirmation pages can bewilder your shoppers. Every extra step can increase friction. This can be a waste of all the careful marketing you've done to get customers to the checkout page.

Fortunately, the solution is simple. All you have to do is cut down on cart complexities and minimize the steps your customers have to complete to purchase your products. By doing this, you can capitalize on interested parties instead of spending time reaching new audiences.

It's not just about the steps themselves. You can start a checkout off on the right foot by making it as easy to begin as possible. Our plugin Buy Now Plus can help you do just that:

A banner for Buy Now Plus, an easy way to boost sales fast.

With Buy Now Plus, encouraging more sales is easy. First, you can create customized buy now buttons. Then, you can post them on your site. Finally, when a user clicks those buttons, they'll be taken straight to a secure checkout process.

Buy Now Plus has a super-quick setup. This means you can focus less on getting used to a new program and more on using it to drive sales.

In addition to your site, you can also use Buy Now Plus on your social media accounts. You can place a button anywhere you can add a URL or HTML link, so the possibilities are nearly endless. Simply add the link and let our platform do the rest.

Conclusion

Running an ecommerce store can come with a lot of pressure. If you need to increase your sales as soon as possible, this stress is likely to rise. Fortunately, you can quickly boost your revenue by focusing on your shoppers' experiences.

In this article, we covered the top three ways to boost online sales fast:

  1. Use a deadline to add urgency to a sale.
  2. Give out free products to attract new customers.
  3. Streamline your checkout process with a tool like Buy Now Plus.

How do you boost your sales on a tight timeline? Let us know in the comments section below!
How to Sell Anything from Anywhere with Buy Now Buttons

As an online store owner, there are lots of different places you can promote your products. However, by default, customers have to navigate to your store to purchase the products featured in your social media posts, marketing emails, and other locations.

Here's where buy now buttons can be the secret to driving conversions. That's because they allow customers to jump straight to the checkout stage with the click of a button. Using these simple but effective call to action (CTA) buttons, you can sell anything from anywhere. You don't even need a website.

In this post, we’ll discuss why every business and online store can benefit from buy now buttons, and show you how to create one within minutes. Then we'll explore four places where you can use your new buy now button for maximum sales. Let’s get started! 

How to Create a Buy Now Button (And Why You Should)

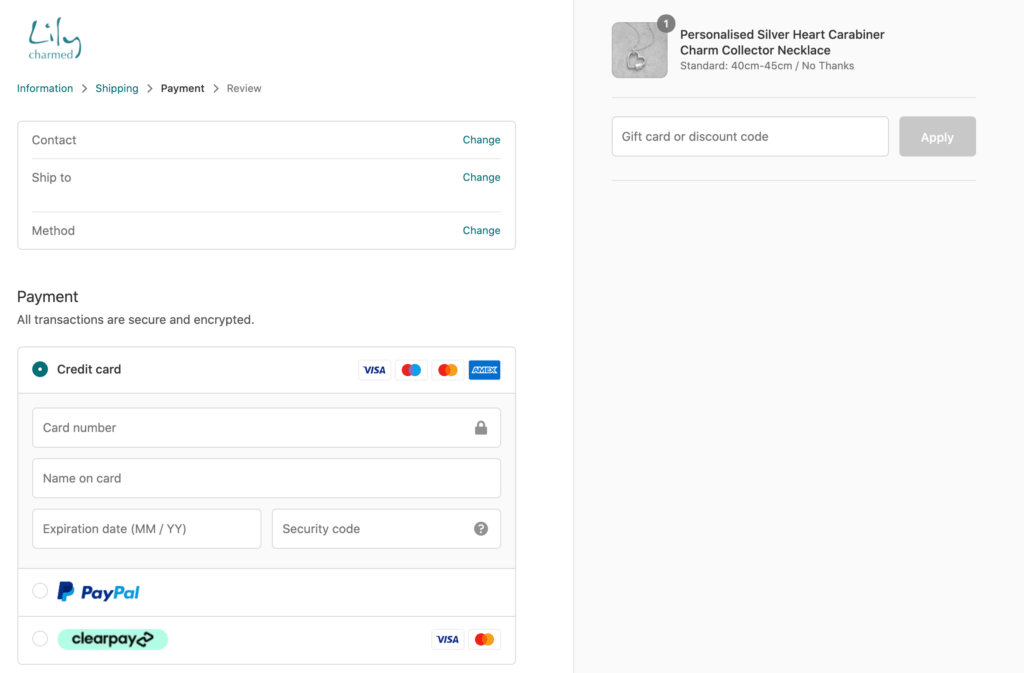
Typically, whenever a customer wants to make a purchase, they’ll add that item to their basket and then navigate to your checkout page. Depending on how your store is set up, there may even be additional steps, such as creating an account and reviewing the items in their basket. 

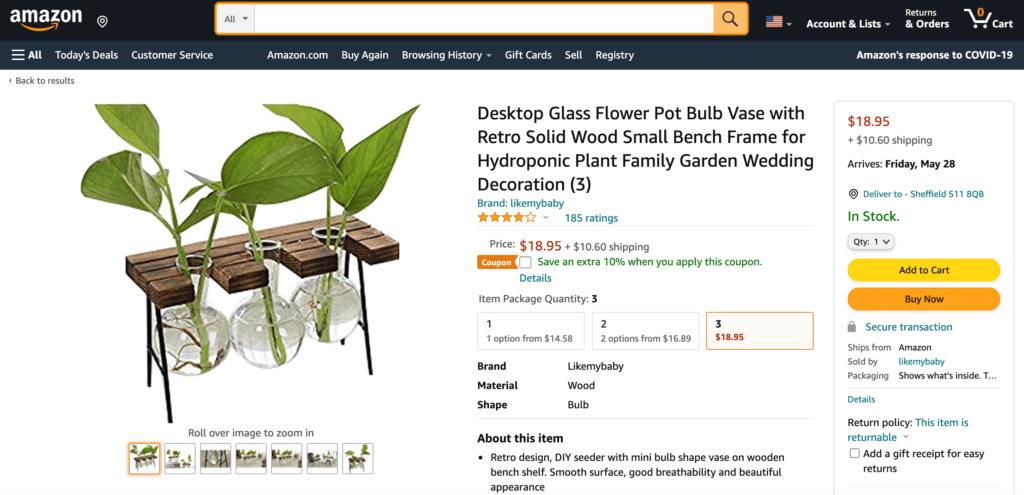
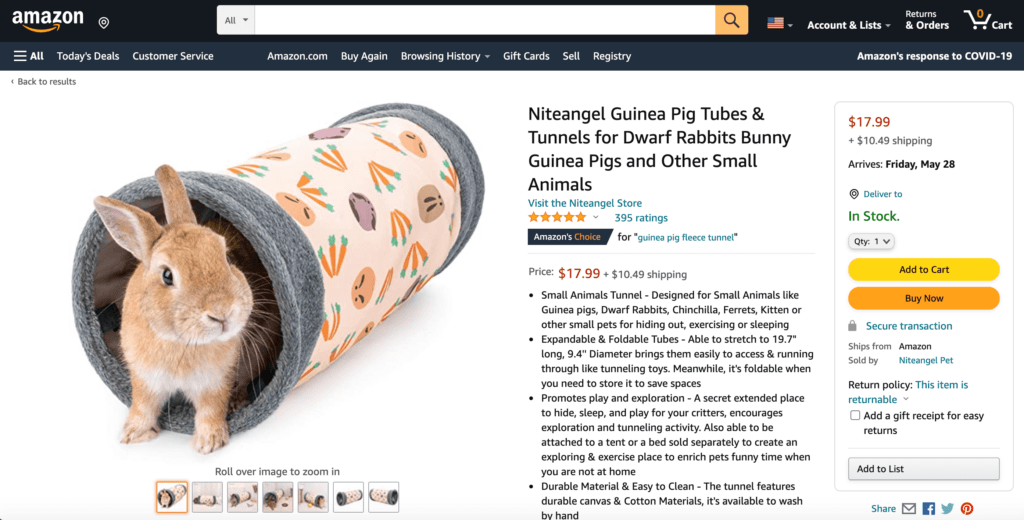
Every step in the payment process is another opportunity for the customer to change their mind and abandon the purchase. This is where buy now buttons come in. These powerful button can reduce cart abandonment rates and drive conversions by allowing customers to jump straight to checkout:

An example of a buy now button on the Amazon website.

If you create these powerful CTAs using a flexible service like Buy Now Plus, you can post the same button across multiple platforms. In this way, you can transform external platforms into additional revenue streams and sell anything from anywhere. 

To create your first buy now button, all you have to do is register for a free Buy Now Plus account. If you already have a Stripe account, you'll be able to connect the two automatically in the sign up process. If you don't have a Stripe account, you'll automatically create a new one during sign up.

Once you're all set, go to your Buy Now Plus dashboard and select Add New:

How to sell anything from anywhere with Buy Now buttons.

You can now create a high-converting button by completing the form. When you’re happy with the information you’ve entered, click on Create:

The Buy Now Plus dashboard.

On the main Buy Now Plus dashboard, find the button in question and click on the Share icon. This opens a little popup that contains everything you need to sell your items.

How to Sell Anything From Anywhere (4 Ways to Use Your Buy Now Buttons)

In 2020, ecommerce sales surpassed $4.2 trillion. With more people purchasing online than ever before, there’s huge potential to boost your profits. Here’s how you can seize this opportunity by posting your buy now buttons across your site and the wider web.

1. Add Your Button to Any Page or Post

You can add your Buy Now Plus button to any page or post using the supplied embed code. Many online stores choose to feature this button on their product pages, alongside their regular Add To Cart buttons. This gives customers the choice to continue shopping or jump straight to checkout. 

You can also add a buy now button to locations where you mention a specific product. For example, you might write a guide to using a new product or share five top picks for the summer. By providing easy access to a buy now button, you can encourage the reader to purchase the featured products: 

An example of how to sell anything from anywhere with Buy Now buttons.

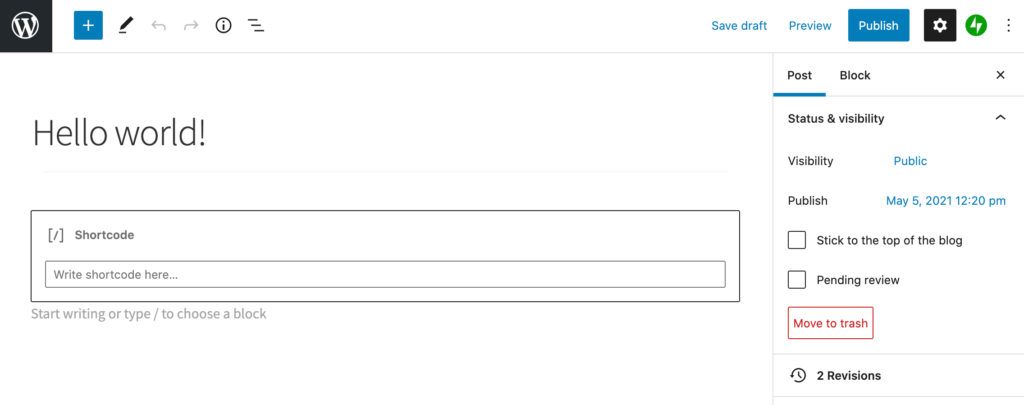
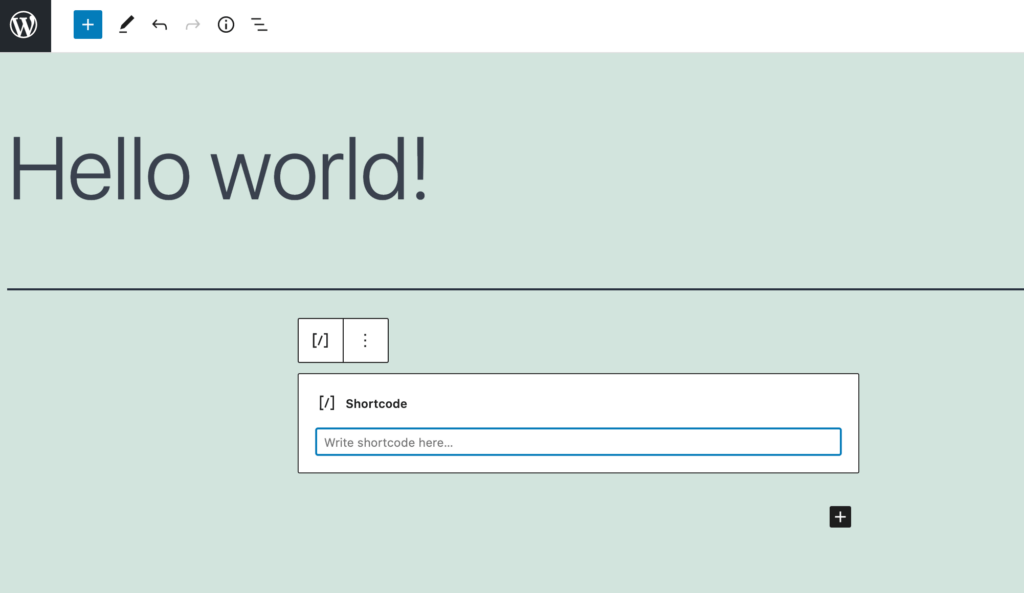
In the Buy Now Plus popup, copy the embed code and then switch over to your WordPress dashboard. You can then navigate to the page or post where you want to feature this button. Open the page for editing, and create a new shortcode block:

How to sell anything from anywhere using the WordPress shortcode widget.

Now, simply paste the embed code into this block and save your changes. This buy now button will now appear on this page in the exact location specified by you. 

2. Feature Buy Now Buttons Across Your Website

To drive conversions, you may want to incorporate a buy now button into your site’s recurring elements. This enables customers to start the checkout process from any page:

Sell anything from anywhere by adding a Buy Now button to the sidebar.

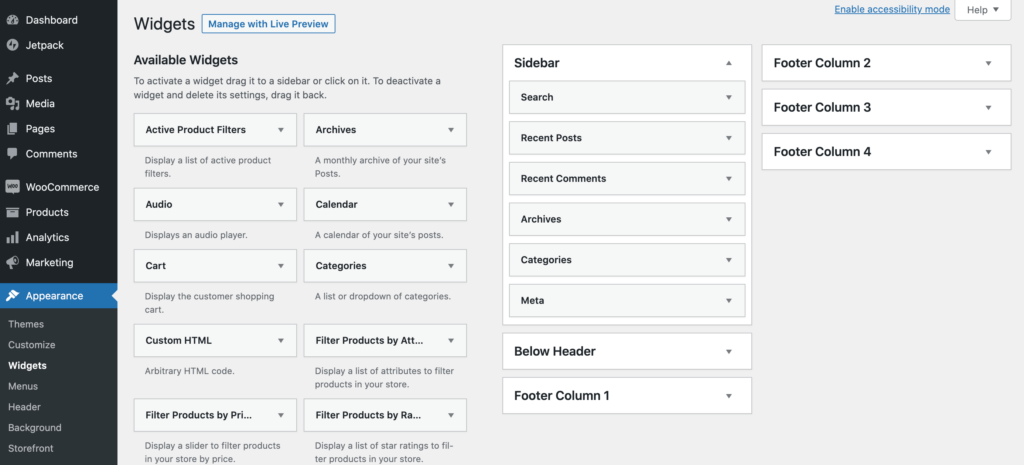
You can achieve this by adding your button to a Text widget. Once again, copy the embed code, but this time navigate to Appearance > Widget in your WordPress dashboard:

The WordPress widgets dashboard.

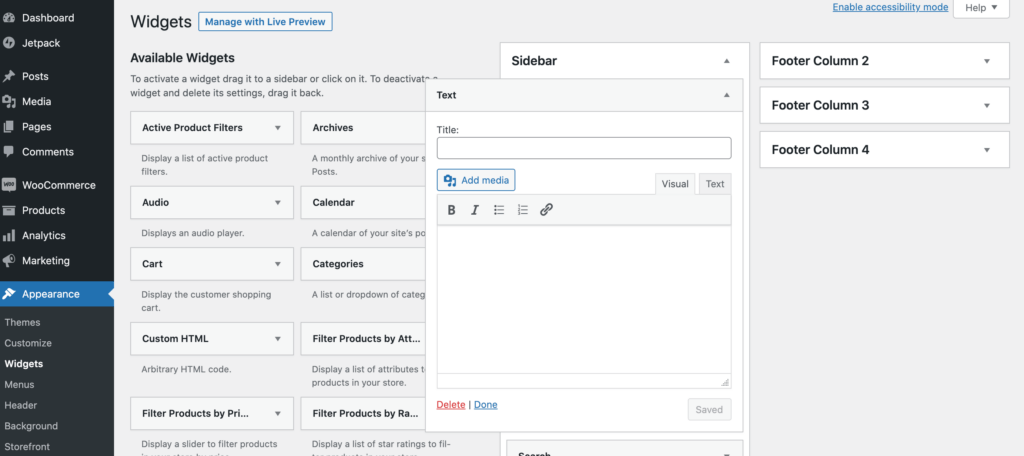
You can now grab a Text widget and drag it to the area where you want to feature your button. Then select the Text tab and paste your embed code:

The WordPress widgets screen.

Switch back to the Visual tab. If you’re happy with your button’s appearance, you can save your changes. This button will now appear across your website. 

3. Post CTAs to Your Social Media

With over 2.7 billion monthly active Facebook users and 69.3 million Twitter users in the US, social media is a powerful platform for promoting your products. By posting your buy now buttons directly to social media, your followers can start the checkout process directly from their favorite networking sites.

This can also be a way to encourage impulse purchases. A customer who’s scrolling through their timeline might spot your product, complete with a convenient buy now button, and decide to make a purchase on a whim.

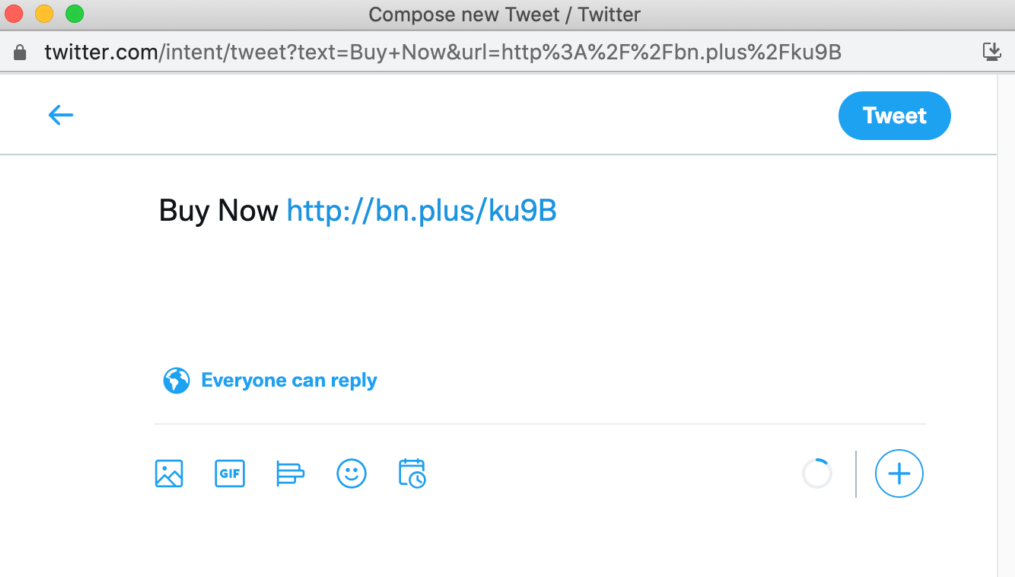
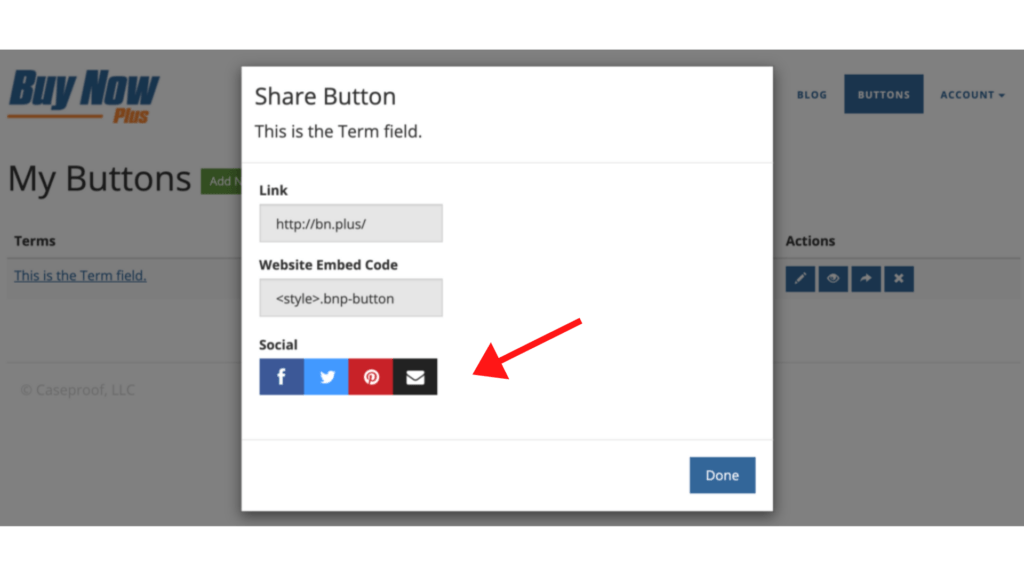
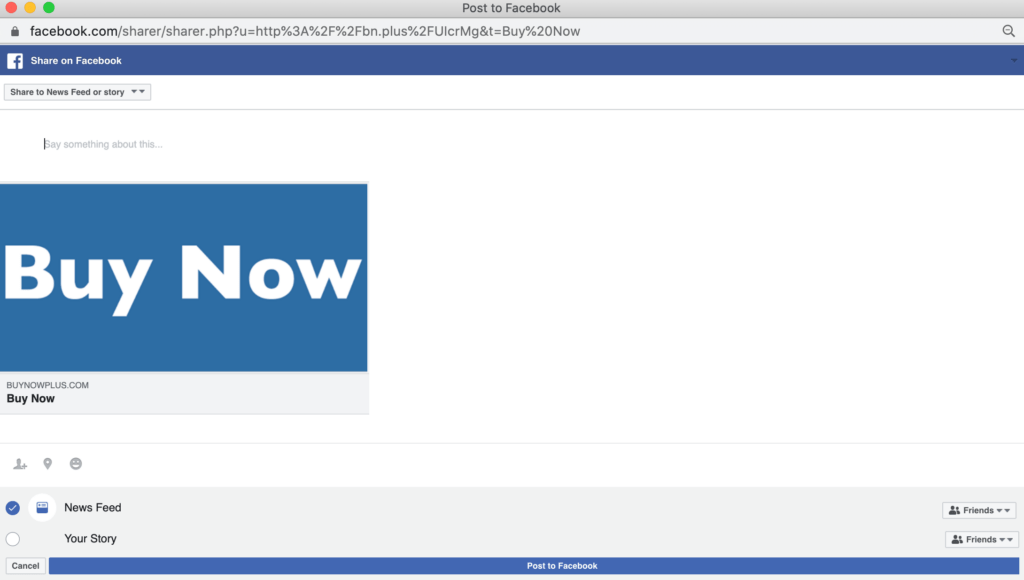
Our popup has sharing buttons for Facebook, Twitter, and Pinterest. Simply click on this button, and Buy Now Plus will auto-generate a post for your chosen platform:

A Buy Now link posted to Twitter.

However, there are dozens of social networks out there. That’s why we also provide a link that you can copy and paste into any social platform that accepts text input.

4. Include a CTA in Your Next Email Marketing Campaign

According to the 2019 Adobe Email Usage Study, Americans spend over five hours per day checking their work and personal emails. That’s five hours when you could be promoting your products. 

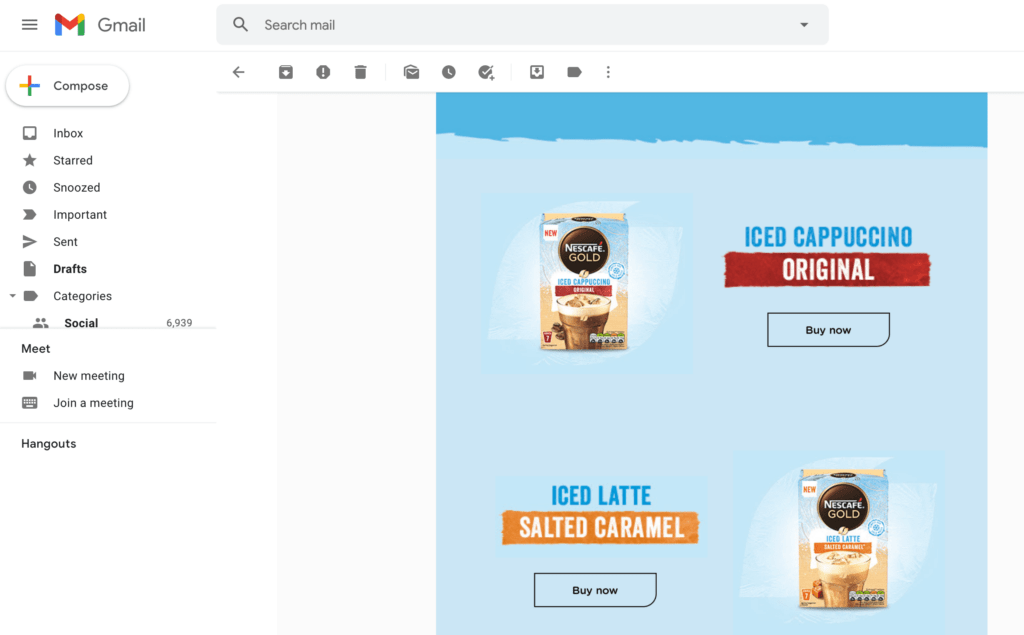
For example, you might email your entire list about an upcoming sale or recommend products based on the customer’s purchase history. If the recipient decides to covert, including a buy now button in your email can help nudge them over the finishing line:

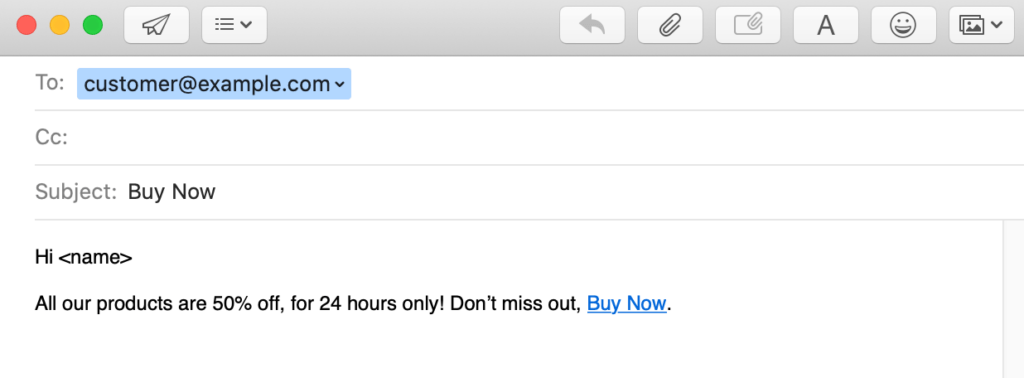
An example of Buy Now buttons inside an email.

Our popup contains an email button that you can use to generate a message containing your buy now link. Alternatively, you can copy and paste the link directly into your next email campaign:

An example of a buy now link in an email.

Depending on your choice of mailing software, you might even be able to paste our embed code directly into your email. ActiveCampaign is one platform that we now allows embedding buttons (because we use it!).

For more information about whether your provider supports embed code, we recommend referring to their official documentation.

Conclusion

Platforms such as social media and email can be excellent places to promote your products. However, requiring customers to navigate to your store and then search for items isn’t going to deliver the best conversion rates. 

Fortunately, buy now buttons can be the key to selling anything from anywhere. Let’s quickly recap four places where you can use these powerful CTAs: 

  1. Add your button to any page or post.
  2. Feature buy now buttons across your website.
  3. Post CTAs to your social media.
  4. Include a CTA in your next email marketing campaign.

Do you have any questions about how to sell anything from anywhere with buy now buttons? Let us know in the comments section below!
If you liked this post, be sure to follow us on Twitter, Facebook, and LinkedIn.

How to Accept Credit Cards Without a Website

Would you like to accept credit cards from your customers, but you don't have a website? No problem! As long as you have a social media account and a bank account, you can take credit card payments with Buy Now Plus.

In this post, we’ll discuss why accepting credit cards is crucial to running a successful business. Then we’ll show you how easy it is to use this payment method with Buy Now Plus. Let’s get started! 

Why It’s Important to Accept Credit Card Payments

Credit cards are the most popular payment method in the United States. If your business doesn’t accept card payments, then you could be alienating the majority of your audience and losing potential sales.

If your customers can't make a purchase using their preferred payment methods, they may go elsewhere. To maximize your sales, it’s important to support as many different payment methods as possible.

The method we always recommend prioritizing? Credit cards.

Many e-commerce sites accept credit card payments.

Despite the popularity of paying by credit card, some businesses may be reluctant to support card payments due to the associated fees. For every credit card transaction, you’ll have to pay interchange fees, assessment or service fees, and the payment processor’s markup.

These transaction fees can seem off-putting, particularly for small businesses and startups that may be operating on tighter budgets. However, if you don’t accept credit cards, you're shrinking your customer pool.

It’s far better to sacrifice a percentage of a successful sale than to lose out on that sale entirely. Plus, if your checkout process is more accessible, you're more likely to boost your profits, grow your customer base, and secure repeat sales.

How to Accept Credit Card Payments Without a Website Using Buy Now Plus

Buy Now Plus is a free service you can use to accept payments without purchasing and installing SSL certificates. You only get charged if you make a sale. And that charge is only 3% – super low compared to the industry standard for similar services, which is between 4% and 5%.

The best part is that it works right on top of the Stripe payment processor. That means to get set up, all you have to do is head to BuyNowPlus.com, and click the Start Selling button:

Buy Now Plus homepage

Clicking the Start Selling button will open the Getting Started form. If you already have a Stripe account, you'll be able to login and connect it to Buy Now Plus.

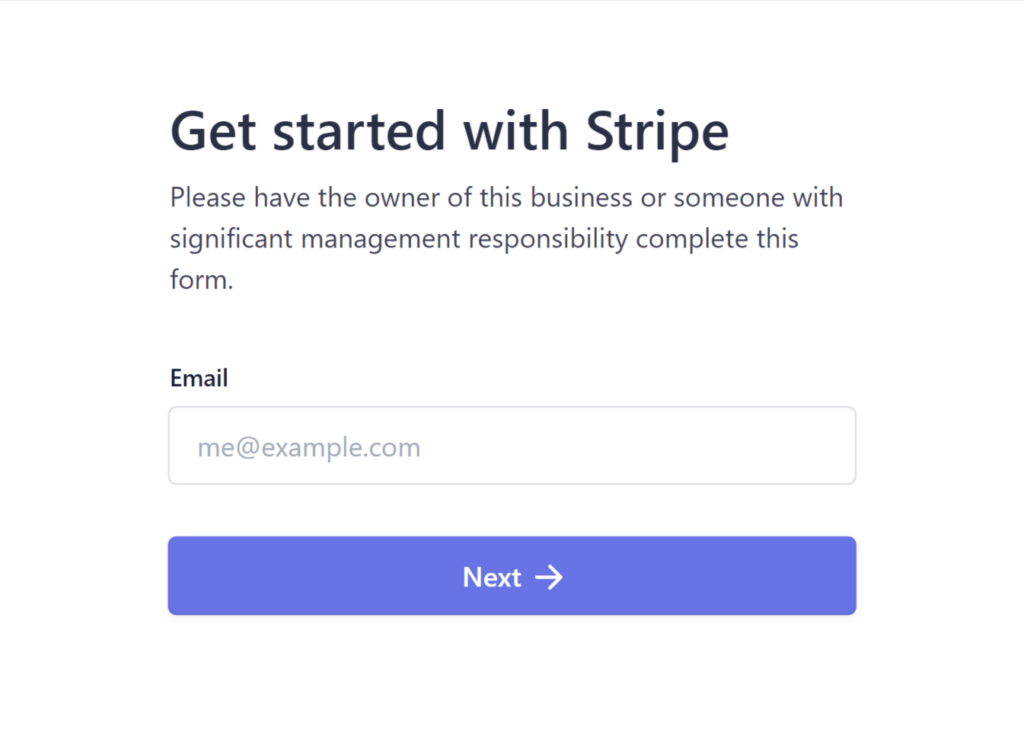
If you don't have a Stripe account, just enter your email and click Next to get your free account set up:

Get started with Stripe in Buy Now Plus

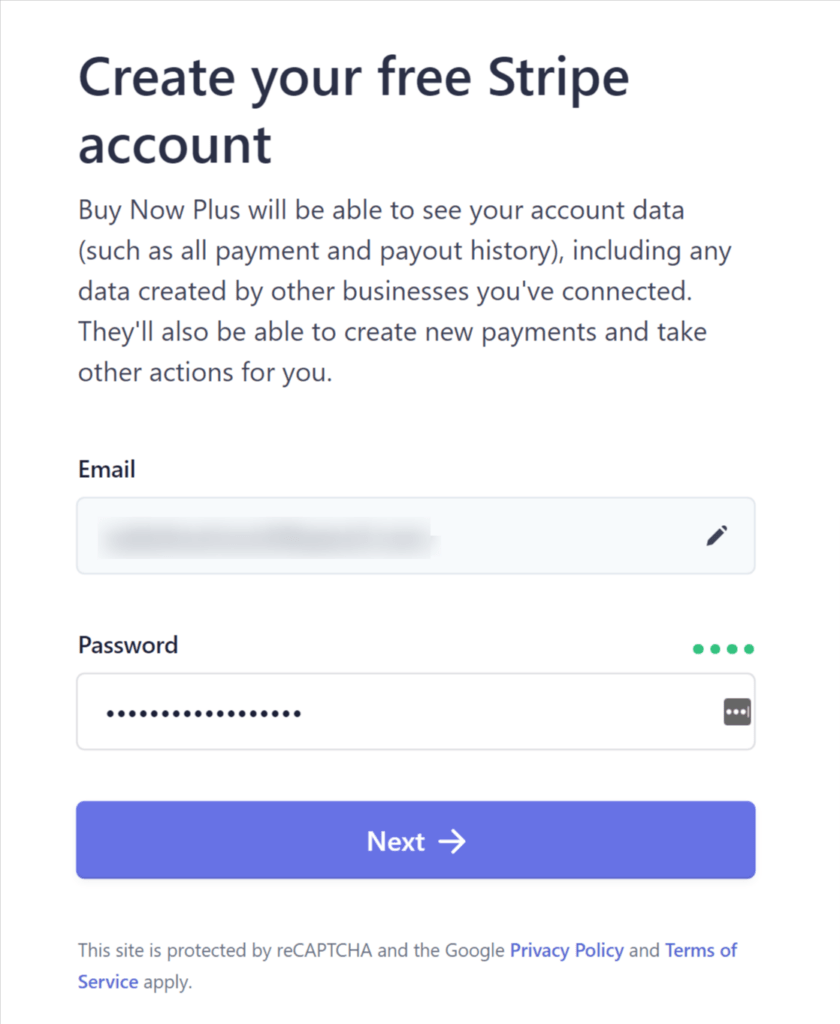
On the next page, create a password for your new Stripe account, and click Next:

create a free Stripe account in Buy Now Plus

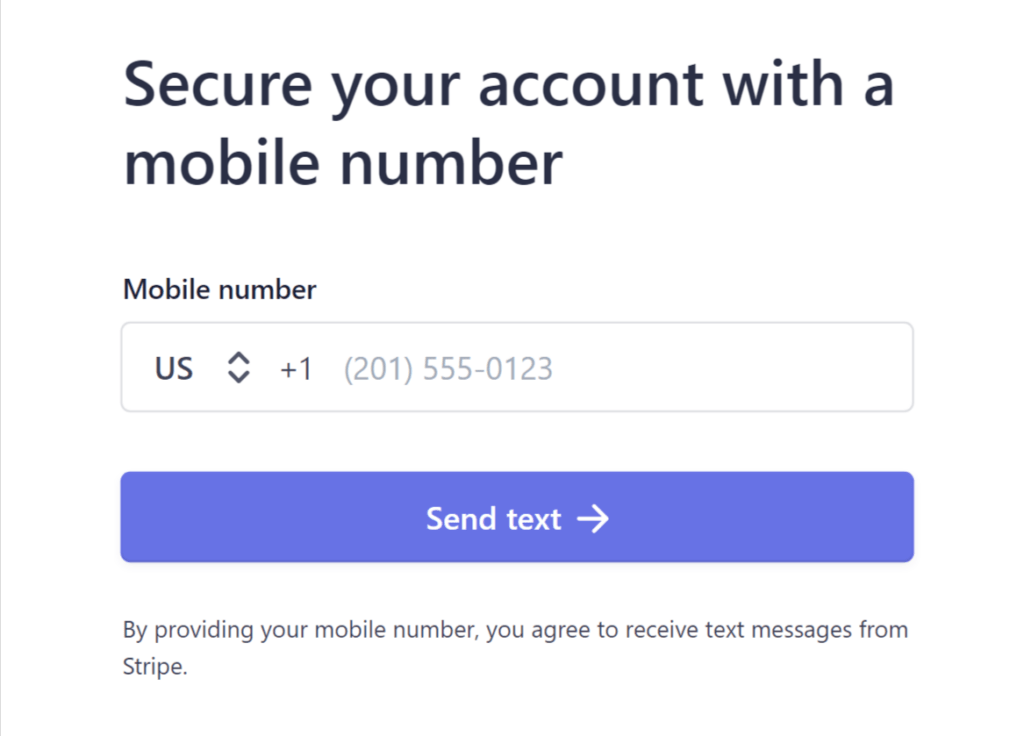
In the next step, you'll secure your account by adding your cell phone number:

Secure your Stripe account in Buy Now Plus

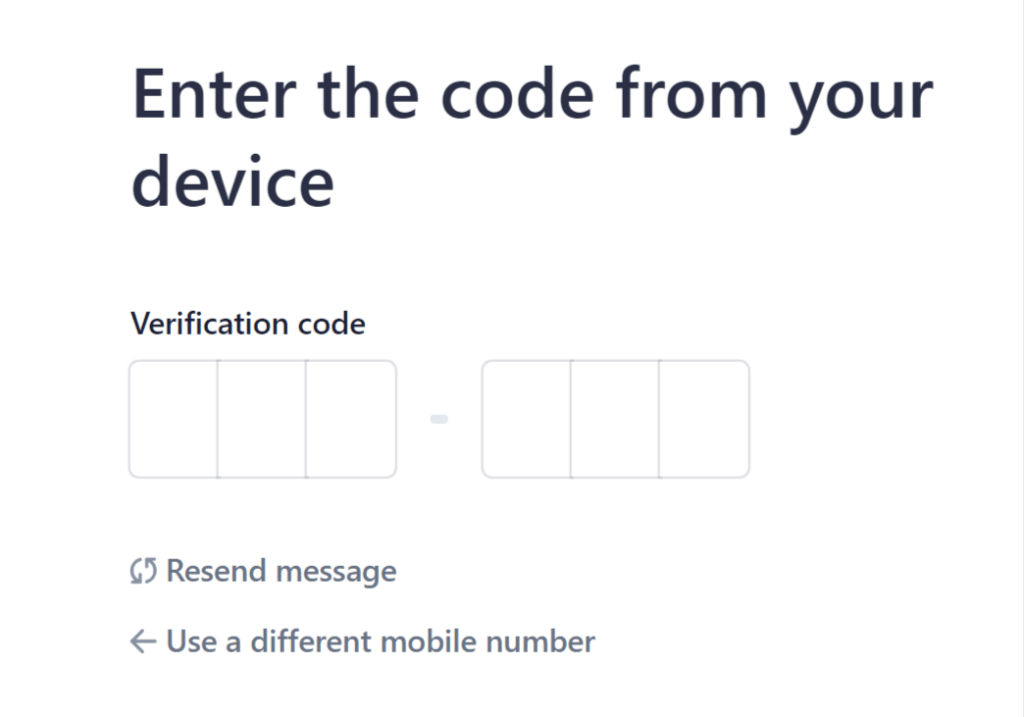
You'll get a text with a special code, which you'll then enter for verfication:

Enter the code from your device in buy now plus

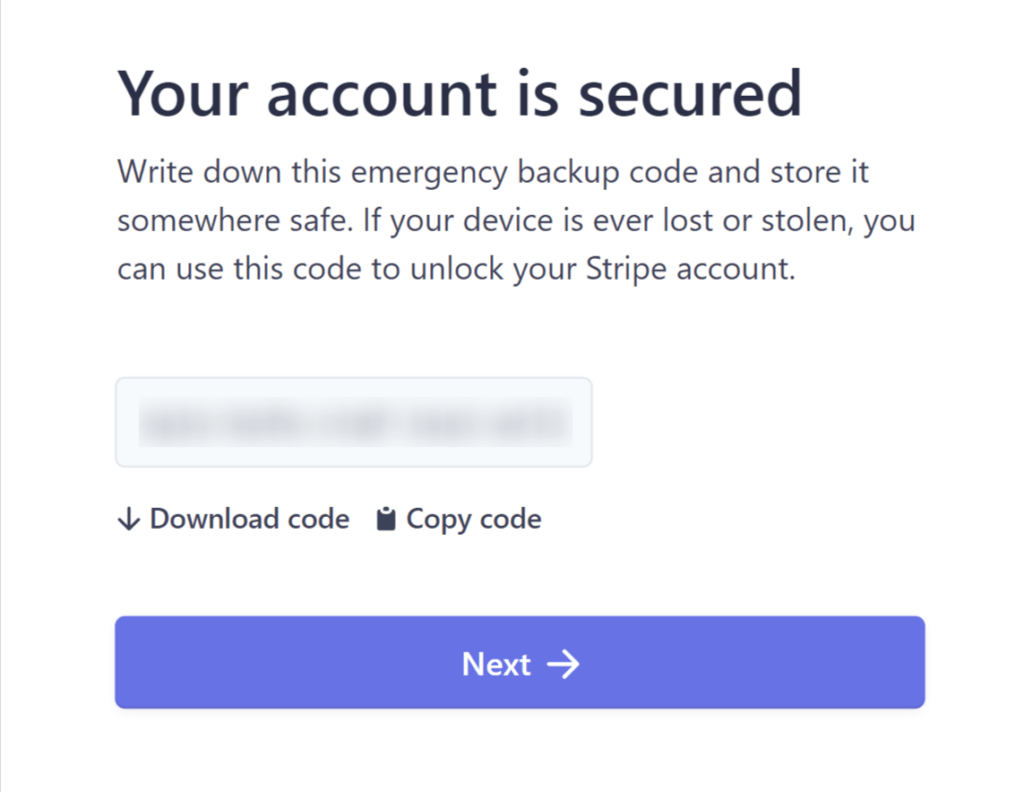
If verification is successful, you'll get a confirmation that your new Stripe account is secured. The confirmation will also include an emergency backup code you can use if your device is lost or stolen. You'll definitely want to copy that code and keep it in a safe place.

Once you've got your backup code stored away safely, click Next:

Stripe account is secured in Buy Now Plus

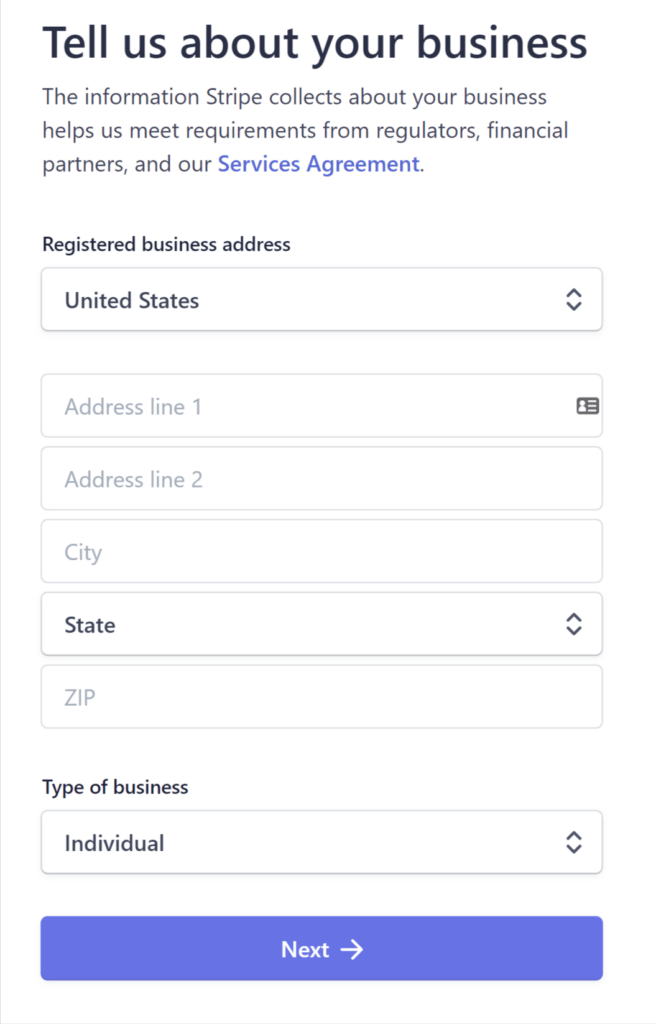
In this step, you'll give some basic information about your business. If your business doesn't have a physical address, just enter your home address, then click Next:

Tell us about your business in Buy Now Plus

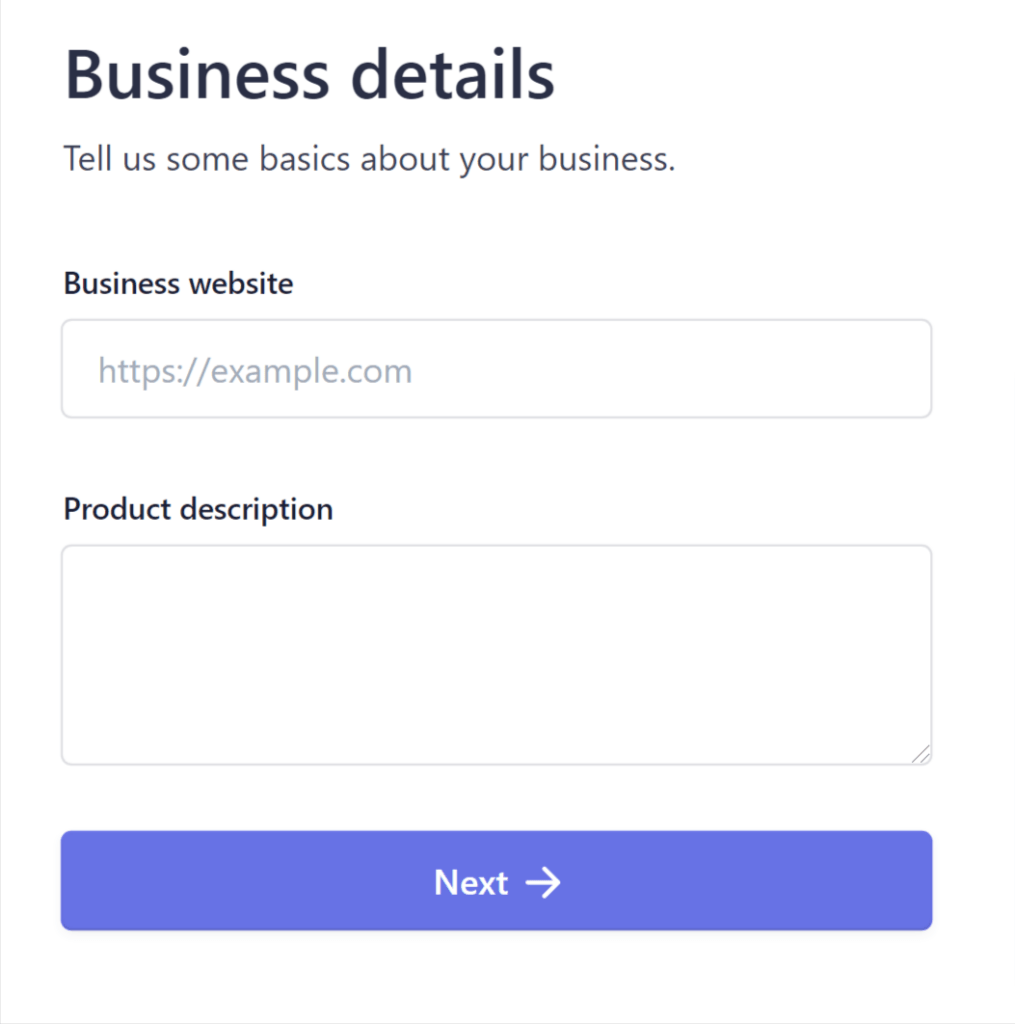
Now you'll enter a few additional details about your business. The first field asks for your business website. But don't worry. You can enter your social media profile address if you don't have a business website.

Then enter a short product description and click Next:

Business details in Buy Now Plus

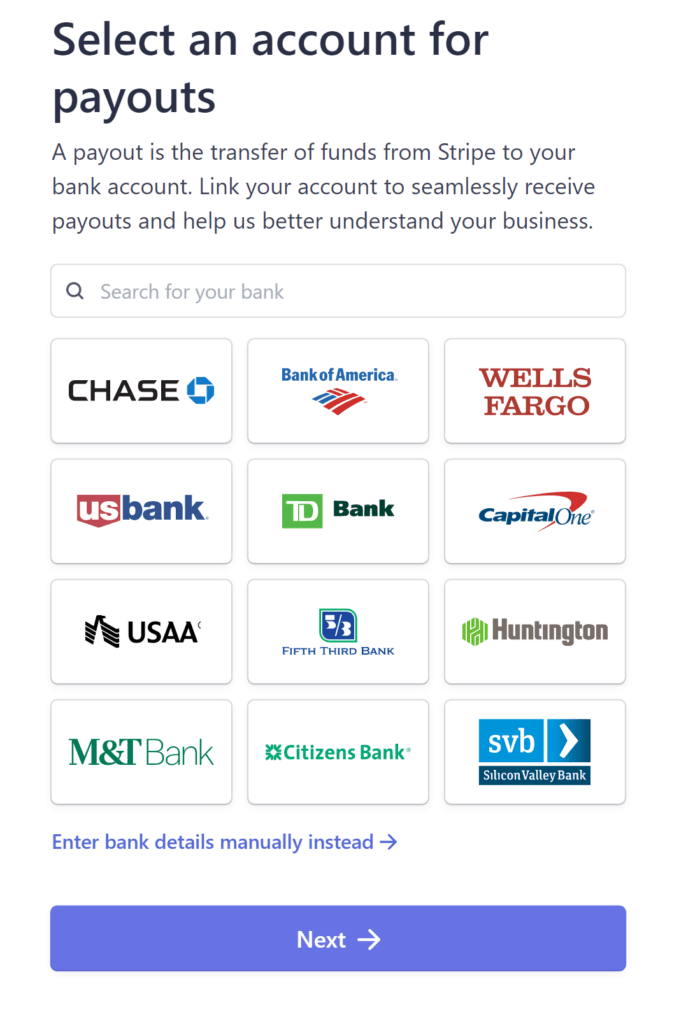
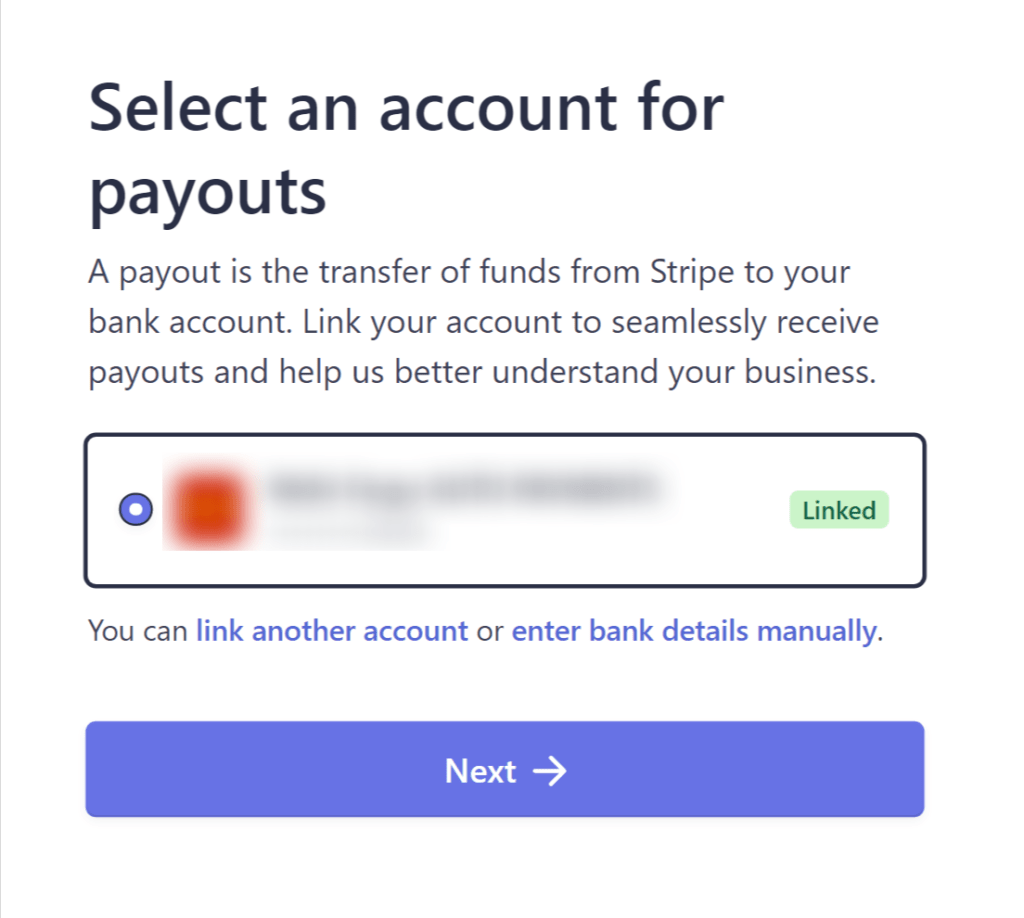
Now you'll choose a bank account where your payments will be deposited. First search for your bank in the search field. If it doesn't pop up, you can enter your bank's details manually by clicking the link at the bottom of the screen.

Once that's all set, click Next:

Select an account for Stripe payouts in Buy Now Plus

The next screen will verify that your bank account is linked to your new Stripe account. If everything looks good, click Next:

bank linked verification page in Buy Now Plus

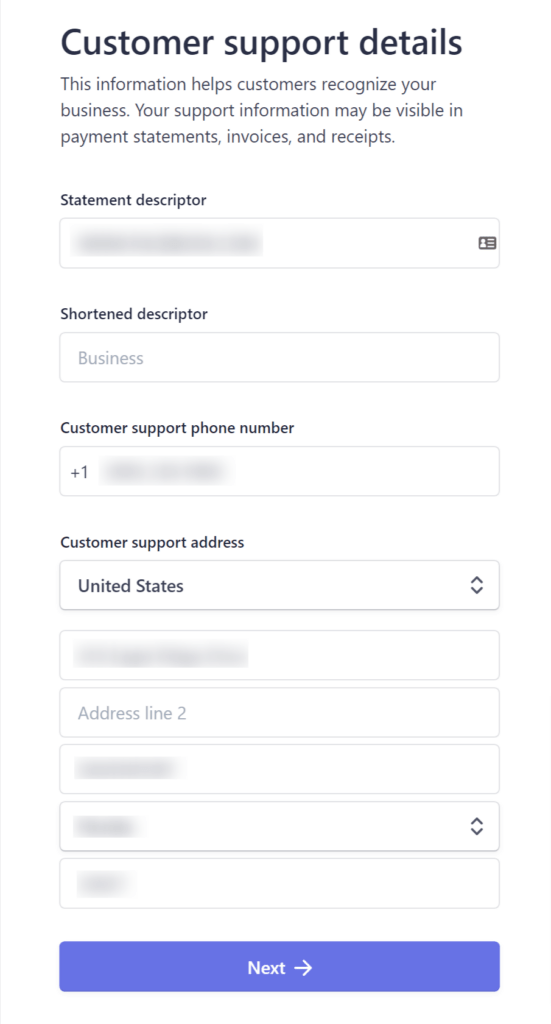
In this step you'll enter your customer support details. One of these details is a “descriptor” that will appear on a customer's credit card statement to help them identify the charge.

For example, if your business name is ABC Plumbing, you could simply enter “ABC Plumbing” in this field. In the shortened descriptor field, you might enter just “ABC” or “Plumbing”.

Now you'll enter your business address and phone number. Again, just use your home address and cell number if that's what you use for business. Then click Next, and your Stripe account will be all set:

customer support details in Buy Now Plus

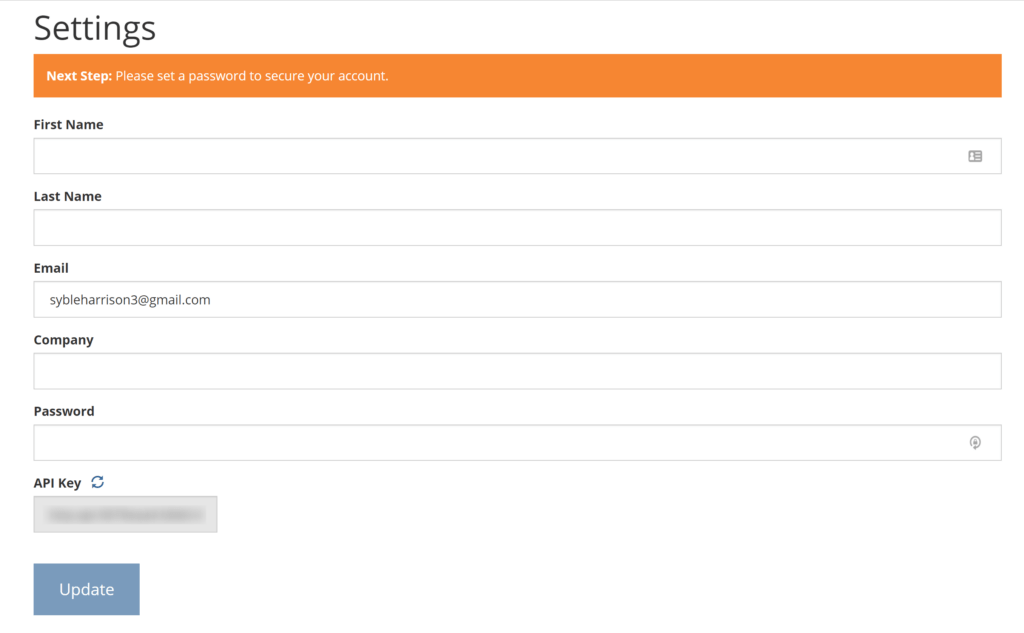
On the next page you'll configure your Buy Now Plus settings. Just make sure the form includes your name, email, and company name. Then create a password, and click Update:

Buy Now Plus account settings

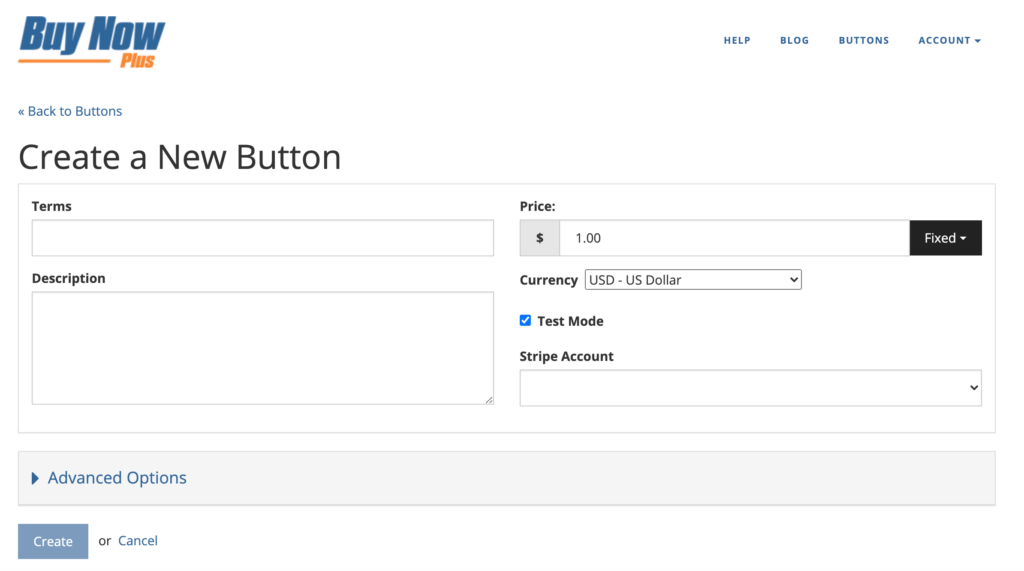
That's it! On the next page, you'll be able to create your first button and start selling:

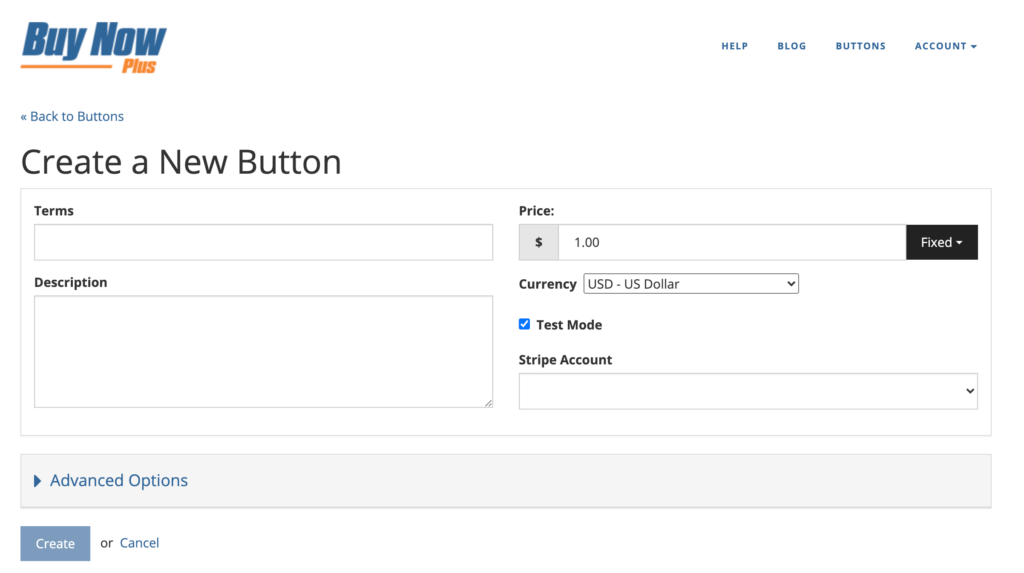
Create a new button in Buy Now Plus

After creating your button, you can add it to any compatible platform using the auto-generated embed code.

Conclusion 

Processing credit cards may sound daunting, but it’s also the preferred payment method for the majority of shoppers. If your business doesn't support credit cards, then you may struggle to make sales.

With Buy Now Plus, incorporating this popular payment method doesn’t have to be complicated or expensive.

Do you have questions about how to add credit card support to your business? Let us know in the comments section below!

If you liked this post, be sure to follow us on Twitter, Facebook, and LinkedIn.

How to Create a PayPal-Style Buy Now Button with Stripe (4 Steps)

Most modern payment gateways support PayPal-style buy now buttons. However, adding these powerful call to action (CTA) buttons to your website isn’t always a straightforward process.

Thankfully, there are tools that can help you create high-converting buy now buttons for your ecommerce store, social media platforms, or any other location where you want to drive sales.

If you opt for a user-friendly tool, it’s even possible to create an engaging CTA without having to write a single line of code.

In this post, we’ll show you how to create a buy now button using the popular Stripe payment gateway. We’ll also look at how to further optimize the checkout process by designing an information-packed Thank You page. Let’s get started! 

An Introduction to Buy Now Buttons (And Why They’re Important)

Payment providers such as PayPal and Stripe are hugely popular with merchants who want to offer customers a quick, easy, and secure way to purchase their products and services.

Supporting a range of payment methods is often essential for driving sales. After all, if customers can't send you a payment using their preferred method, they may go elsewhere!

To really drive conversions and reduce cart abandonment rates, it’s smart to support a range of payment methods, and to make these gateways easily accessible via a buy now button. This is a CTA that bypasses multiple steps in the traditional payment process, and typically takes the shopper directly to your checkout page.

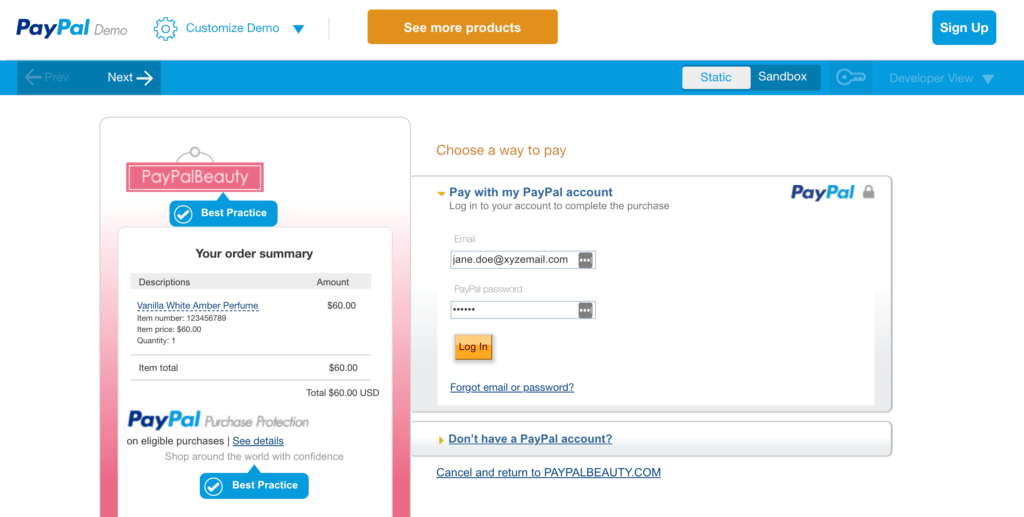
Most payment gateways support these powerful CTA buttons. This includes PayPal, which provide a Pay Now button that enables customers to make a purchase in seconds: 

The PayPal demo.

Stripe also offers a similar payment request button. However, implementing both the PayPal and Stripe buttons is a multi-step process that requires you to write some code. 

At Buy Now Plus we believe that creating your buttons should be just as easy as using them. Thanks to our dashboard and Stripe integration, you can create a PayPal-style buy now button for Stripe with ease – and without code!

How to Create a PayPal-Style Buy Now Button with Stripe (In 4 Easy Steps)

Let’s see how easy it is to create a buy now button. We’re going to assume you already have a Stripe account. If you don’t, then you can register for one at the Stripe website.

Step 1: Connect Stripe and Buy Now Plus

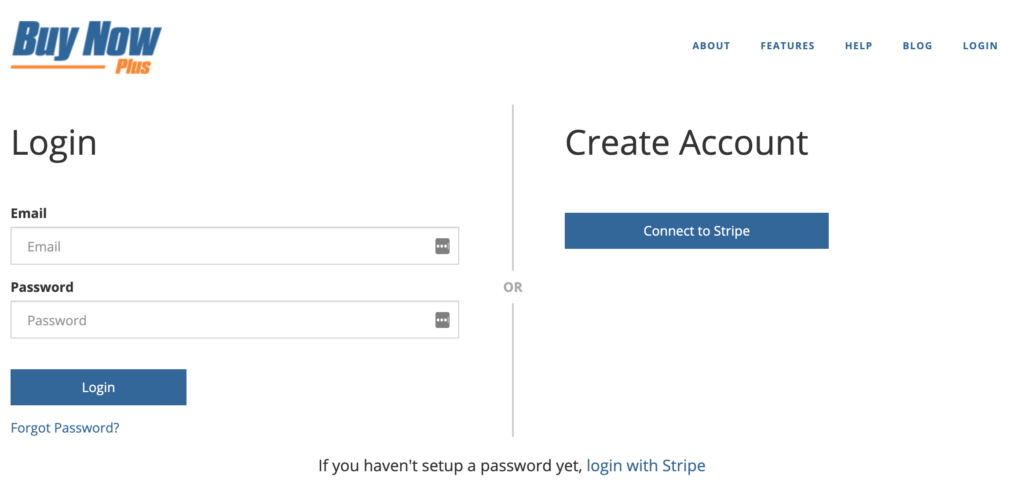
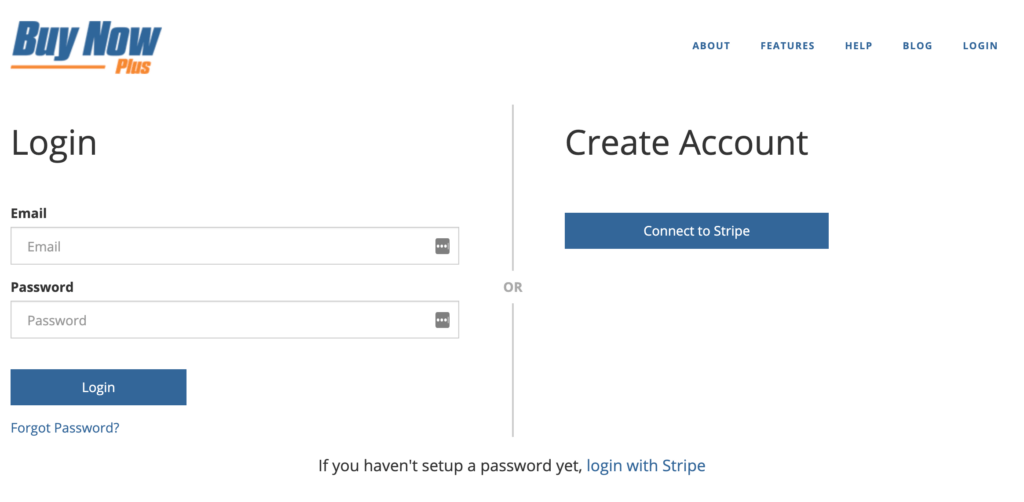
To start, head over to the Buy Now Plus login page. You can then either log in or connect to Stripe: 

The Buy Now Plus login screen.

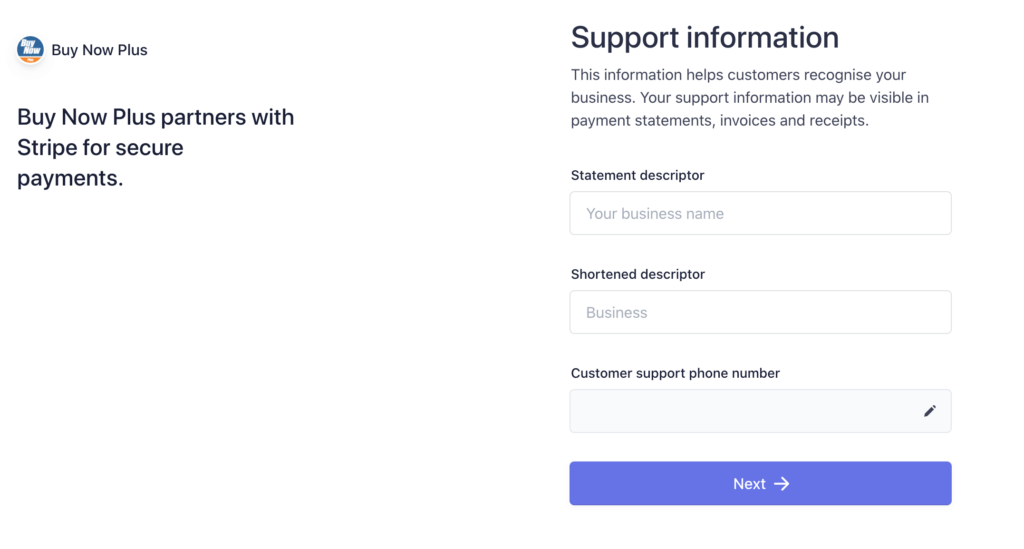
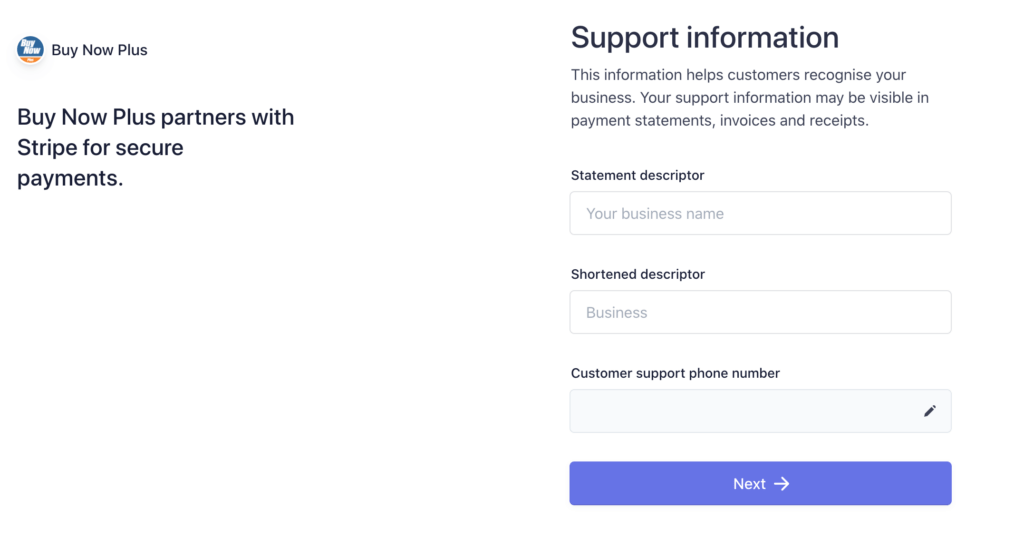
The Buy Now Plus wizard will then walk you through linking your account to Stripe. As part of the registration process, Stripe will ask you to provide a statement descriptor and shortened descriptor.

This information explains charges and payments on bank statements, invoices, and receipts, which can help you avoid chargebacks:

The Buy Now Plus registration process.

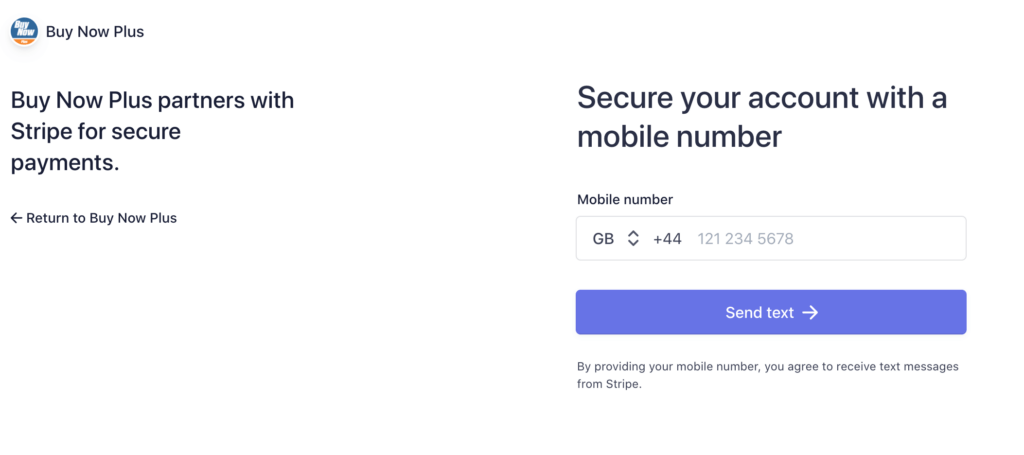
Stripe will also ask for some information about your business, and for a mobile phone number. This adds an extra layer of security to your account. 

After registering, you’ll be automatically redirected to your Buy Now Plus dashboard. You can then get started on your buy now button.

Step 2: Design Your Buy Now Button

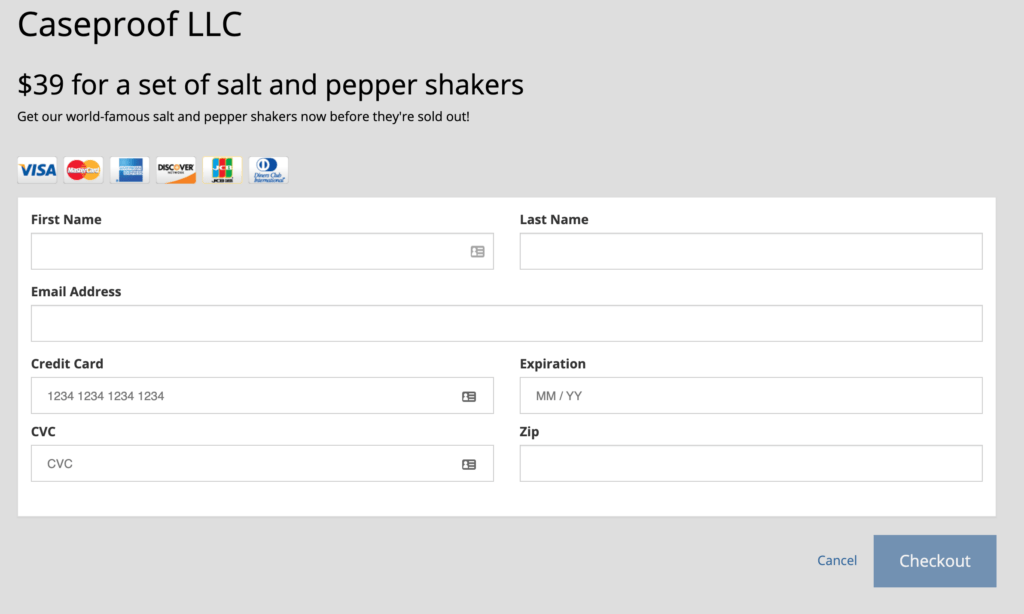
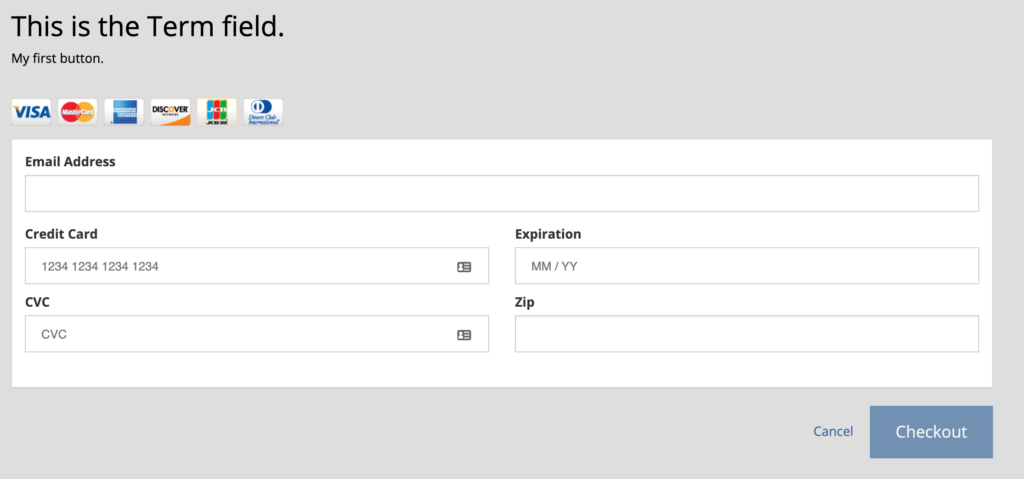
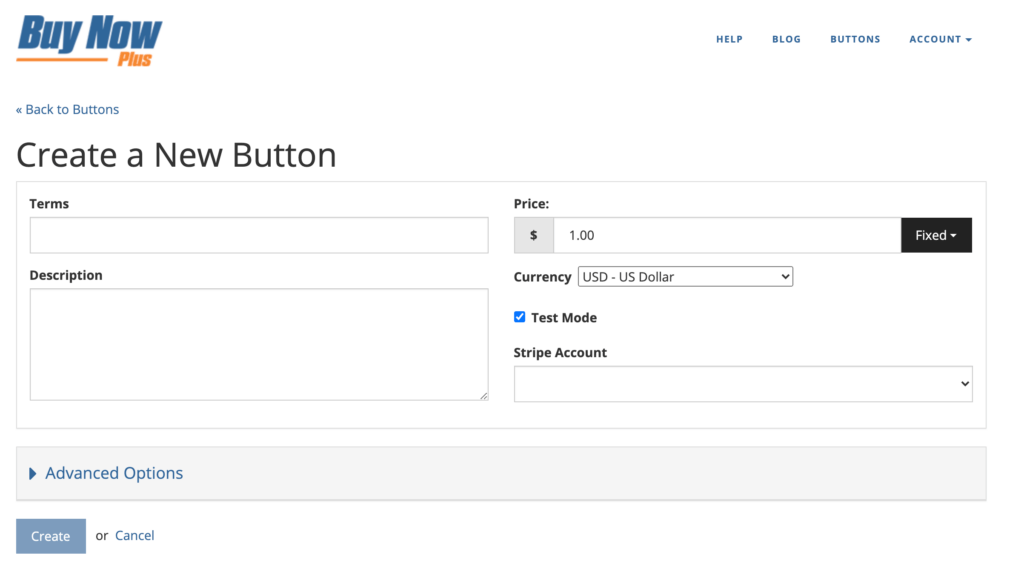
To create your first button, select Add New. Next, you'll need to enter some text into the Terms and Description fields. This information will appear on your payment screen:

A Buy Now Plus payment screen.

Then you can decide whether these payments should be fixed or variable. For example, you might create a variable purchase button if you’re accepting donations, or if you’re implementing a “pay what you want” model. You can also specify the currency that you’ll receive payments in.

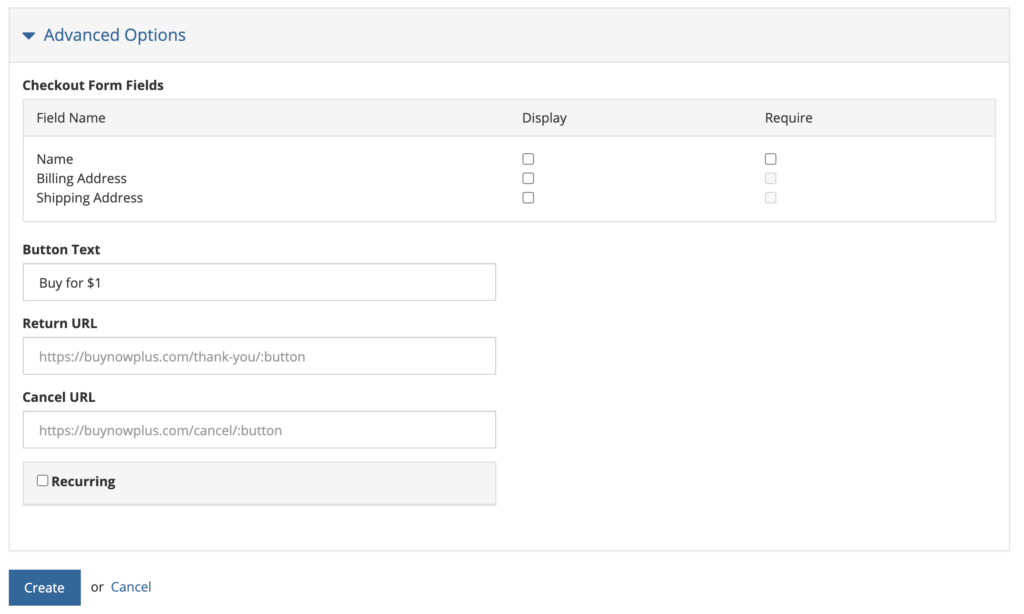
Next, choose the Stripe account where you’ll accept these payments, using the Stripe Account dropdown. You can access some additional settings by clicking to expand the Advanced Options section.

Here, you can set the text that’ll appear on your button, for example Buy Now or Pay with Stripe.  This is all you need to create a simple buy now button. When you’re done, click on Create.

Step 3: Create an Optional Thank You Page

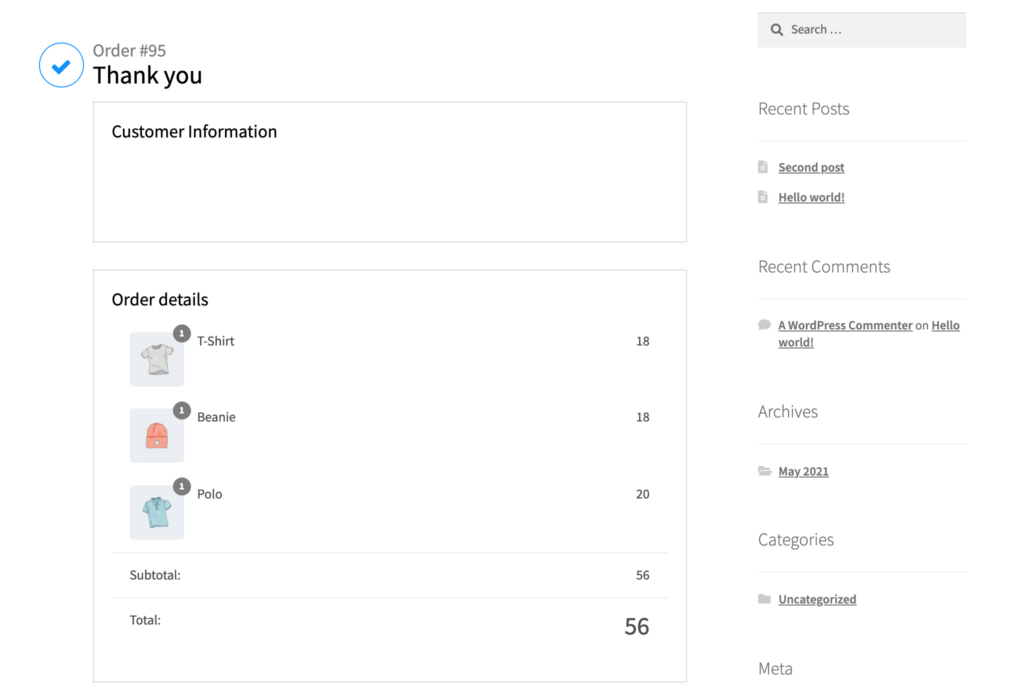
If the customer is unsure whether the payment has been processed correctly, they may contact your customer service desk or send you a duplicate payment. To avoid confusion, you can create a Thank You page where customers will be redirected following a successful payment.

This page is also an opportunity to provide helpful information, including a summary of the customer’s order and their tracking code. This can improve the customer experience, which may put you in a stronger position to secure repeat sales:

A Thank You page, created using a WordPress plugin.

Buy Now Plus can automatically redirect the customer to a page of your choice following a successful payment. This can be any page or post that you create in the WordPress dashboard.

Step 4: Preview and Post Your Buy Now Button

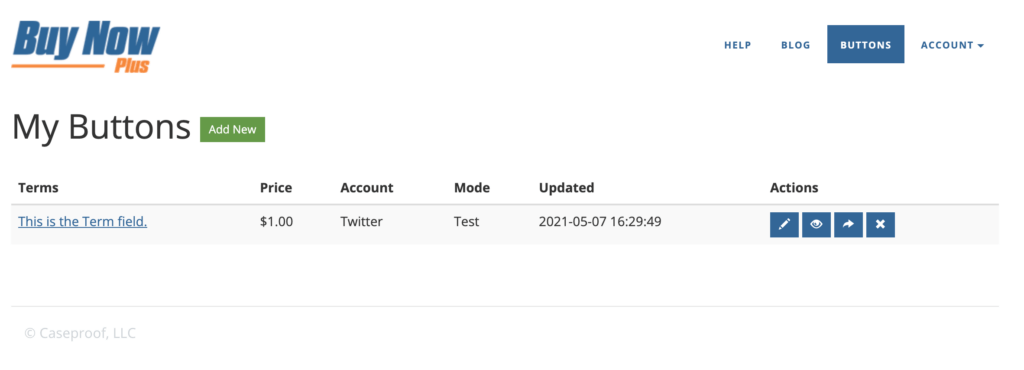
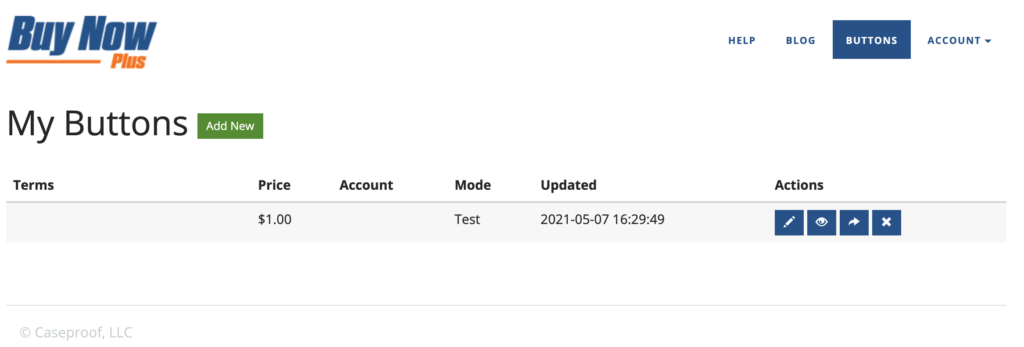
The main Buy Now Plus dashboard will now display the button you just created.  You can see how this CTA will appear to the customer by clicking on the preview icon under Actions:

Create a PayPal-style Buy Now button with Stripe, in the  Buy Now Plus dashboard.

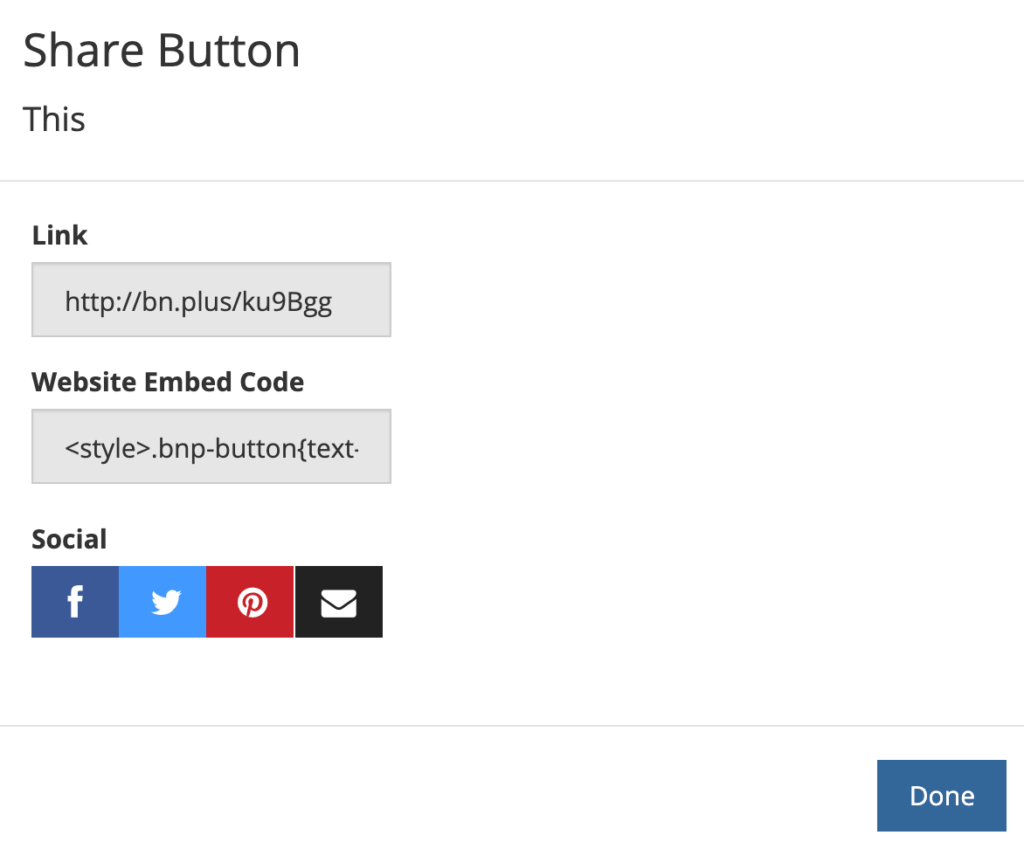
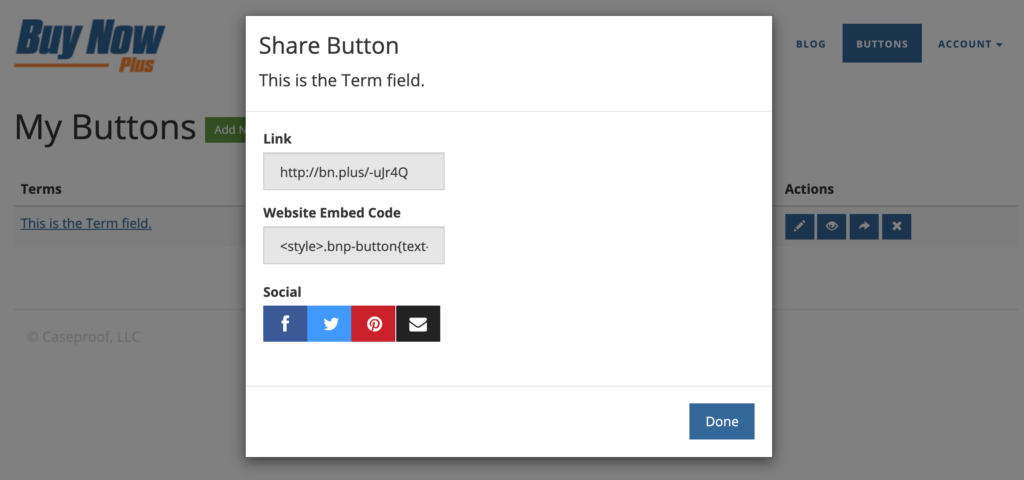
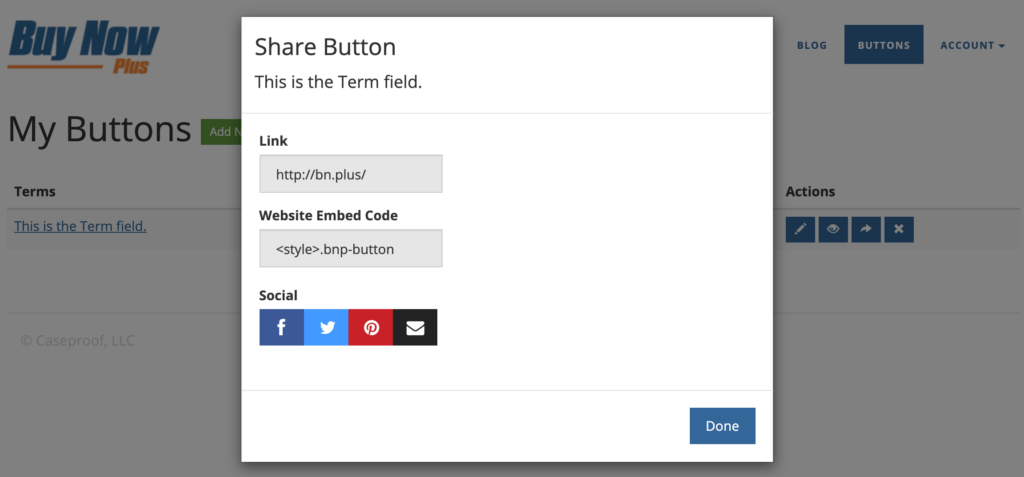
If you’re happy with your button, you can navigate back to the main dashboard and select the share icon under Actions. This will launch a dialog containing an embed code: 

Buy Now Plus' website embed code.

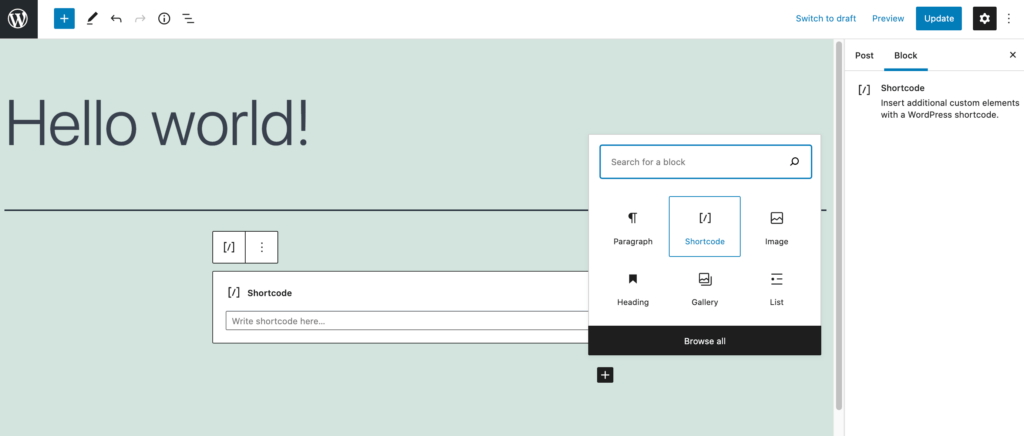
Now, head over to your WordPress website, and find the page or post where you want to add your button. Open the page editor and create a shortcode block at the exact location where you want to display it:

The WordPress shortcode block.

You can now paste your embed code into this block and save your changes. Alternatively, you may want to add this button to your site’s recurring elements, such as the header, footer, or sidebar. 

Conclusion 

Buy now buttons can be a simple but effective tool for boosting your sales. Although most popular payment gateways support the buy now feature, adding this may require writing some code or installing additional tools. Thanks to Buy Now Plus, you can implement these payment buttons more easily. 

Let’s recap how you create a buy now button in four quick steps: 

  1. Connect Stripe and Buy Now Plus.
  2. Design your buy now button.
  3. Create an optional thank you page.
  4. Preview and post your button PayPal-style buy now button.

Do you have any questions about creating a PayPal-style buy now button with Stripe? Let us know in the comments section below!

How to Sell on Social Media With Buy Now Buttons (In 3 Steps)

A buy now button can be a powerful addition to your ecommerce site. However, your ability to generate sales is still reliant on people visiting your site.

Fortunately, with the right tools, you can post your buy now button across multiple platforms, including social media. This strategy enables you to turn some of the biggest global social networks into additional revenue streams. 

In this post, we’ll discuss how buy now buttons can help you boost revenue directly from Facebook, Twitter, and other popular social networks. Then we'll show you how to create a buy now button and share it with your followers in three simple steps. Let’s get started! 

An Introduction to Using Buy Now Buttons on Social Media

A buy now button is a call to action (CTA) that brings customers directly to your checkout page. By removing multiple steps from the purchasing process, buy now buttons can be an effective solution for driving conversions:

A Buy Now button on the Amazon website.

If you create your buttons using our Buy Now Plus service, you can use them across multiple channels, including on social media. By incorporating buy now buttons into your social media posts, you can transform these networks into additional revenue streams and monetize your existing followers

Buy now buttons can minimize the time between customers becoming interested in products and entering the checkout process. In other words, this feature can encourage impulse purchases. 

Time-sensitive social media platforms are particularly great for incentivizing spur-of-the-moment decisions. Someone scanning social media may spot your product and use your buy now button to make a purchase on a whim. 

Every time you post on social media, you have the opportunity to introduce your brand to an entirely new audience. With over 2.7 billion monthly active Facebook users and 69.3 million Twitter users in the U.S. alone, social media is a powerful tool for getting your products in front of more people.

However, there's no need to be content with simply raising brand awareness.  By adding a buy now button to your next post, you may be able to immediately convert these new followers into paying customers. 

How to Sell on Social Media With Buy Now Buttons (In 3 Steps)

Now that you understand more about the potential of leveraging social media to increase sales, let's take a look at how to go about it. Below are three steps you can take to create buy now buttons for all your social media accounts.

Step 1: Sign Up for Stripe and Buy Now Plus Accounts

To get started with Buy Now Plus, you’ll need a Stripe account. If you don’t already have one with this popular payment processor, you can create one on the Stripe website:

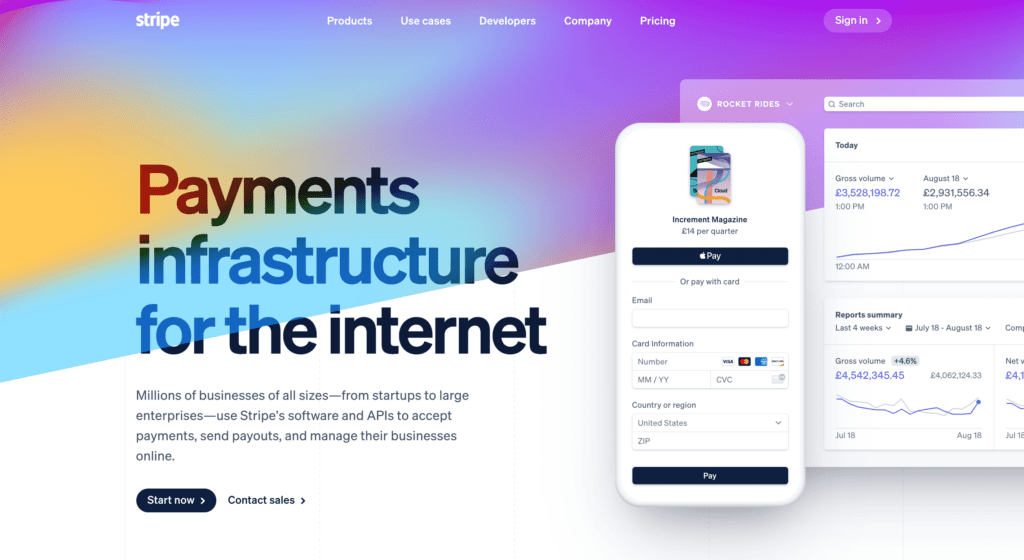
The Stripe homepage.

After enrolling with Stripe, head over to the Buy Now Plus login page. You can then select either Login with Stripe or Connect to Stripe: 

The Buy Now Plus service.

Follow the on-screen instructions to set up your Buy Now Plus account, which includes securing your account with a mobile number:

How to sell on social media using the Buy Now Plus service.

During the registration process, you’ll be asked to provide a statement descriptor and shortened descriptor. This information will appear in payment statements, invoices, and receipts.

If a customer doesn’t recognize your descriptor, they may request a chargeback. Therefore, it’s important to provide a clear statement and shortened descriptor:

Add your statement and shortened descriptors in the Buy Now Plus dashboard.

After registering with Buy Now Plus, you’ll be transferred to your dashboard. To create your first button, select Add New. 

Step 2: Create a Buy Now Button

To start, enter a value in the Terms field. This is the text that will appear at the top of your payment screen:

The Buy Now Plus checkout screen.

Payments can either be fixed or variable. Variable purchase buttons are useful if you operate on a “pay what you want” model or accept donations.

You can also set the currency and add a description that will display on your payment screen. Next, specify the Stripe account where you’ll accept payments using the Stripe Account drop-down menu.

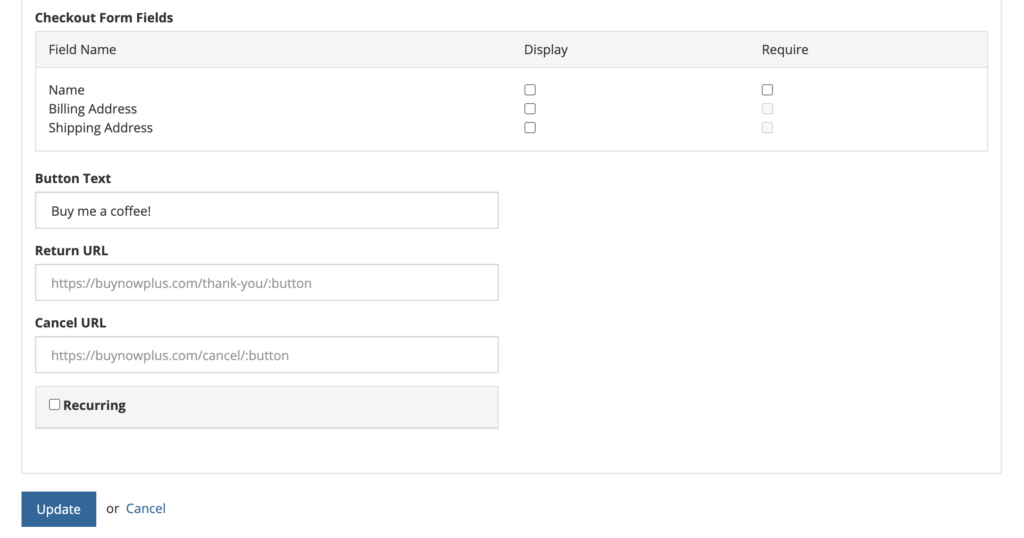
You can access additional settings by clicking to expand the Advanced Options section. Here, you can enter the button text.

For fixed payments, it often makes sense to display the cost of the purchase or a generic message such as “Buy now”.  Alternatively, if you’re creating a variable button, you might use a label such as “Donate” or “Buy Me a Coffee”:

The Buy Now Plus dashboard.

To provide a better customer experience, you may want to create a dedicated page where customers will be directed following their successful payments.

Similarly, you could point visitors to a different page if they choose to cancel their payments. After building these pages in your WordPress dashboard, you can copy and paste their URLs into the Return URL and Cancel URL fields.

Buy Now Plus has many other settings that are worth exploring in more detail. However, for now, this is all you need to create a simple buy now button. Select Create to continue.

Step 3: Preview and Share Your Button on Social Media

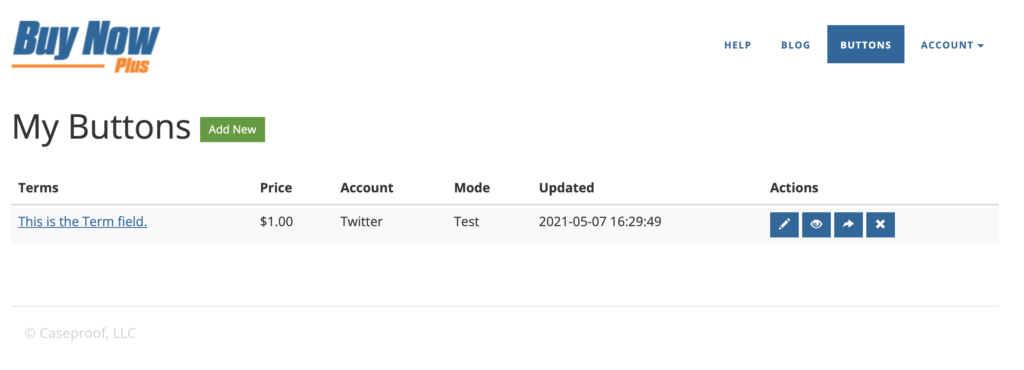
If you navigate to the main Buy Now Plus dashboard, you’ll see the button you just created. You can see how this CTA will appear to customers by clicking on Preview:

Create a Buy Now button, ready to sell on social media.

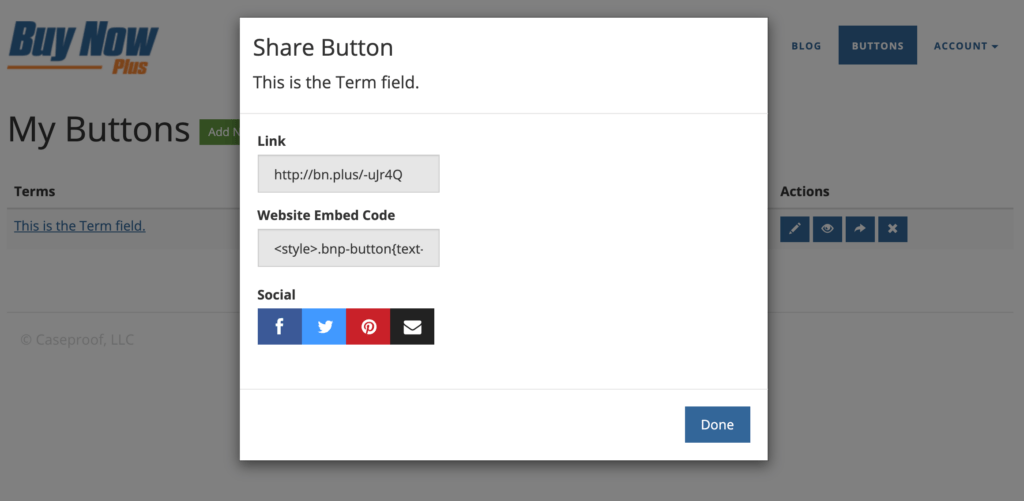
If you’re happy with your button, you can select the Sharing icon. This will launch a popup containing buttons for all the major social networks, including Facebook and Twitter:

A share button, ready to sell on social media.

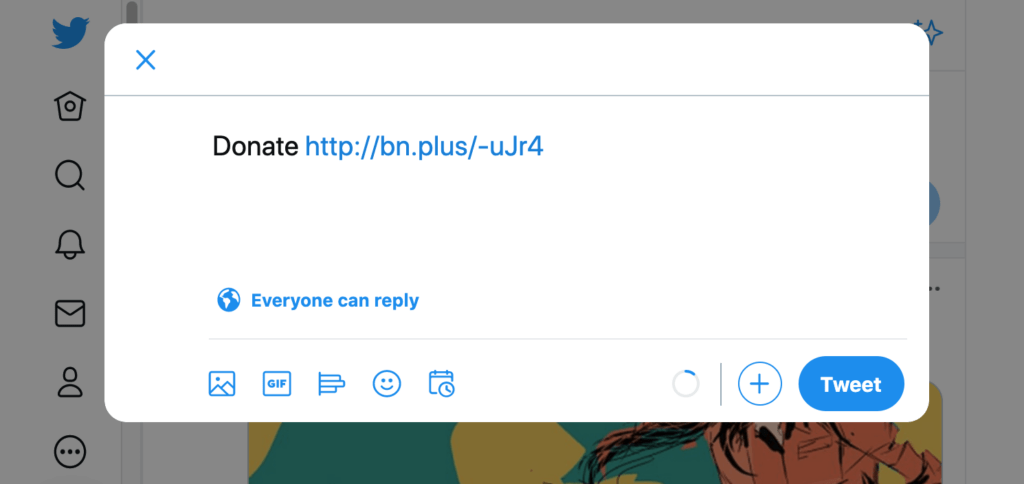
Clicking on any of these buttons will create a new draft post containing a link to your Buy Now page. Your followers can send you payments by following this URL:

Sell on social media with Buy Now Plus.

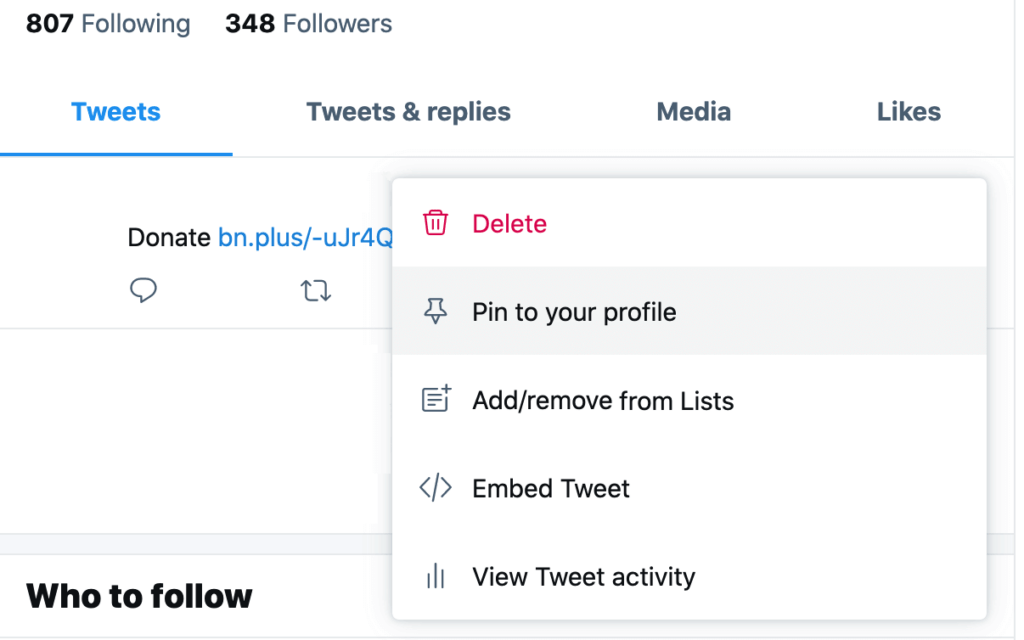
If you’re posting to Twitter, your tweet can easily get lost in the timeline. To help drive conversions, you may want to pin the tweet to the top of your profile: 

Sell on social media with Buy Now buttons.

Buy Now Plus provides dedicated sharing buttons for several social networks. However, if you want to post to an alternative platform, simply click on the sharing icon and copy the provided link. Then you can paste the URL into any location that accepts text, including other social channels. 

Conclusion 

By posting your buy now buttons on social media platforms, you can remove an additional step in the checkout process and enable customers to make purchases without having to explicitly visit your site.

Let’s recap how you can sell on social media in three easy steps: 

  1. Sign up for Stripe and Buy Now Plus accounts.
  2. Create a buy now button.
  3. Preview and share your button on social media.

Do you have any questions about using buy now buttons on social media? Let us know in the comments section below!
How to Optimize Your Buy Now Buttons and Boost Your ROI (3 Tips)

Buy Now buttons can be an effective tool for driving conversions and boosting your profits. However, in the competitive world of e-commerce, it’s essential to optimize every part of your store, including your buy now buttons.

Fortunately, if you’re using a flexible tool such as Buy Now Plus, there’s a lot of room to get creative. By putting some extra thought into how you set up your buttons, you can maximize the chances of customers spotting Buy Now and taking you up on the offer.

In this post, we’ll explore why this button is such a powerful solution for driving sales. Then we'll share three simple tactics to improve those all-important click-through rates (CTRs). Let’s get started!

Why Buy Now Buttons Are Important for Conversions

Cart abandonment rates are a huge problem for e-commerce sites. There’s evidence to suggest that 69% of customers fail to complete the checkout process. 

To boost conversions, it’s vital that you streamline your checkout workflow. The fewer steps customers have to take, the fewer opportunities they’ll have to rethink their decisions and abandon their purchases.

Here, a buy now button can be your secret weapon. This is a simple-but-effective call to action (CTA) that, when clicked on, takes users directly to your checkout page:

An Amazon Buy Now button.

Buy now buttons enable customers to skip multiple steps in the purchasing process. This may include time-consuming stages, such as account creation. When shoppers can complete their purchases in seconds, you should notice a positive impact on your cart abandonment rates. 

If you create your button using a platform such as Buy Now Plus, you can even use it across multiple platforms, including your website, social media accounts, and email marketing. This helps provide a more consistent and seamless user experience (UX), which can further boost your conversions.

How to Optimize Your Buy Now Buttons and Boost Your ROI (3 Tips)

Buy now buttons may be a powerful tool, but e-commerce is a competitive business. If you’re going to get a cut of the online shopping market, you’ll want to optimize every part of your store. Here are three tips to ensure you’re getting the maximum value from your buy now buttons. 

1. Add Buy Now Buttons to Your Blog Posts

Content creation is a hugely important marketing strategy for many online stores. By regularly publishing valuable content, you can encourage people to return. Every visit presents an opportunity to make a sale. 

Blog posts can be particularly effective for promoting your products and services. For example, if you sell cooking utensils, you might publish recipes showcasing all the delicious meals that budding chefs can create using your products. This content can also help boost your search engine rankings. 

Once you’ve attracted a potential customer to your blog, it’s important to bridge the gap between them reading your content and making a purchase. By adding a buy now button to your post, you can capitalize on the buzz generated and encourage impulse purchases.

If you create a button using our Buy Now Plus service, we’ll provide a handy embed code:

The Buy Now Plus dashboard.

With it, you can add the button to any part of your site, including specific blog posts. Simply open the page or post where you want to feature your button and create a new shortcode block: 

A WordPress shortcode block.

Once you paste the embed code into this block, your button will appear. This flexibility and fine-grained control enable you to deploy your buy now buttons at the exact moment when readers are most likely to make a purchase.

2. Create More Powerful CTAs for Your Email Campaigns

Email marketing can be another effective way to promote your products and services. According to the 2019 Adobe Email Usage Study, Americans spend over five hours checking their mailboxes every single day. That’s a huge opportunity to get your items in front of your target audience.

In addition, your marketing emails remain in customers' inboxes until they perform some action. Even if they fail to check their inboxes for hours or even days after receiving your emails, your content will still be waiting the next time they log in. This is in stark contrast to time-sensitive marketing channels such as social media.

Email marketing is a powerful tool in your arsenal, so it’s crucial that you use it to its full potential. By incorporating buy now buttons into your next email campaign, you enable customers to start the checkout process directly from their inboxes.

If you couple your buy now buttons with compelling marketing copy and beautiful product images, you should notice a sharp surge in conversions:

An example of a Buy Now button in an email.

Even if you deploy buy now buttons across your website, some shoppers may still abandon their carts. Many store owners use email to remind these customers about the items still in their baskets. However, requiring busy users to navigate back to your site and then to their abandoned baskets might be too much to ask.

By adding a buy now button to your cart abandonment emails, you can remove multiple steps from the cart recovery process. This may be enough to nudge uncertain shoppers over the finishing line. 

3. Replace Traditional Affiliate Links With Buy Now Buttons

Many website owners use affiliate marketing to monetize their content. As part of an affiliate partnership, you’ll promote a merchant’s products or services using a special URL. You’ll earn a commission for every sale that originates from this link.  

Affiliate marketing can be a lucrative sideline, or even a way to generate a full-time income. To put this into perspective, The Wirecutter affiliate marketing site famously made an estimated $10 million in revenue, and was eventually sold to the New York Times for $30 million.

If you decide to explore the world of affiliate marketing, buy now buttons can encourage visitors to interact with your links:

An example of a Buy Now button used in affiliate marketing.

Many internet users are security and privacy-conscious, and may avoid clicking on a link that contains an obvious affiliate tracking code. By embedding your URLs in a buy now button, you may be able to improve your CTRs and increase your affiliate revenue.

Conclusion 

If you’re going to drive conversions, it’s not enough to simply add a bunch of buy now buttons to your site. With careful planning and creativity, you can capture potential customers when they’re most likely to make purchases. 

Let’s recap three ways that you can transform a simple button into a high-converting CTA: 

  1. Add buy now buttons to your blog posts.
  2. Create more powerful CTAs for your email campaigns.
  3. Replace traditional affiliate links with buy now buttons.

What techniques do you use to drive conversions? Let us know in the comments section below!
How to Create a Buy Now Button With Stripe

As an online seller, it’s easy to become fixated on encouraging customers to add products to their shopping carts. However, this isn’t enough to guarantee sales, as there's evidence to suggest that nearly 70% of shoppers fail to complete the checkout process.

Fortunately, it is possible to replace the traditional multi-step checkout with a single Buy Now button. By adding one to your site or social profile, you can often dramatically reduce cart abandonment rates and boost your bottom line.

In this post, we’ll look at why every online business should have a buy now button. Then we’ll show you how to add this simple but effective feature to your own website or social account step by step. Let’s get started!

An Introduction to Buy Now Buttons (And Why You Might Want to Create One)

A buy now button is a call to action (CTA) that usually takes a shopper to either a product page, their cart, or directly to your checkout page. Buy now buttons are useful for bypassing many of the steps typically required to complete a purchase.

This may include time-consuming tasks, such as creating an account. Since you’re streamlining the buying process, Buy now buttons can help drive conversions and reduce cart abandonment rates.

A Buy button created using Buy Now Plus.

Buy Now buttons are most commonly used on ecommerce sites. However, when you create a button using our flexible Buy Now Plus tool, you can use the same CTA across multiple platforms, including email newsletters and social media

This helps you provide a consistent purchasing experience, while also transforming multiple channels into revenue streams. Buy now buttons are particularly valuable in omnichannel marketing, as they help provide a smooth and integrated shopping journey across all of your channels. 

How to Create a Buy Now Button With Stripe

Now that we've discussed why a Buy Now button can be a powerful addition to your ecommerce site, let’s look at how easy it is to create one with Stripe.

Step 1: Sign Up for Buy Now Plus

Buy Now Plus is a free service that allows you to accept payments without the need for SSL certificates. You're only charged if you make a sale. And our fee is only 3% – a very low rate when you consider the industry standard is between 4% and 5%.

What's great about Buy Now Plus is that it works right on top of Stripe. So whether or not you already have Stripe account, just head over to BuyNowPlus.com, and click the Start Selling button:

Buy Now Plus homepage

Clicking the Start Selling button opens the Getting Started form. If you have an existing Stripe account, you'll have to option to login and connect it to Buy Now Plus right then.

If you've never had Stripe, just enter your email and click Next to set up your new free account:

Get started with Stripe in Buy Now Plus

After that, you'll create a password for your new Stripe account, and click Next:

create a free Stripe account in Buy Now Plus

And secure your account by adding your cell phone number:

Secure your Stripe account in Buy Now Plus

Once you get your special code via text message, enter the code for verification:

Enter the code from your device in buy now plus

In a few seconds, you'll receive a confirmation that your new Stripe account is secured. Make sure you the emergency backup code provided, and keep it in a safe place. Then click Next.

Stripe account is secured in Buy Now Plus

Here, you'll enter a few basic details about your business. If you don't operate with a physical address, just use your home address, then click Next:

Tell us about your business in Buy Now Plus

Next you'll add a bit more info about your business. The first field asks for your business website. If you don't have a website, just use the social media profile URL for your business.

Next provide a short product description, and click Next:

Business details in Buy Now Plus

Now is when you'll designate a bank account where your payments will be deposited. Search for your bank in the search field. If it doesn't show up, you can enter the bank's details manually by clicking the link at the bottom of the screen.

Once that's done, click Next:

Select an account for Stripe payouts in Buy Now Plus

The next screen that appears will verify that your bank account is linked to your new Stripe account. Make sure everything looks right, then click Next:

bank linked verification page in Buy Now Plus

Now you'll want to set up your customer support info. One of these details is a “descriptor” that will appear on a customer's credit card statement to help them identify where the charge originated.

For example, if your business name is ABC Upholstering, you could simply enter “ABC Upholstering” in the field. In the shortened descriptor field, you might enter just enter “ABC” or “Upholstering”.

Next you'll add your business address and phone number. Again, just use your home address and cell number if that's what you use for business. Then click Next, and your Stripe account will be all set up:

customer support details in Buy Now Plus

Now you'll get to configure your Buy Now Plus settings. Just make sure the form includes your name, email, and company name. Then create a password, and click Update:

Buy Now Plus account settings

On the next page, you'll be all set to create your first button and start selling.

Step 2: Create a Buy Now Button

For the purposes of this post, we’ll create a simple button that charges customers a flat fee. To get started, select Buttons > Add New:

The Buy Now Plus dashboard.

In the Terms field, enter the text that will appear at the top of your payment screen. For Price, click to open the drop-down menu, then select Fixed. Now, you can specify your flat-fee rate: 

Creating a new button with Buy Now Plus.

Next, you can open the Stripe Account drop-down menu and choose the account where payments will be deposited. After you click to expand the Advanced Options section, you can specify the text to appear on your Buy Now button:

Buy Now Plus' advanced options.

To improve the customer experience, you may want to display a thank you or payment confirmation page following a successful transaction. Similarly, you can redirect customers to an error page if they choose to cancel the transaction.

You can create these pages in your WordPress account, then copy and paste their URLs into the Return URL and Cancel URL fields:

Defining a return URL with Buy Now Plus.

While there are other settings you can customize, this is all you need to create a simple Buy Now button. Click Create to continue. 

Step 4: Embed Your Button

How to Embed on Your Website

On the main Buy Now Plus dashboard, you can see how your button will appear to customers by selecting Preview. If you’re happy with how it looks, it’s time to add it to your website: 

A buy now button created using Buy Now Plus.

On the main dashboard, select the Sharing icon. This will launch the Share Button window containing an embed code:

Embedding your Buy Now Plus button.

Now, head over to your WordPress website and find the page or post where you want to feature your Buy Now button. Open the editor, and insert a Shortcode block at the exact location where you want to insert your button: 

WordPress' shortcode block.

Next, paste your embed code into this block and save your changes. If you check your site, you should see a new Buy Now button!

How to Embed on Your Social Account

If you do business with a social account, simply follow the same instructions above, and click the sharing icon to open the Share Button window.

From the Share Button window, simply click on one of the social buttons. You'll then get a pop up window where you can sign into your account, and your links will be ready to go.

Conclusion 

Cart abandonment is a huge problem for online stores, but Buy Now buttons promise to help you improve those all-important checkout rates. By removing steps from the payment process, your customers will have fewer opportunities to reconsider their purchases, and your conversions should increase as a result. 

Let’s recap how you can create a Buy Now button with Stripe in four easy steps: 

  1. Set up your Buy Now Plus account.
  2. Create a Buy Now button.
  3. Embed your button on your website or social account. 

Do you have any questions about creating a Buy Now button with Stripe? Let us know in the comments section below!
If you liked this post, be sure to follow us on Twitter, Facebook, and LinkedIn.

css.php