How to Monetize Your Blog (4 Revenue-Generating Tips)

Thanks to the rise of user-friendly content management systems (CMS) such as WordPress, it’s never been easier to create a blog. However, you may want to convert all of that time and effort into cash at some point. 

Fortunately, there are lots of ways to make money as a blogger. If you’re generating a healthy amount of traffic, you’re in a prime position to turn your visitors into revenue. 

In this post, we’ll discuss why so many people are monetizing their blogs. We’ll then share three of our favorite revenue-generating tips. Let’s get started!

Why You Should Consider Monetizing Your Blog

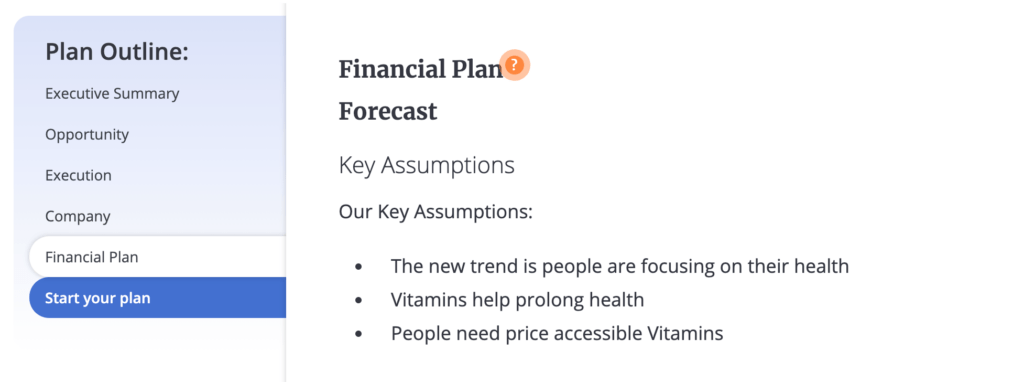
There are many different reasons why people decide to start a blog. You might have dreamed about monetization all along. Alternatively, perhaps you’re knowledgeable about a particular subject and want to share your passion with the world:

An example of a passion blog about growing succulents.

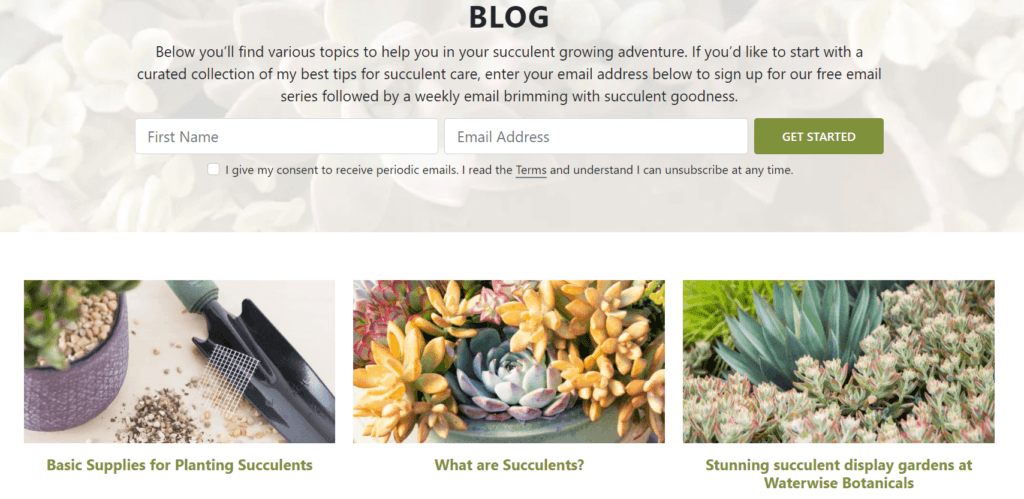
You might even use your posts as part of a content marketing strategy for a related business. 

Regardless of why you started blogging, running a successful blog requires time and effort. At some point, you may want to be reimbursed for all your hard work.

Blogging can also turn into an expensive hobby. While there are plenty of free tools, you’ll usually end up investing some hard-earned cash into your blog. 

Most commonly, these costs include purchasing web hosting and a domain name. However, you can also incur additional miscellaneous fees.

For example, you may pay for specialist training to help grow your audience. Alternatively, you might run advertising campaigns on popular platforms such as Facebook, Twitter, or Google.

By monetizing your blog, you can recoup some of these costs and perhaps even turn a profit.

While blogging is a hugely competitive industry, it’s still possible to convert a popular site into an additional revenue stream. You might even achieve the ultimate dream and trade your job for a career as a full-time blogger.

How to Monetize Your Blog (4 Revenue-Generating Tips)

If your blog has an audience, there are many ways to convert those visitors into revenue. Here are three ways to earn money from blogging.

1. Use a Paywall Plugin

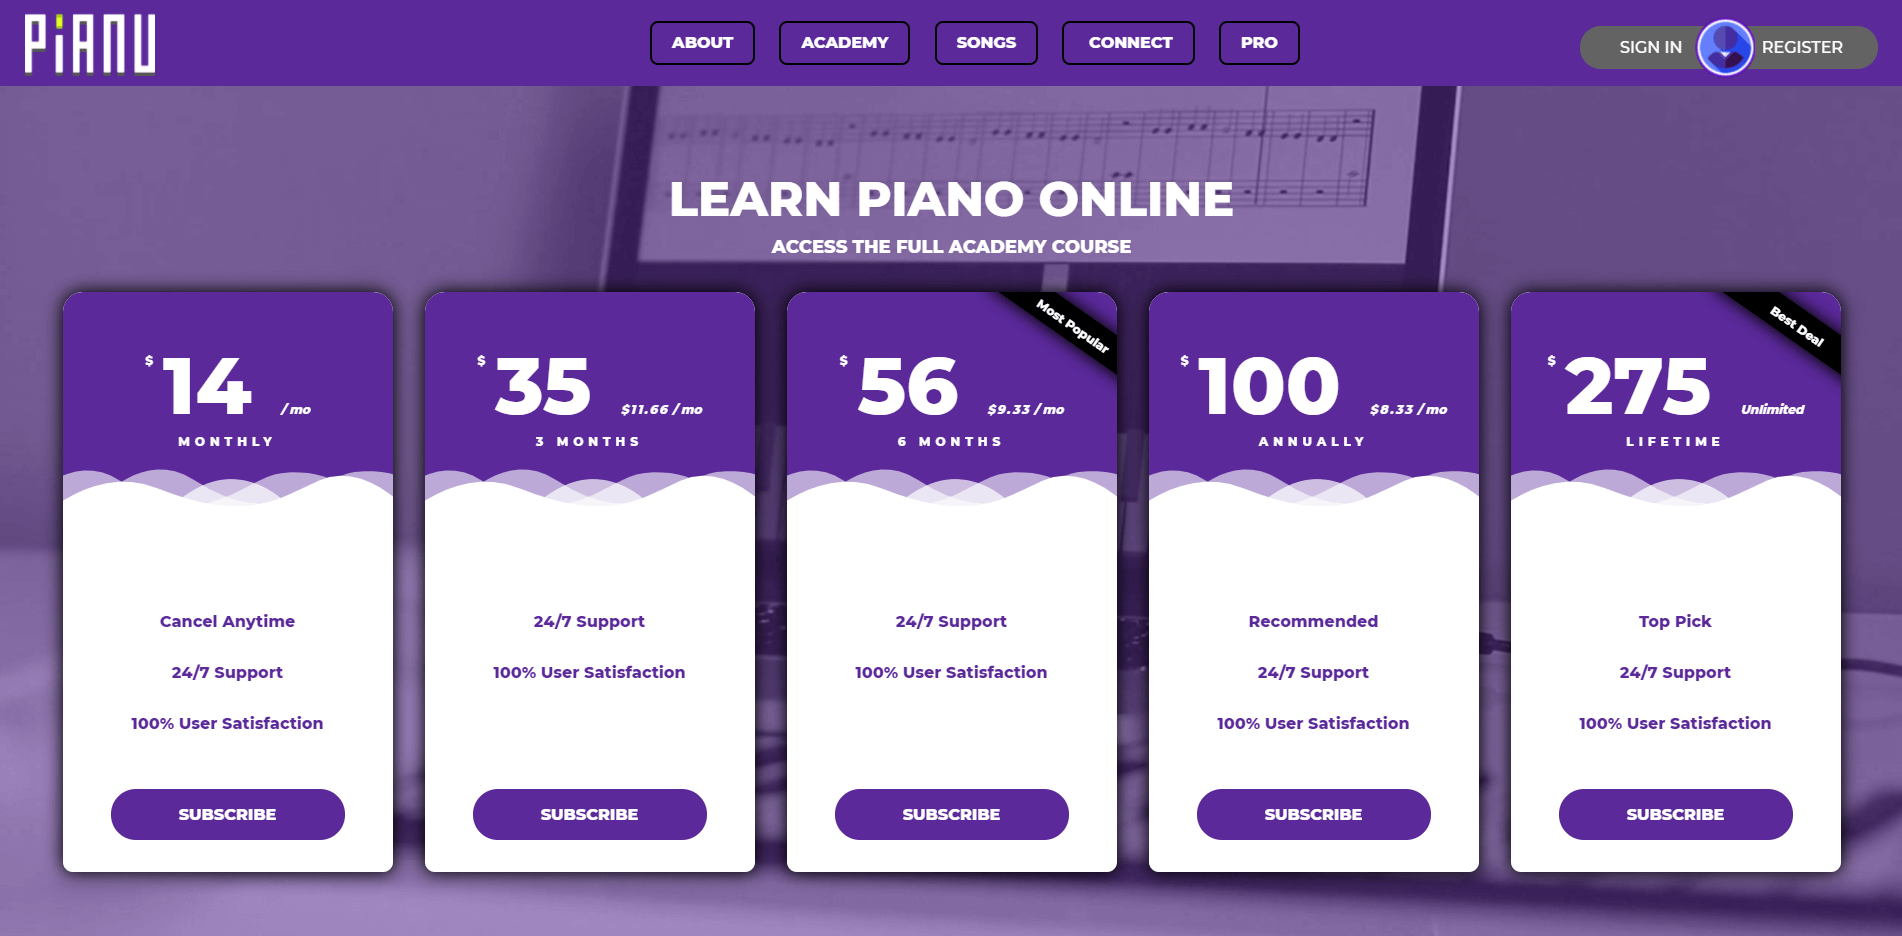
As with any product, one of the easiest and most straightforward ways to make money off your content is to sell it.

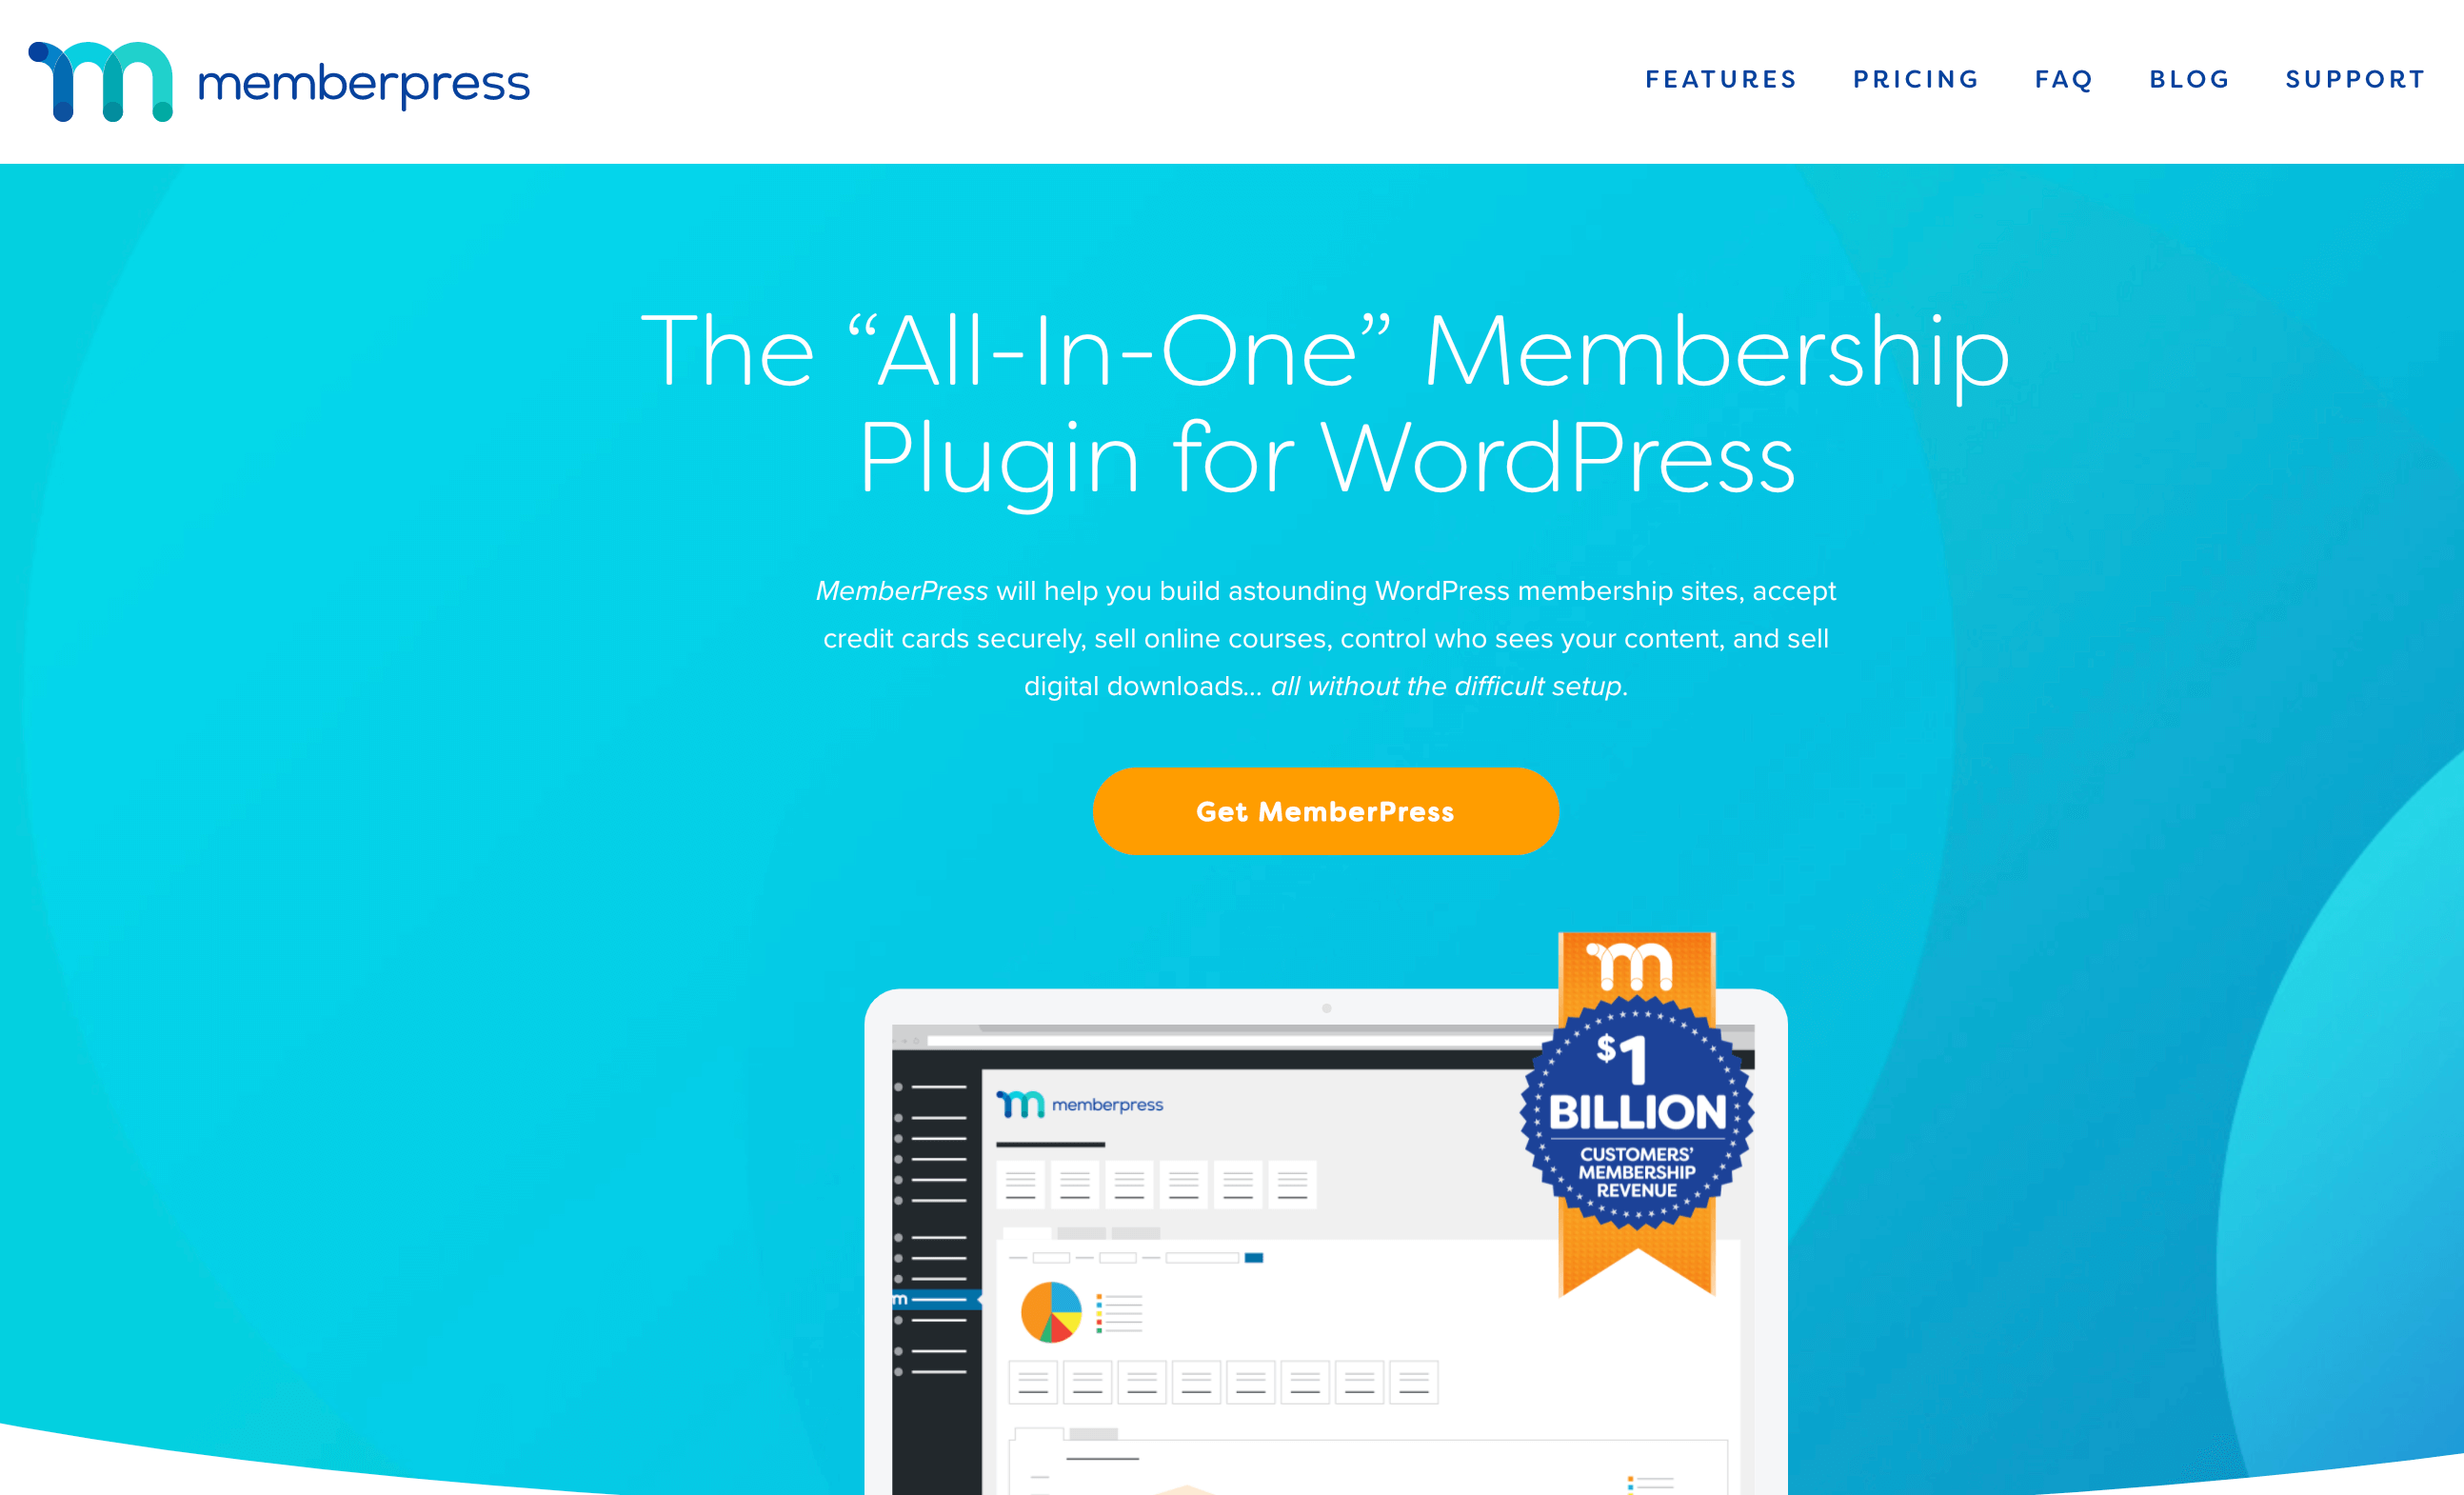
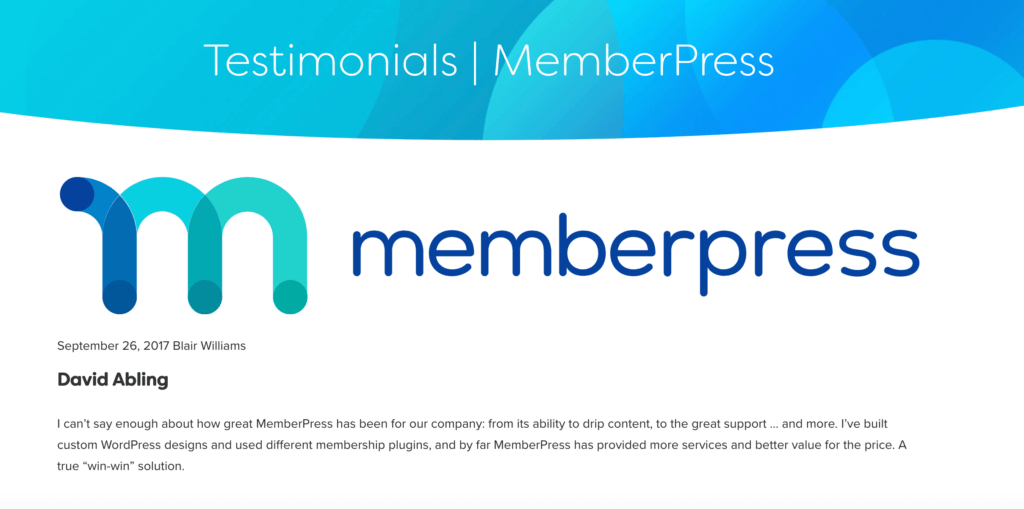
If you have a WordPress site (and what blogger doesn't?), a high-quality paywall plugin is your best bet. The most popular one out there is MemberPress – and for good reason.

The MemberPress homepage.

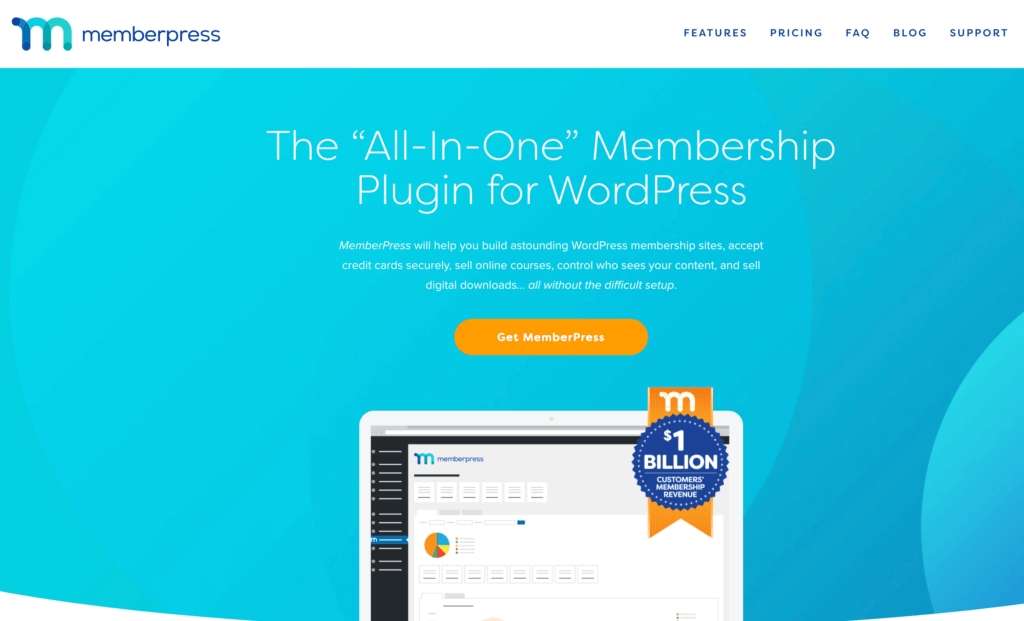
The plugin is super easy to use, requires no coding, and lets you do things like…

  • Create a new paywalled site
  • Add subscriptions to your existing site
  • Use super customized paywalling with flexible sampling (lead-in, metered, and hard paywalls) like The Wall Street Journal or The New York Times, for example
  • Create and sell online courses
  • Build a dedicated community
  • Accept credit cards and digital wallet payments right on your site

The real beauty of MemberPress is in its Content Protection Rules and Memberships functions.

Through Content Protection Rules, you can really drill down how you monetize your content. You can protect…

  • All content – Your entire website
  • Posts categorized and posts tagged – All content under a specific category or tag
  • Single posts – Any individual post
  • All posts – All posts except those you specify as exempt
  • Custom URIs – Specific URLs (super useful if you want to restrict content like ebooks or digital downloads)
  • Custom post types – Any custom post type you create

MemberPress basically makes your blog work like any of the big, fancy online publications out there. And if you run into any issues with the plugin – or your site in general – reach out to the MemberPress wizards over at WP Tech Support.

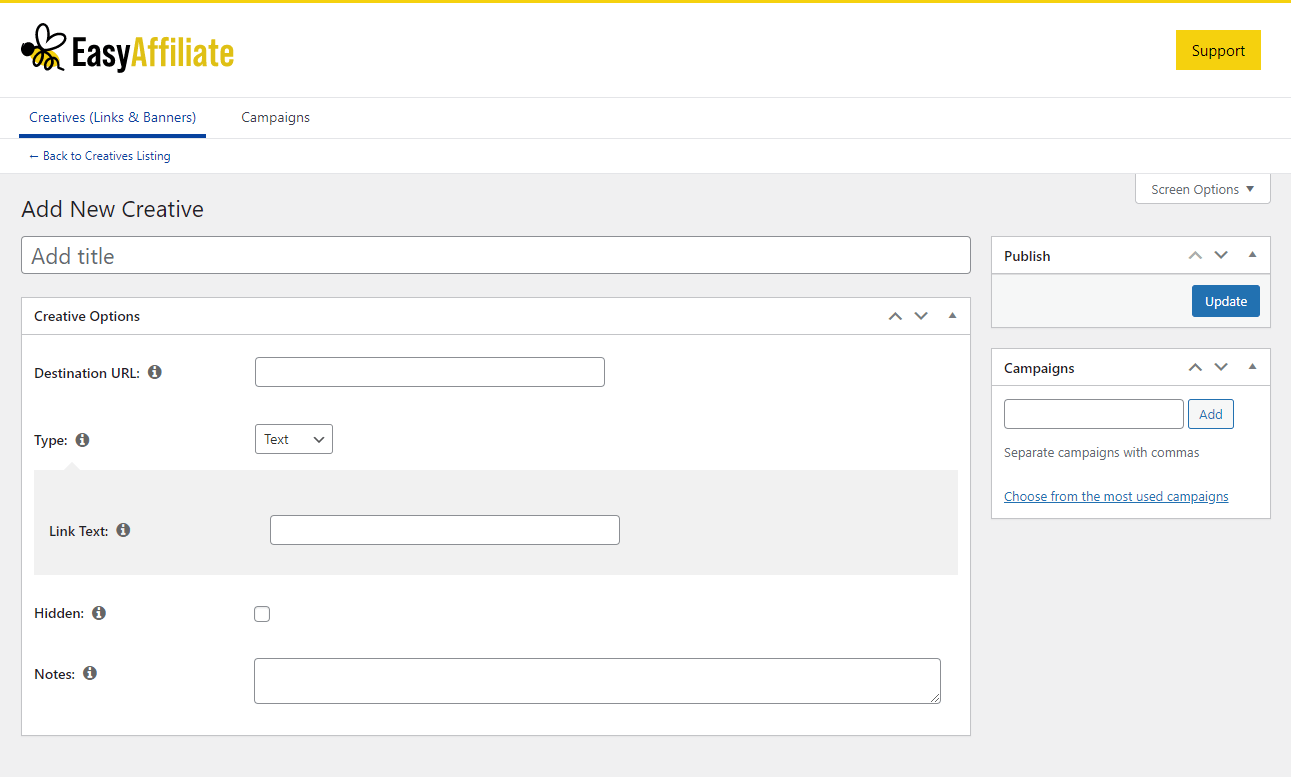
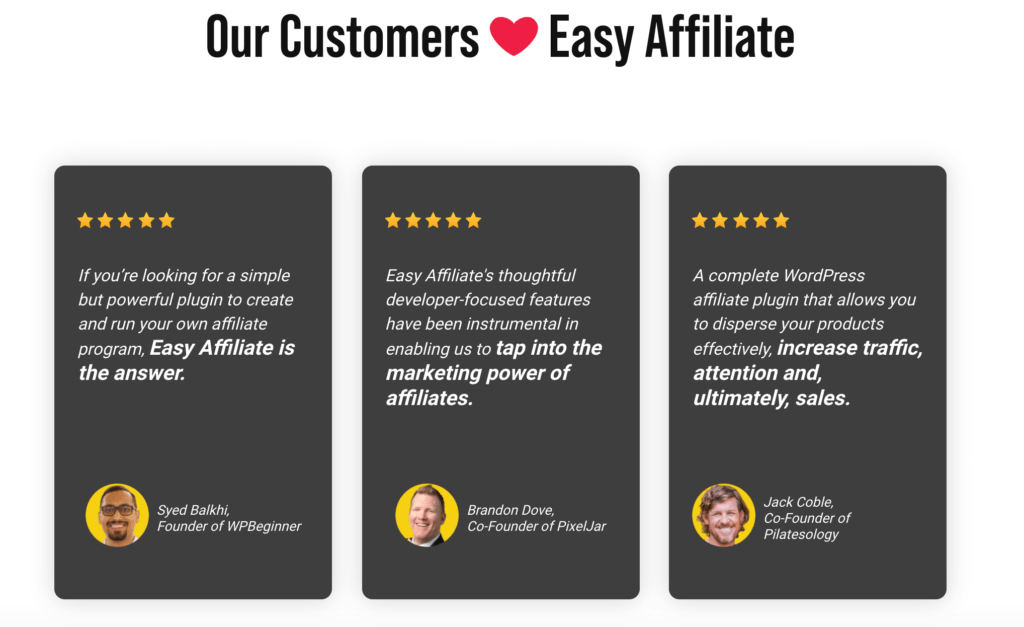
2. Become an Affiliate Marketer

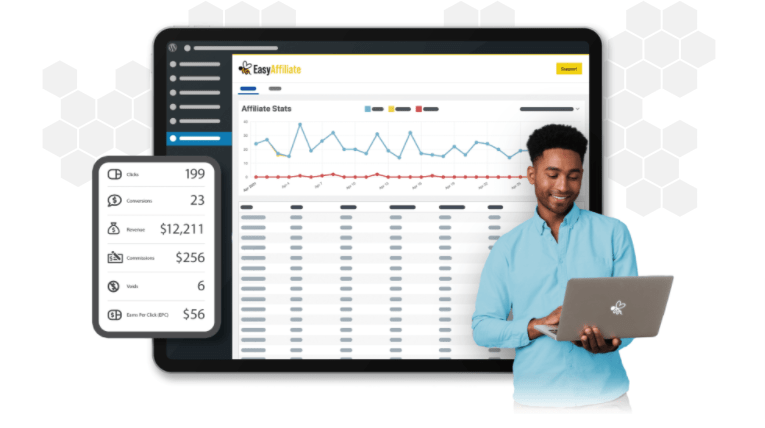
As an affiliate marketer, you’ll partner with third-party businesses and promote their products and services via your blog. You’ll earn a commission for all sales originating from your unique affiliate links. 

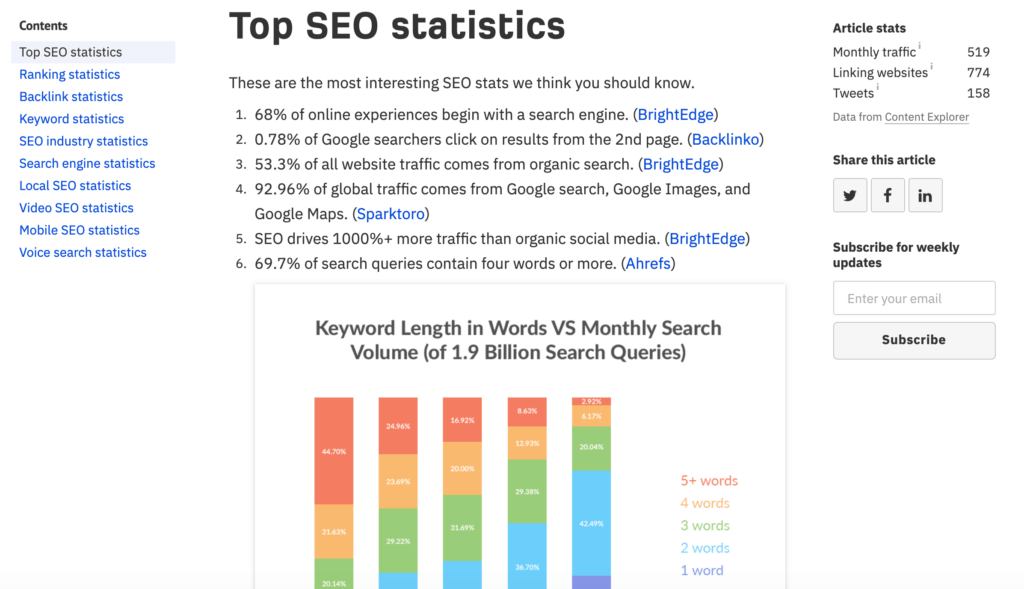
Affiliate marketing is big business. With annual spending estimated at $12 billion, bloggers have a huge opportunity to make money online. 

A quick search will reveal hundreds of affiliate programs that you can join. To help drive conversions, we recommend searching for a partner or products that will appeal to your existing readership.

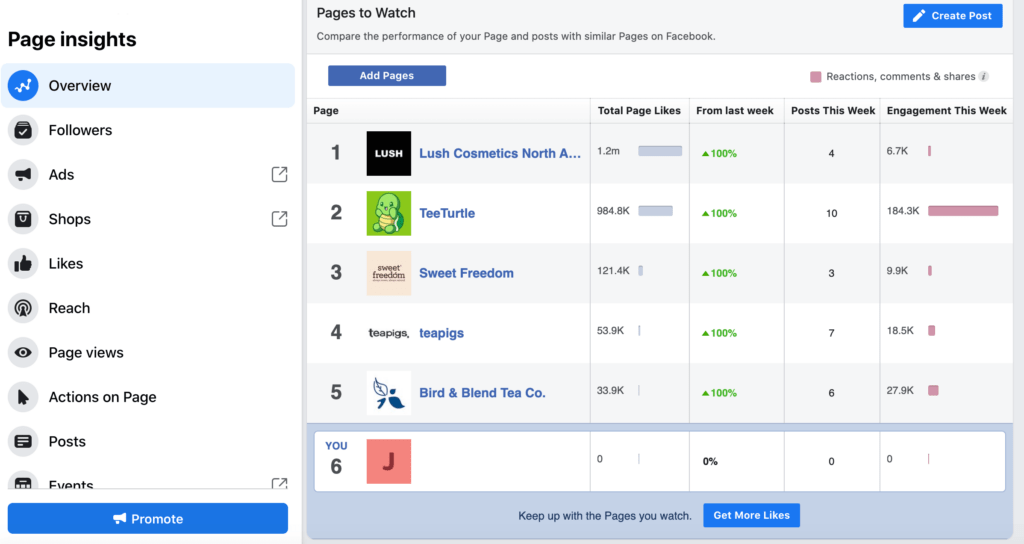
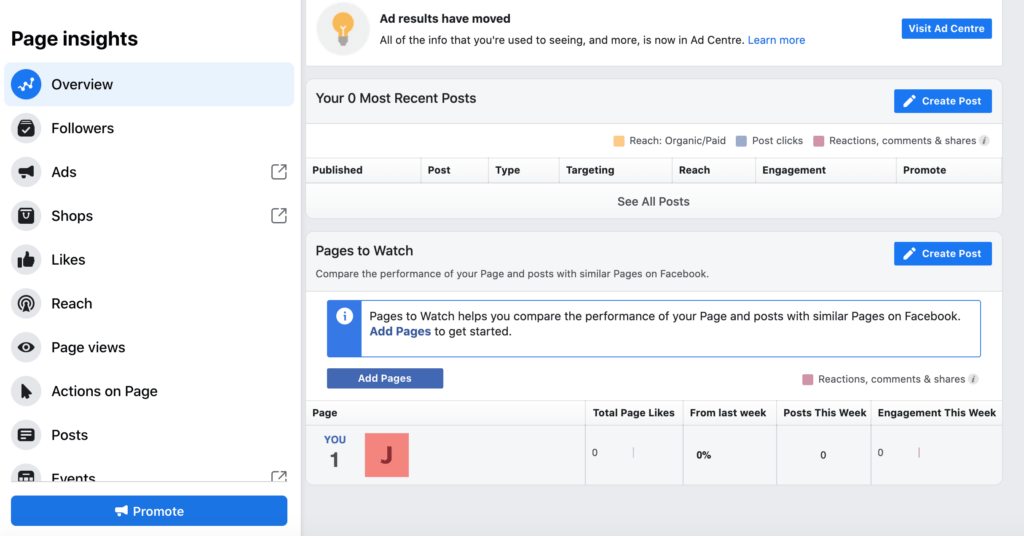
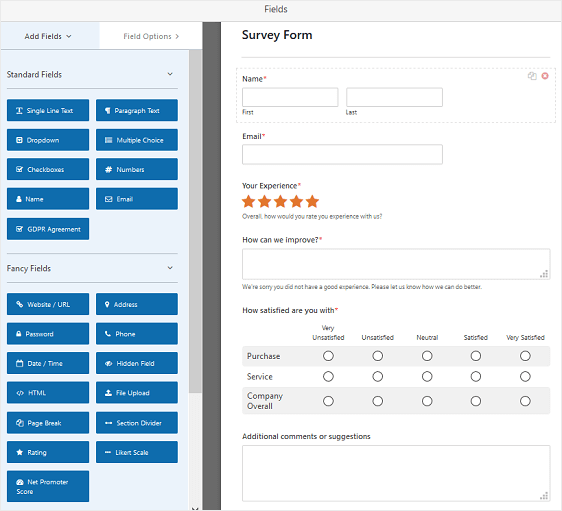
If you’re unsure about your audience demographics, then you can learn more about your visitors using a tool such as Google Analytics:

The Google Analytics dashboard.

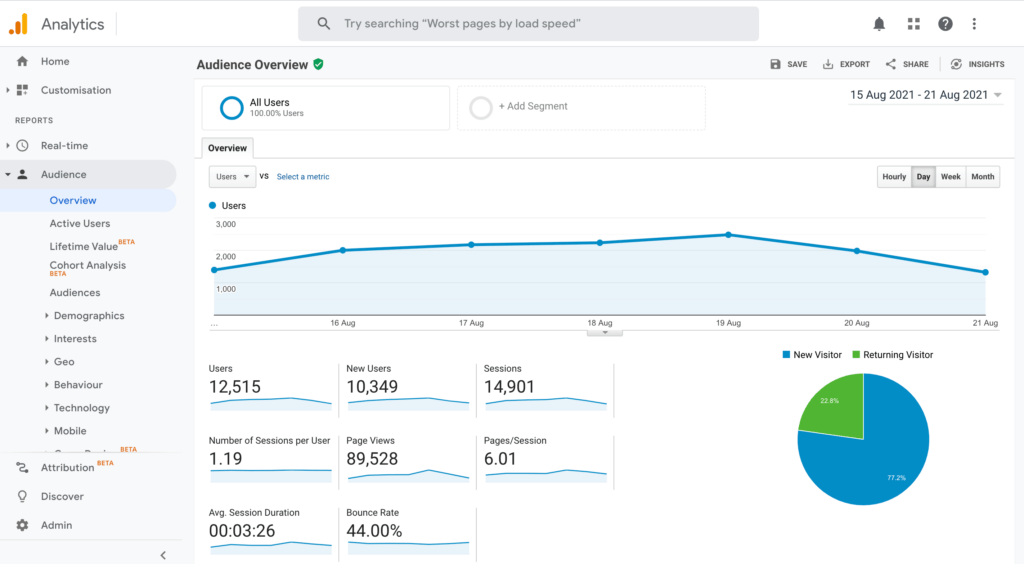
It’s also wise to feature products related to your blog’s content. For example, if you write about your experiences as a parent, it may make sense to promote baby-themed products.

These relevant promotions will make your affiliate links feel more authentic, which can help drive conversions.

While using affiliate marketing is one of the most popular ways to generate money from blogging, affiliate URLs aren’t always pretty.

These links are often long and complex with obvious tracking codes. They can be off-putting to your readers, who may even wonder whether these odd-looking URLs are spam.

For this reason, we recommend simplifying your affiliate URLs using a link shortener such as the Pretty Links plugin:

Monetize your blog using the Pretty Links plugin.

With Pretty Links, you don't have to worry about lengthy URLs scaring your readers away. Simply enter the target link into the dashboard. Then, the plugin will generate a shorter, neater alternative, ready for you to post to your blog.

3. Enrol in an Advertising Network

Many businesses, including blogs, generate revenue by selling advertising space. There are various ad networks, but Google AdSense is one of the biggest platforms. In fact, it is used by over 38 million blogs and websites.

All of Google’s ads are mobile-responsive, so you can earn revenue regardless of whether readers are using a desktop, smartphone, or tablet.

Google even tailors these adverts based on the visitor’s geographical location, which is great for driving conversions.

There are multiple ways to display Google advertisements on your blog, but WordPress users may want to check out Site Kit. This plugin adds a range of popular Google services to your WordPress dashboard, including Google AdSense:

The Google Site Kit plugin.

After activating and configuring this plugin, you’ll need to wait for Google to approve your blog. However, as soon as you get the go-ahead, it will start displaying ads across your site.

Site Kit will even optimize your advertisements automatically by determining their optimal sizes, types, and placements. With this tool, you can avoid alienating your readers by displaying intrusive or irrelevant adverts. 

4. Add Buy Now Buttons to Your Blog Posts

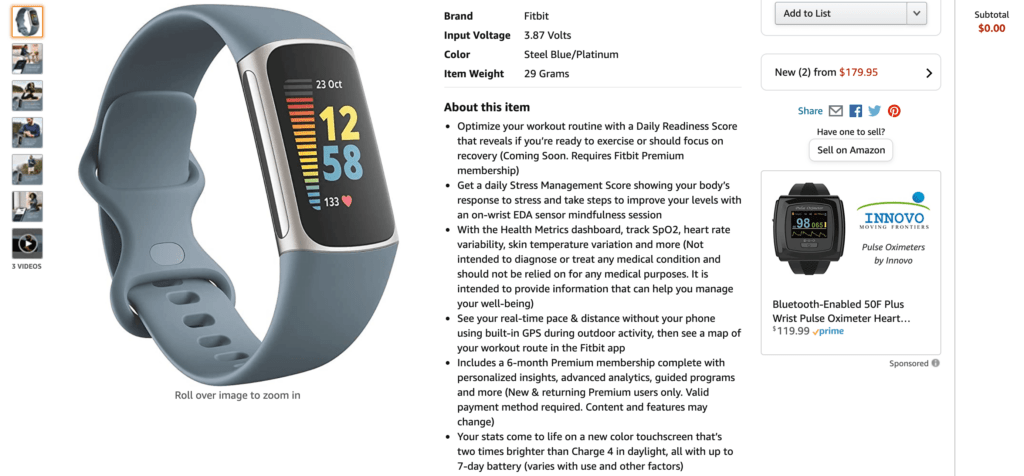
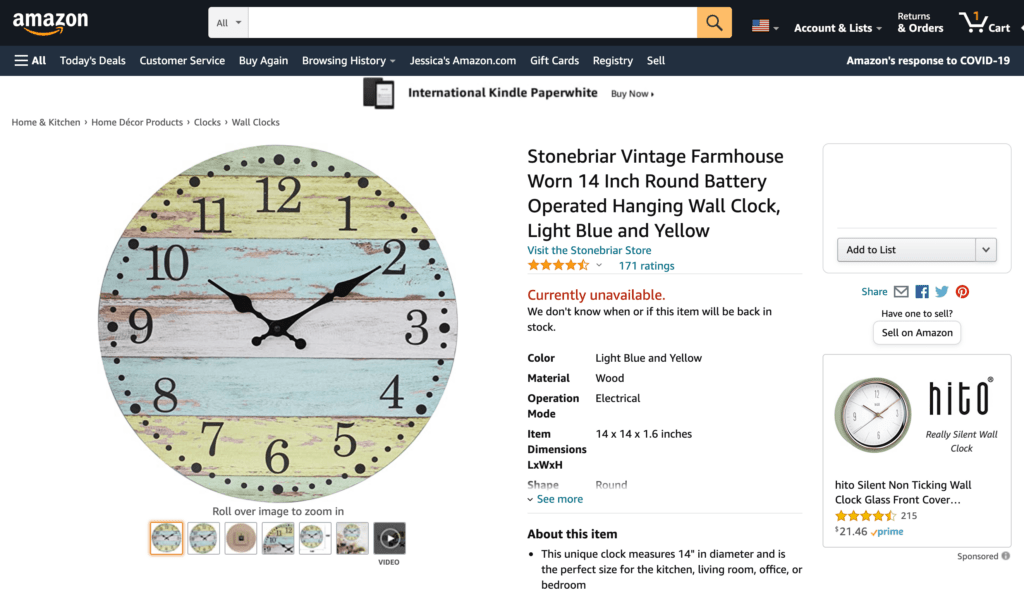
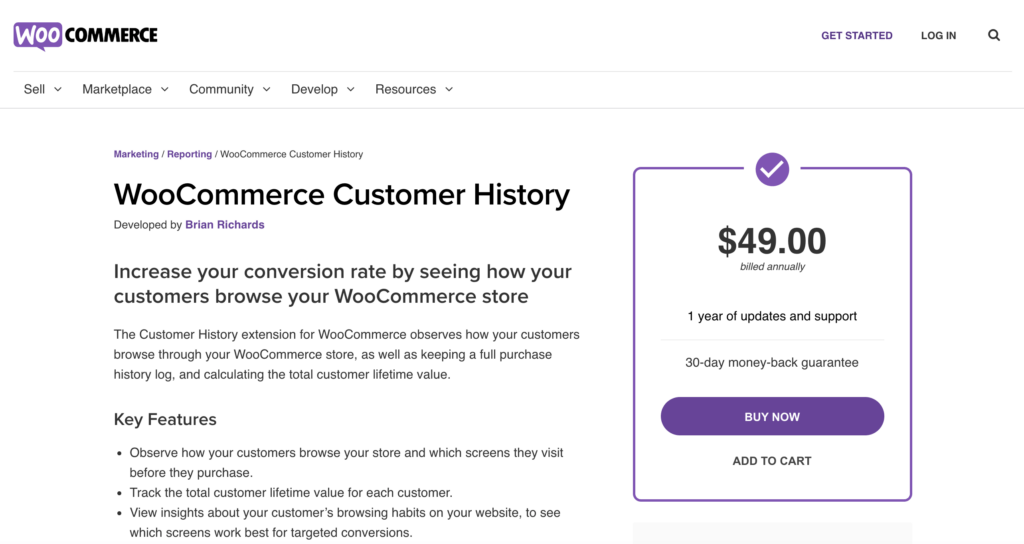
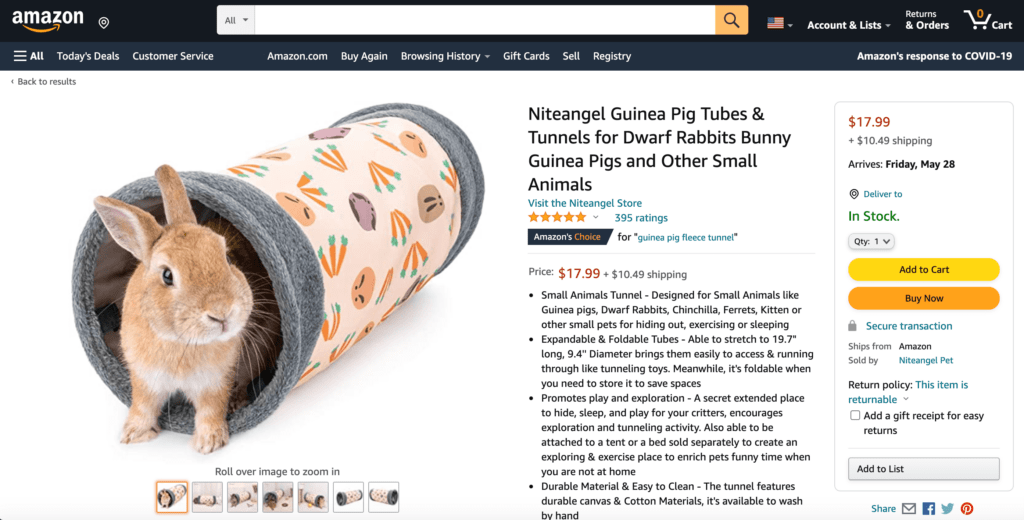
Some of the biggest websites in the world use buy now buttons to encourage visitors to make a purchase. These buttons simplify the purchasing process by enabling customers to jump straight to checkout:

An example of a buy now button.

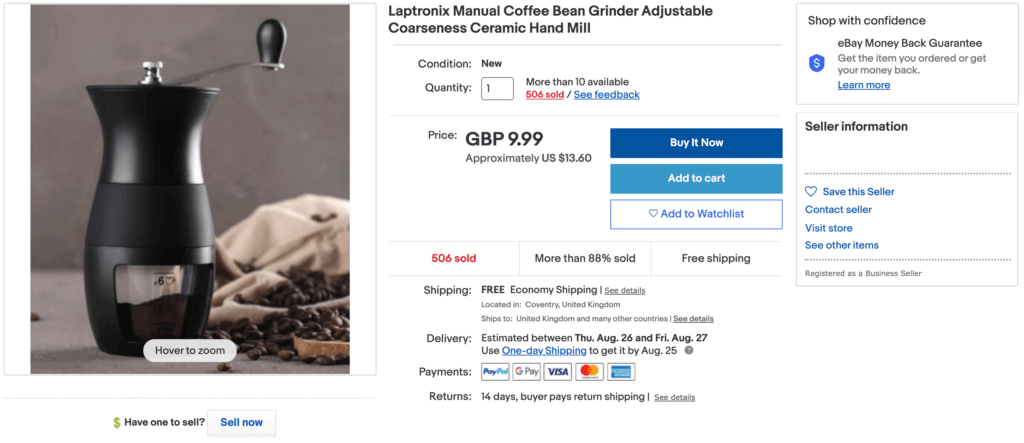
Although they’re commonly associated with ecommerce giants such as Amazon and eBay, you can add buy now buttons to your blog posts. If you sell products or services in addition to writing articles, these buttons can convert your readers into customers.

Alternatively, you can use buy now buttons to promote your affiliate URLs if you're part of an affiliate network. 

Even if you don’t have any products to promote, you can still monetize your site using buy now buttons. Many writers publish blogs for free but ask visitors to donate if they enjoyed the content.

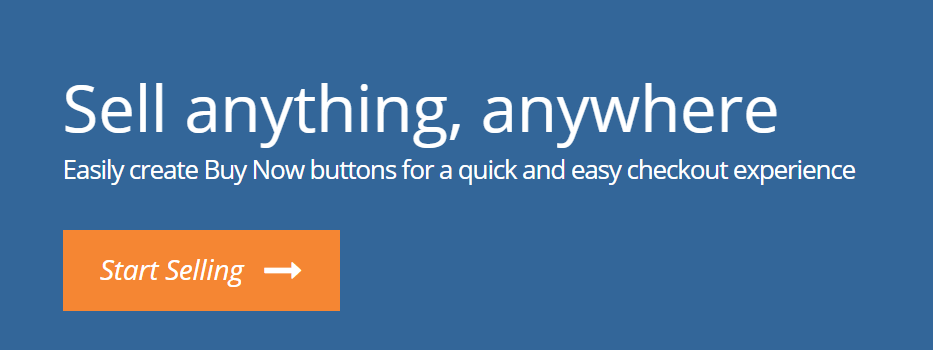
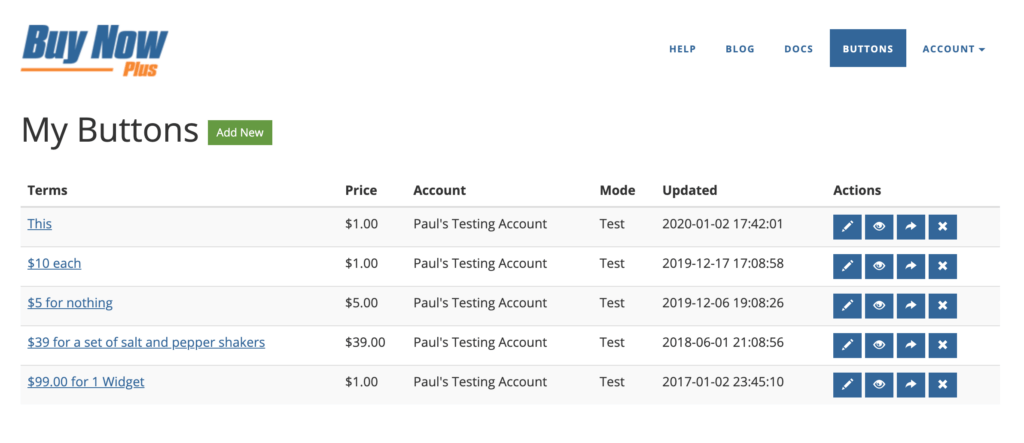
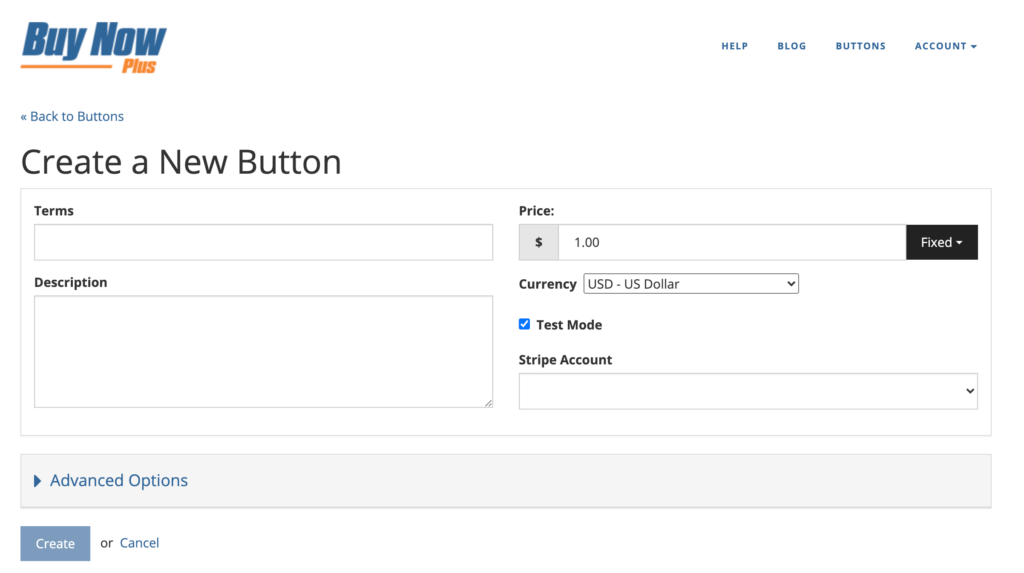
If you create your buttons using a flexible service such as our Buy Now Plus plugin, then it’s easy to transform them into donation prompts: 

The Buy Now Plus dashboard.

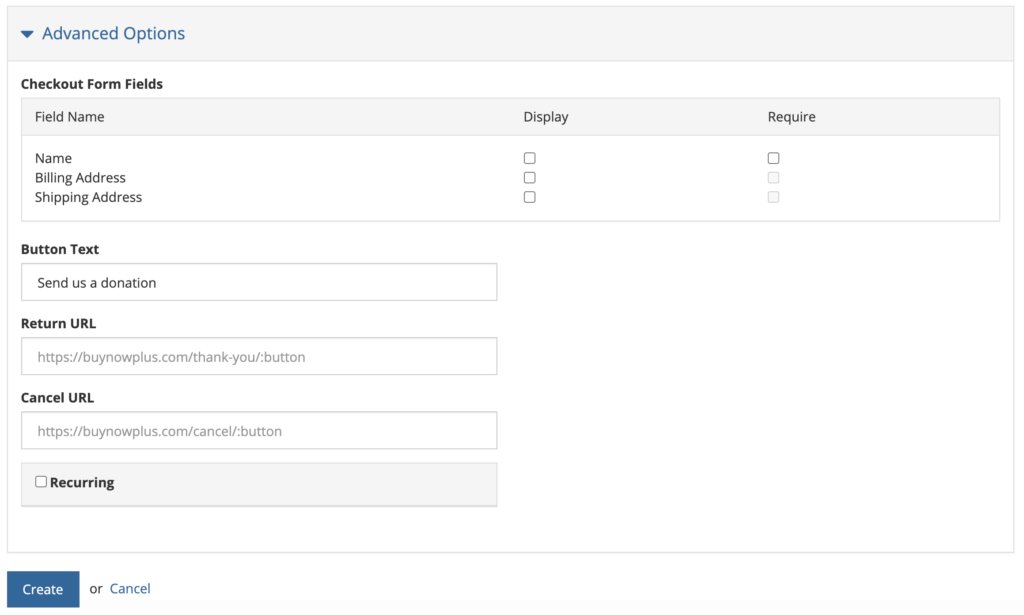
By simply changing the button’s label, you can start accepting donations. Buy Now Plus even supports variable pricing, so your readers can choose how much money to send you. This flexibility may result in more contributions. 

Conclusion

Creating a successful blog takes time and dedication. At some point, you may want to be reimbursed for all of your hard work. 

Let’s quickly recap three ways to monetize your blog:

  1. Become an affiliate marketer, using a plugin such as Pretty Links.
  2. Enrol in an advertising network.
  3. Add buy now buttons to your blog posts, with our Buy Now Plus service.

Do you have any questions about how to make money as a blogger? Let us know in the comments section below!

If you liked this post, be sure to follow us on Twitter, Facebook, and LinkedIn.

How to Use Stripe Reports to Grow Your Business

A quick glance at the Stripe dashboard is all it takes to get an overview of your finances. However, if you really want to maximize your profits, then it’s time to dig deeper. 

Fortunately, the Stripe platform has everything you need to generate in-depth reports. Armed with this information, you’ll be able to see the impact of all your marketing and advertising activities.

You might even be able to root out suspicious payments, including fraudsters.

In this post, we’ll explore the purpose of Stripe reports and why they’re essential for achieving success.

We’ll then show you how to generate the detailed financial accounts you need to help your business reach its full potential. Let’s get started!

An Introduction to Stripe Reports (And Why They’re Important)

Payments are the lifeblood of your business, so it’s vital that you monitor them carefully. This is where Stripe reports come in. 

Stripe’s reports generally fall into two categories. Firstly, balance reports are an itemized list of all the transactions made from your account, similar to a traditional bank statement:

An example of a Stripe report.

Meanwhile, the payout reconciliation report helps you match the payments received in your bank account with the activity in your Stripe account.

As such, payout reconciliation reports can be handy if you use Stripe to make payments via a business bank account. Note that these documents are only available if you have automatic payouts enabled. 

By analyzing these reports, you can gain a deeper insight into your customers. You may also identify opportunities to increase your sales.

For example, some data might indicate that you’re attracting high traffic from a particular region. In this scenario, you might devise marketing strategies that specifically target this demographic. Therefore, you could convert this influx of visitors into paying customers. 

Additionally, Stripe reports can help you zero in on fraudulent activity. You can then take steps to limit the financial impact on your business. 

The Two Types of Stripe Reports (And How They Work)

To take a closer look at Stripe’s reports, log into your dashboard and select Reports from the left-hand menu.

Once you’re there, you’re ready to explore Stripe’s payment reconciliation and balance reports in more detail. Let’s dive in! 

1. Stripe’s Balance Report 

To export your balance report, navigate to Reports > Balance in the Stripe dashboard. You can then use the controls to set a date range.

The Stripe dashboard will update to display your starting and ending balance for the selected period. It will also show a high-level summary of your activity during this period. This data can be useful for getting a quick overview of your finances. 

For a more in-depth look, click on Download. This launches a popup where you can specify the number of columns to include in your report: 

The Stripe Report dashboard.

Next, click on Show. You can then choose which columns to display in your report: 

Stripe's Download Report dialog.

When you’re happy with your settings, click on Download. Stripe will now generate your report as a Comma-Separated Values (CSV) file.

This document can help evaluate your cash flow by displaying each reporting category's gross, fee, and net values.

The report can also help you to calculate Stripe fees. This process isn't always easy, because increasing the overall sales also raises the corresponding Stripe charge.

However, monitoring the balance report ensures that you’re passing the appropriate fee on to your customers. You may also want to use this document when seeking external funding, such from as a shareholder or investor. 

2. Payout Reconciliation Report

Navigate back to the Reports tab and select Payment Reconciliation. Then, select a date range.

This section will now update to display a breakdown of the automatic payouts received during this period, grouped into reporting categories.

You can then select Download. At this point, you have the option to download a Summary. This is the data displayed in the Payout Reconciliation section of the Stripe dashboard:

The Payout Reconciliation export settings.

Alternatively, you can select Itemized. This will download a complete list of the individual transactions that are summarized in the Stripe dashboard.

If you select this option, then you can choose which reporting categories to include:

The charges and refunds settings, in the Stripe Report dashboard.

Charges include payments from cards plus any other payment methods. If you’re authorizing and capturing payments separately, then only the selected charges will be included here.

Meanwhile, Refunds will display data for all the payments you’ve refunded to your customers. Just be aware that this doesn’t include charge failures or partial capture reversals. 

After making this decision, you can use the Columns and Show/Hide controls to specify which data to include in your report. Then, click on Download

Reconciliation is an important accounting process that ensures the money spent or earned matches the money leaving or entering your account.

After generating this document, you may want to check for fraudulent activity or financial statement errors. For example, you can use source_id to connect a transaction to a particular Stripe object.

You can also use subscription_id to pinpoint how many sales come from billing subscriptions connected to your Stripe account.

How to Get the Most Out of Stripe Reports

It’s wise to check your Stripe reports regularly. This puts you in a strong position to identify any suspicious activity before it causes irreparable damage to your business. 

This data can also help you evaluate the success of your marketing and advertising efforts. For this reason, it could be smart to schedule a review following all major campaigns.

However, you can also refer to Stripe’s reports throughout your campaigns. In this way, you can refine and optimize your in-progress marketing and advertising strategies to deliver even better results.

Since these reports contain such a wealth of information, it’s important to share your findings with other departments.

Wherever possible, we recommend sharing the raw data. Your co-workers may have a unique insight or interpretation of the results.

If you’re using other financial tools, you may want to consider integrating them with your reports. By doing so, you can have a single location to analyze all of your financial data.

If you’re using QuickBooks accounting software or the cloud-based NetSuite, then you'll be happy to know that Stripe reports are compatible with both tools. 

Conclusion

Keeping a close eye on your funds is essential for any business owner. While the Stripe dashboard does provide an overview, you could benefit from analyzing detailed data records.

To help you assess the health of your business, let’s recap the two categories of Stripe reports: 

  1. Balance report: This itemized Comma-Separated Values (CSV) file can help evaluate your cash flow and accurately calculate Stripe fees. 
  2. Payout reconciliation report: A breakdown of the automatic payouts received in your bank account. It is ideal for identifying suspicious activity, including potential fraudsters. 

Do you have any other questions about how to get the most out of Stripe reports? Let us know in the comments section below!

If you liked this post, be sure to follow us on Twitter, Facebook, and LinkedIn.

How to Reduce Customer Refunds (3 Tips)

As a business owner, every sale is a success. However, not every sale is final, and sometimes customers may request a refund.

Processing these product returns can be time-consuming and frustrating, but they don’t have to be a constant part of running an online business. There are ways to reduce the number of customer refunds you receive. 

In this post, we’ll discuss why product returns are bad for business. We’ll then share three ways to keep your customers happy – and keep those hard-won dollars in your pocket. Let’s get started! 

Why It’s Important to Reduce Customer Refunds

Whenever a customer requests a refund, you have a lot of work ahead of you – for zero profit. Processing a refund requires time and effort, and it’s an unexpected drain on your resources. In fact, customers returning electronic products alone cost U.S businesses nearly $17 billion a year

Every refund is bad news for your bottom line. If you’re going to turn a profit, then it’s crucial that your product returns are few and far between. 

A customer who wants to return a product may not be in the best frame of mind. For this reason, it’s important that you maintain a high standard of professionalism and positivity throughout the entire refunding process.

If the refund experience is slow, or your staff seem unhelpful, then the customer is likely to take their refunded money and run straight to your competitors. 

A returned product may represent a short-term loss of earnings. However, losing a customer will have a long-term financial impact on your business. To minimize the short and long-term revenue losses, it’s important to take steps to reduce the number of customers who request a refund. 

How to Reduce Customer Refunds (3 Tips)

Refunds represent a major headache for all businesses. Let’s make sure your hard-won profits remain in your pocket. Here are three ways to reduce customer refunds. 

1. Write Informative and Accurate Product Descriptions

With online shopping, customers cannot physically inspect a product before hitting that buy now button. Instead, they rely on product descriptions. This is all the information shoppers have to help them make the correct purchasing decision: 

Detailed product descriptions can help you reduce customer refunds.

If your product page is incomplete, unhelpful, or outdated, there's a greater your customer will make the wrong decision. For example, they might order a piece of hardware that’s incompatible with their setup, or a jacket that’s too big.

If the customer is unhappy with the product, they’re way more likely to request a refund.

That's why all the information on your product pages should be accurate, detailed, and written in a simple and understandable way. However, there’s also the danger of overwhelming shoppers with too much text. To keep the word count to a manageable level, you might want to link to other resources where appropriate:

Reduce customer refunds with in-depth product descriptions.

For example, many clothing websites state the item’s size and then link to supporting documentation. Here, customers will find the exact body measurements for small, medium, and large sizing:

An example sizing guide.

You can also hide some content by default. Shoppers can then click to expand a section in order to access more detailed information: 

An example product description.

Every product description is different. However, you’ll typically want to highlight the product’s weight and its dimensions.

When writing your product information, it may help to refer to the descriptions used by ecommerce giants such as Amazon. This can provide valuable inspiration, and help you spot any details that are missing from your own product pages. 

2. Provide Lots of Visuals

As the saying goes, ​​a picture is worth a thousand words. While shoppers cannot physically see the product in real-life, you can provide lots of high-resolution images:

How to reduce customer refunds with high-resolution images.

Ideally, we recommend uploading at least four photos of each product. These images should show the item’s front, back, and both sides.

Product images are crucial, but they can also add a significant amount of weight to your website. To help preserve your site’s performance, we recommend using an image compression plugin. 

Compression reduces the size of an image by removing or grouping together certain parts of the file. There are many compression solutions available, but TinyPNG is available as both an online service and a WordPress plugin:

The TinyPNG image compression plugin,

Product images are a mainstay of ecommerce stores. However, you may also want to consider creating a short video.

This can be a simple 360-degree view of the product, or something more complex, such as a demonstration of the item’s core features. If there’s a video advertisement for the product, this can help give the customer a clearer picture of what the item looks like.

3. Encourage Your Customers to Leave Reviews

According to research, shoppers are 270% more likely to purchase an item that has reviews. This makes product reviews a powerful way to boost your sales.

These reviews can also help customers make more informed purchasing decisions. By reading a customer’s honest thoughts and experiences with a product, shoppers can decide whether this is the right item for them.

It may seem crazy to give shoppers a convenient way to complain about your products. However, most consumers understand that you cannot please 100% of the people, 100% of the time.

Reading negative opinions about your products can help customers decide whether these drawbacks are deal breakers for them. This may reduce your conversion rates, but it should also reduce the number of refunds you'll need to process.

According to Bright Local, 76% of consumers are happy to leave feedback, if asked. This suggests that generating lots of customer reviews may be as easy as sending follow-up emails asking customers to review a recent purchase: 

Reviews can help you reduce customer refunds,

Some of the major mailing platforms can even automate this process. For example, ActiveCampaign makes it easy to send follow-up emails to your audience: 

ActiveCampaign homepage

Convincing customers to provide a review is only half the battle. They also need a way to upload their thoughts to your website.

If you’re selling products via WooCommerce, you're in luck. This popular ecommerce platform supports product reviews out-of-the-box. Alternatively, your customers can submit reviews via a plugin such as Site Reviews. 

Conclusion

As the old saying goes, the customer is always right. If someone wants to return a product, then it’s often best to provide their refund with no questions asked, rather than risking losing the customer completely. 

With this in mind, let’s quickly recap how to ensure that your customers are happy with their purchase:

  1. Write informative and accurate product descriptions.
  2. Provide lots of visuals.
  3. Encourage your customers to leave reviews.

Do you have any questions about reducing the number of product returns? Let us know in the comments section below!

If you liked this post, be sure to follow us on Twitter, Facebook, and LinkedIn.

3 Easy Ways to Make Your First Online Sale

The digital age has brought a lot of changes for salespeople. Even brick-and-mortar purchases are shifting to the ecommerce stage.

If you haven’t made your first online sale yet, all of these developments might make it hard to know where to start.

Fortunately, the process doesn’t have to be difficult. By focusing on your audience, you can successfully start selling your products online – even if you don’t have a website.

In this article, we’ll look at why you should consider shifting to an ecommerce model. Then we’ll show you three strategies for getting started with your first online sale. Let’s dive right in!

Why Online Sales Are the Wave of the Future

Let’s be honest: ecommerce is here to stay. In fact, recent studies have predicted that U.S. retail ecommerce revenue will grow an annual 12.3% by 2024.

This is a huge opportunity for both brick-and-mortar retailers and newcomers.

Additionally, there are unique benefits to an ecommerce approach. One of these is that online purchases are generally more resistant to circumstances that are hard on physical stores.

For example, the above statistic predicts accelerated growth despite recent COVID-related downturns.

There’s also typically a lower investment for online sales. You don’t need to maintain a storefront or pay someone to stock your shelves.

That means you can use this saved money and flexibility to further develop your business, such as by making it more environmentally friendly.

Finally, there’s substantial demand for online purchases. Up to 60% of consumers who have shifted to online purchases aren’t planning on returning to physical ones. Therefore, you could risk losing customers if you don’t make the switch with them.

How to Make Your First Online Sale (3 Easy Ways)

Fortunately, you can begin selling online quickly by focusing on one key element: your audience. Here are three ways to cater to your shoppers and make your first online sale.

1. Leverage Your Social Media Presence

Social media platforms are already filled with active users. Furthermore, those who have followed your business profile have shown that they’re interested in your products.

That's why social media networks can be an excellent way to directly pinpoint your current fans.

All you have to do is provide these already interested users with an easy way to purchase your offerings online. If you’re searching for the perfect tool to help you, look no further than Buy Now Plus:

A banner for Buy Now Plus, an easy way to make your first online sale.

Our program makes selling online easy. Best of all, you don’t even need to have a website. You can instead provide a buy now button directly on your social media profiles with a simple link.

That means your users won’t need to leave the platform. We’ll process their purchases through our secure servers. So your customers can be confident in the safety of their personal data.

In addition to potential first customers, social media can also help you develop a plan to keep them coming back.

These platforms make it simple to interact with brands and share feedback. You can consider Oreo’s official Facebook page as an example:

An image of Oreo's Facebook page complete with user feedback.

Your profile is the perfect place to start building audience engagement. You might also gain a clearer idea of what your customers love about your products.

With a little bit of outreach, you might even be able to find influencers who will enthusiastically promote your brand.

2. Build an Email List of Potential Customers

Social media has its benefits, but more traditional email marketing still holds a lot of power. Recent figures show that there are about 4 billion email users around the world.

As you can imagine, using these platforms is a reliable way to reach most of your potential consumers.

In addition popularity, using emails also has several other benefits. For example, emails are easier to personalize.

You can address them to individuals rather than groups. This personal touch may encourage recipients to open the messages.

By the same token, this allows you to create more targeted messages. You might decide to make your first online sale by offering a special discount to those who have been customers in your physical store, for example.

Fortunately, there are several ways to start your first email list. For example, you might collect this information from an already popular social media account.

If you have your own website, you can also promote your email list there.

Additionally, email marketing itself doesn’t have to be complicated. Simply providing your recipients with an easy link to access a specific product can be very effective:

A simple example of effective email marketing from Brooks Running.

We also encourage you to build your email list as your customers make more purchases. Consider giving your shoppers the option to sign up for special deals.

Then, you can take advantage of your growing list with some of the best email campaign strategies for maximum effect.

3. Consider Affiliate Marketing

You don’t need to make your first sale alone. On the contrary, using affiliate marketing can be an effective way to launch your online plans.

Affiliate marketing is where you work with individuals in your niche to advertise your brand. Then, if their advertising results in a sale, you pay them a commission.

This process offers several benefits. For one, influencers are often very connected to niche markets. Therefore, they can help you reach potential customers who you may not have even considered.

Additionally, affiliate marketing can be very cost-effective. The commission structure means you only have to pay for marketing that works. This is an ideal arrangement if you’re just starting out and operating on a tight budget.

If you’re looking for a tool to help you kick-start an affiliate marketing program, you can consider our sister plugin, Easy Affiliate:

Easy Affiliate homepage.

Easy Affiliate makes it simple to start a program, even if you haven’t made your first sale yet.

You can begin with a few affiliates and use them to grow your customer base. Then, as your sales increase, you can scale your program to match.

Other powerful Easy Affiliate features can support you as well, such as built-in email marketing and real-time reports to help you refine your approach. If these elements sound appealing, consider checking out how to start an affiliate program.

Conclusion

We won’t lie to you – making your first online sale can be a real challenge. With so many new elements to consider, it’s normal to feel a bit overwhelmed. Fortunately, a straightforward audience-centric strategy can go a long way.

In this article, we covered three ways to reach out to your shoppers and make your first online sale:

  1. Leverage your existing social media following.
  2. Craft an email list of interested customers.
  3. Consider affiliate marketing to expand your reach.

Do you have any questions about shifting to online sales? Let us know in the comments section below!

If you liked this post, be sure to follow us on Twitter, Facebook, and LinkedIn.

How to Write a Small Business Plan (4 Key Elements to Include)

When you have a brilliant business idea, it’s tempting to dive straight into making your dream a reality. However, without a plan, you may struggle to motivate your new employees, attract the best partners, or secure investor capital.

This is where a business plan comes in.

By taking the time to create this formal document, you can transform your idea into something tangible, and convince everyone to get behind your organization.

In this post, we’ll explore what a business plan is and why every company should have one. We’ll then discuss the four essential elements of any effective small business strategy. Let’s get started!

An Introduction to Small Business Plans (And Why They’re Important)

At a high level, a business plan is a written document that defines what your company is, the activities it performs, its core objectives, and how you’re going to achieve those objectives.

Many startups create this document before beginning operations, to help them explore whether their brilliant idea might actually become a viable business.

This plan can be used internally, but also externally. If you’re seeking investment from third parties, an effective business plan can help you secure funding even if you don't have a proven track record:

An example small business plan.

Although they’re useful tools for startups, many established companies treat their business plans as internal road maps.

By constantly referring to this document, you can evaluate whether you’re on track to achieving your goals, or whether you might need to adjust your operations. For this reason, we recommend that all companies maintain an up-to-date business plan.

This document may also help you realize that your goals have evolved, and that you need to adjust your approach as a result. It’s not uncommon for an established company to create an entirely new business plan to reflect a change of direction.

How to Write a Small Business Plan (4 Key Elements to Include)

Before we get to the list, we thought we'd throw you an idea. While you can save money creating your business plan on your own, it might be worth it in the long run to consult with an expert.

Platforms like Fiverr are a great place to find someone who can help you make sure you're starting out on the right foot.

That said, no two business plans are identical. However, there are some common elements that you’ll typically include in your plan. To help you structure this important document, here are four key elements you may want to incorporate.

1. Executive Summary

This section outlines your company and its mission statement. It’s also a good idea to provide information about your products and services, plus an overview of your leadership, employees, operations, and location.

If you plan to ask for financial backing, you may also want to include a high-level overview of your growth plans and some basic financial information:

An executive summary.

Although all parts of your business plan are important, we recommend prioritizing the executive summary.

This is because busy investors, banks, and potential business partners may decide whether to study your business plan in more detail based on the executive summary alone.

As the saying goes: “You never get a second chance to make a first impression”. Therefore, if your summary doesn’t contain exactly the information a person is looking for, they may dismiss your plan from the first page.

2. Products, Services, and Market Analysis

Next, you can go into detail about your products and services. You’ll typically want to include pricing, benefits to the customer, and your unique selling point (USP).

And if you’re performing any research and development, now is the time to mention it:

A small business plan.

It’s also smart to disclose your plans for intellectual property, such as copyright or patent filings. For some industries, it may also make sense to go into detail regarding the production and manufacturing process.

In addition to defining what your business has to offer, it’s important to demonstrate an understanding of where your products and services will fit within the industry.

This means exploring the competition, their strengths and weaknesses, and how challenging it will be to acquire part of their market share. Throughout this section, it’s also smart to communicate an understanding of the expected demand for your particular products and services.

3. Financial Planning and Budget

Financial planning and future projections are an essential part of any business plan. Even if the document is for internal use only, this section can help you budget and balance your cash flow:

Financial planning and budgeting information.

As part of your financial planning, we recommend including staffing, development, manufacturing, and marketing costs.

If you’re seeking outside investment, you may want to go into more detail, and provide targets and estimates spanning the first few years of your business:

Projected financial data.

While you may feel passionate about your new venture, it’s important to be realistic. An overly optimistic business plan that ignores weaknesses, potential pitfalls, and threats is unlikely to be well-received by potential investors and business partners.

Even worse, if you overestimate your revenue, this can lead to increased overheads and perhaps even a cash flow crisis.

To help keep your plan grounded in reality, only make claims that you can support with hard evidence. You might weave this proof into your business plan or include it as part of an appendix.

As an alternative, you might simply have this data on hand in case a potential investor requests more information. The only rule is that this evidence must exist.

4. An Appendix

An effective business plan will strike a balance between providing enough detail and remaining focused on what the reader needs to know.

Creating a comprehensive, detailed, and extensive plan may feel like you’re setting your business up for success.

However, lengthy documents are notoriously difficult to maintain. By creating an exhaustive business plan now, you may find that this plan is rarely used in practice.

While creating the document, it’s wise to constantly ask yourself whether each piece of information might be better suited to an appendix. In particular, detailed financial forecasts, market research data, product literature, and technical specifications are usually better included in an index.

This ensures that detailed information is on hand for readers who want to delve into the finer points, without distracting from the flow of the document.

Conclusion

We’re not going to pretend that starting a business is easy. However, with some careful planning, you can maximize your chances of turning your brilliant idea into a world-class business.

To set you on the road to success, let’s recap four things to include in your small business plan:

  1. Executive summary
  2. Products, services, and market analysis
  3. Financial planning and budget
  4. An appendix

Do you have any questions about how to write an effective small business plan? Let us know in the comments section below!

If you liked this post, be sure to follow us on Twitter, Facebook, and LinkedIn.

How to Start Your Own Affiliate Marketing Program (In 3 Steps)

It might seem like influencers are everywhere these days. However, you're not just seeing things – working with these representatives is a popular and effective way to promote a brand.

You might be wondering how to leverage this power by starting your own affiliate marketing program.

Fortunately, the process doesn't have to be difficult. By following a few best practices and focusing on the essential elements, you can build a profitable affiliate program for your brand.

In this article, we'll cover a few reasons you might want to consider starting an affiliate marketing program. Then we'll show you how to create your own in three simple steps. Let's get to it!

Why You Might Want to Start an Affiliate Marketing Program

An affiliate marketing program is a network of influencers. You connect with respected people within your niche, and they promote your products to their followers. In return, you pay them a commission from any resulting sales.

There are many benefits to running an affiliate program. For one thing, it's a simple way to spread the word about your products. You also don't have to pay unless a sale is made, so using influencers is cost-effective.

Influencers also get a lucrative deal. On top of commissions, affiliate links can be a passive and flexible income stream.

That means these marketers can promote your content even if they've shifted to remote work. Additionally, the influencer's audience might appreciate an informed recommendation.

With advantages for all parties, it's no wonder that affiliate marketing is a booming business. Statistics show that this market is expected to reach a value of nearly $8.2 billion by 2022. That means getting started now will be an investment in your brand's future.

How to Start Your Own Affiliate Marketing Program (In 3 Steps)

We'll now use this simple guide as a kickstart for affiliate marketing. If you're interested in promoting your business with affiliate marketing, chances are you already have a website up and running.

If not, you'll need a basic WordPress site ready before you get started with the Easy Affiliate plugin, which we'll be using in this tutorial.

Step 1: Install and Activate Easy Affiliate

Starting an affiliate marketing program can be a bit complex. It can be hard to juggle links, payments, and ads.

That's why we highly recommend you use an affiliate program management product, such as Easy Affiliate, to take care of everything for you:

Easy Affiliate homepage.

Easy Affiliate enables you to host your affiliate program on a WordPress site. It's a simple way to integrate referral marketing infrastructure into your page.

Some other powerful features that you'll unlock with Easy Affiliate include:

  • Detailed progress reports to help you perfect your approach
  • Email marketing to spread the word about your program
  • One-click payouts to make commissions easy for you and your influencers

Additionally, Easy Affiliate doesn't charge any transaction fees. Once you purchase your plan, there are no additional hidden costs. The only per-transaction fee you'll pay is to PayPal, which the plugin uses to process payments.

The program also carries a 14-day money-back guarantee, so it's safe to give it a try if you're on the fence.

First you'll want to decide on your pricing plan. The options are Basic, Plus, and Pro. We suggest starting with Basic if you're new to affiliate marketing. However, Plus and Pro might also be worth considering if you have a few sites.

After you've made your choice, download Easy Affiliate. Be sure to grab your license key as well, because you'll need it to receive crucial plugin updates. Then install and activate the plugin.

You might also want to take some time at this point to consider your strategy. Understanding the essential elements for affiliate beginners can set you up for success.

Step 2: Customize Your Main Settings

Before you get started, there are a few settings you'll want to adjust. We'll take you through the most important ones. However, you might want to thumb through Easy Affiliate's helpful articles for more information.

Let's begin with the basic settings. You can find them in your WordPress dashboard under Easy Affiliate > Settings. Your screen will differ slightly depending on your plan:

The main settings for Easy Affiliate.

If you'd rather use the built-in setup wizard, simply scroll down to the bottom of the page to find that option. You can also add elements such as your basic business info.

If you keep scrolling, you'll find an option to decide which pages will act as your affiliate pages. These pages will generate automatically when you add Easy Affiliate. However, you can also edit them from this area.

Next up, we'll take a look at the Commissions tab:

The Easy Affiliate commissions tab under settings..

Here you'll decide on your affiliate program commission structure.

You can choose to pay out commissions as a percentage of sales or as a fixed rate. Your payout settings are also in this tab. Feel free to take your time here – payments are essential for both you and your influencers.

If you want to add integrations, check out the Ecommerce and Integrations tabs. For example, you can set up one-click PayPal functions under Ecommerce.

Finally, head over over to the Advanced tab:

The Easy Affiliate advanced settings tab.

It has several useful fields, but we'll focus on the essentials for now. We encourage you to set up email notifications to keep affiliates in the loop.

Additionally, you'll need to adjust international settings if you work on a global level.

Step 3: Prepare Resources for Your Affiliates

Finally, let's get to the heart of your program: your affiliates! Supporting your influencers is the best way to help them succeed.

On top of showing them how to do things like accept credit cards without a website, you can also provide other resources.

Remain on the page from the last step. This time, navigate to the Affiliates tab:

The Affiliate tab for Easy Affiliates.

First up is Registration Type. This is where you'll determine whether affiliates can join automatically, will need to apply, or will need direct administrative approval.

For your first program, we recommend requiring an application. This will help you screen for the best candidates directly.

The Form Fields section enables you to decide what information you'll collect from influencers. You can also make it so that users are automatically added as affiliates – which is perfect if you've built your WordPress site solely for your program.

Finally, you can change the affiliate dashboard. We suggest that you take the time to add your brand's colors and a custom welcome message. Doing so is a simple yet essential part of any new website branding checklist.

Next up, we'll change gears. Easy Affiliate enables you to expand your brand with professional-looking links and banners. Go to Easy Affiliate > Creatives > Add New:

The creative creation screen for Easy Affiliates.

Simply fill in the fields to create your new link. If you'd like to add a visual element, choose Banner from the Type drop-down menu. You'll then see an option to upload an image.

Try to make several links and banners. This can help make your marketing varied yet consistent. Once you've made a few creative assets, you can provide them to affiliates so they can advertise your business in places such as their social media accounts.

Conclusion

Affiliate marketing spending is on the rise. That means there's a lot of potential for using influencers to advertise your company. Fortunately, starting your own affiliate marketing program can be simple with the right tools.

In this article, we showed you three steps to begin your affiliate program:

  1. Choose and install a pricing plan from Easy Affiliate.
  2. Customize the main settings, such as the commission structure.
  3. Help your influencers succeed with a clear structure and dynamic assets.

Do you have any questions about starting your own affiliate marketing program? Let us know in the comments section below!

If you liked this post, be sure to follow us on Twitter, Facebook, and LinkedIn.

How to Start a Membership Business (In 3 Steps)

If you sell products online, you can benefit from a strong, dedicated customer base. One of the best ways to do this is by creating your own membership site. However, you might not fully understand what that undertaking involves.

Fortunately, this format can be quite simple and accessible even to beginners. By understanding the basic format of a membership site and using the right tools, you can get your own business up and running in no time.

In this article, we’ll cover a few reasons you might want to start your own membership business. Then we’ll take you through three steps to help you begin with confidence. Let’s get started!

Why You Might Want to Start a Membership Business

A membership site is any website that has member-exclusive content. They make a profit by charging users to become members. One example of this kind of page is You Are Nourished by Lauren Gayfer:

An image of Lauren Gayfer's membership site, You Are Nourished.

Gayfer offers food-focused advice to help people live healthier lives. Her customers pay a membership fee to access the expert content and advice.

However, you can use a membership site to sell virtually any kind of content including physical items, online courses, podcasts, even a personal blog! As long as you have an audience that's interested in your content, the potential is nearly limitless.

You probably won't be surprised to know, then, that this model comes with a range of benefits. One of the major advantages is that running a membership site can enable you to be own boss and pursue your passions.

In addition to this, starting a membership business can put you in touch with other enthusiasts in your niche. Membership sites can be a great way to build an online community and network with like-minded individuals.

Finally, for business owners there's one obvious benefit: profit. Membership sites can be extremely lucrative. For example, a recent study showed that 85% of people are willing to pay for a dating membership that fits their needs. Moreover, nearly a quarter of respondents are willing to pay over $25.

For all these reasons and more, membership sites are an effective way to do what you love and make a living from it.

How to Start a Membership Business (In 3 Steps)

Starting a membership site can be a great way to make money, and it doesn't have to be complicated. The steps below should give you a general idea of how to get started.

Most importantly, you'll need a basic WordPress website set up before you begin.

Step 1: Choose a Profitable Niche

A niche is your area of focus. This is the field in which you'll offer expertise or products. With so many options available to your customers, it's a good idea to fully embrace your niche right from the beginning.

We highly recommend choosing a focus that you have a real passion for. This will make it easier to produce the large volumes of high-quality content that members may expect. However, there are other considerations as well.

It's important to consider how profitable your niche is. Even if you love something and put out stellar content, you'll need an audience that's willing to pay for it. A smart way to gauge interest is to see how many affiliate programs exist for your niche.

Moreover, it's also important to set yourself apart from competitors in your niche. Try to think of why a customer should choose your membership site over another.

For example, the popular code-learning site Codecademy offers a membership model based on computer languages. However, its landing page also emphasizes how the service will help users with the learning process:

The Codecademy membership site home page.

Codecademy also offers value in terms of user growth. This service offers multiple different coding languages. So, a user doesn't have to find a new membership site once they complete a course.

Also, consider going with a niche that is fairly broad and can be easily scaled up. Doing so may provide opportunities for business growth and increased profits in the future.

Step 2: Establish Your Membership Plans

Once you've chosen your niche, you can start thinking about your membership offerings. Most membership sites offer several pricing plans in different tiers. This system gives your audience the option to pay more for additional content.

It can also be helpful if your niche is skill-based. This is because you'll be able to target different people based on their expertise.

Alternatively, you might create tiers based on how long users will gain access to your content. The piano learning program Pianu demonstrates this approach with its pricing plans:

Pricing tiers for the membership site Pianu.

Multiple membership plans also enable you to cross-sell and upsell. As long as you don't overwhelm your audience, more tiers can mean more profit potential.

Nevertheless, a freemium model can be equally powerful. With a freemium site, you provide some of your content free of charge. Other content is placed behind a paywall.

Free content can give interested customers an idea of what your membership site is like. If you're not ready for multiple pricing plans, consider offering only one that includes a freemium element.

However you decide to organize your plans, the most important part is also the hardest: setting a price. The aim is to strike a balance between good value and healthy profits, which isn't always easy. Try keeping the anchoring effect in mind to find the perfect balance.

Step 3: Install and Set Up MemberPress

While our Buy Now Plus tool can help you accept online payments without a dedicated page, you'll also want to download a tool that can help you to set up your site for members. Fortunately, there's a powerful WordPress plugin that makes this easy – MemberPress:

The MemberPress homepage.

MemberPress is the all-in-one solution for starting your membership site business. You'll have access to all the infrastructure you need, including:

  • Fine-grained control over who has access to what content
  • The ability to sell everything from online courses to digital downloads
  • A long list of integrations to help you leverage your favorite tools

MemberPress is also user-friendly. There's no need to worry if you're not a tech whiz – that won't stop you from starting an excellent membership site business.

First, you'll need to choose your pricing plan. Each option has different features and limitations, so we recommend you read through each one closely.

Afterward, you can download the plugin, then install and activate it on your WordPress website. When the program is ready, there are a few main steps that you may want to take care of first, such as:

  • Establishing a payment method
  • Adding restricted access rules
  • Creating a registration page

For more information on how to perform these tasks, we highly recommend following the MemberPress setup guide. This document can help you start your membership site business in as few as five minutes. If you need any additional help, we recommend checking out WP Tech Support for all your support needs.

Conclusion

Starting a membership site business can seem like an overwhelming task. Between the technology involved and the planning required, you might feel like it's too much to keep track of. Fortunately, you can simplify the process by taking the right approach.

In this article, we covered three steps to help you get started with a membership website:

  1. Select a niche that is both enjoyable and profitable.
  2. Lay out your membership plan structure.
  3. Choose powerful software such as MemberPress to equip your website.

Do you have any questions about starting a membership site business? Let us know in the comments section below!

If you liked this post, be sure to follow us on Twitter, Facebook, and LinkedIn.

How to Keep It Simple and Keep Your Customers (3 Tips)

In today’s always on, always connected world, you have more opportunities than ever to communicate with your customers. However, you also have more chances to overwhelm and even alienate your target audience.

With the typical internet user suffering from information overload, you may be able to stand out from the crowd by doing less. By stripping your marketing down to its essentials, you can help even the most overwhelmed shopper make a smart purchasing decision and inspire customer loyalty. 

In this post, we’ll discuss why keeping it simple may be the key to retaining your customers. We’ll then share three tips on how to do less while achieving more. Let’s get started! 

Why Keeping It Simple May Be the Key to Retaining Your Customers

When trying to appeal to today’s tech-savvy consumer, more isn’t always better. There’s a misconception that the more content you provide, the greater your chances will be of holding the customer’s attention.

It’s easy to fall into the trap of believing that a constant stream of marketing campaigns is the only way to grow your audience. However, this may not always work.

For many shoppers, the sheer amount of online content can be completely overwhelming. If you bombard people with even more information, you may be putting them off rather than drawing them in.

With this in mind, it makes sense to focus on decision simplicity. This is where you provide your customers with just enough data to make an informed purchasing decision – and no more.

For people who are already feeling overwhelmed, this can make your business far more appealing than a competitor who is pumping out content 24/7. 

How to Keep It Simple and Keep Your Customers (3 Tips)

While it’s tempting to try and wow the customer, information overload is a very real phenomenon. By taking a less-is-more approach, you can cut through all of the noise and help your audience make stress-free purchasing decisions.

Let's take a look at how to keep it simple and keep your customers, in three easy steps. 

1. Personalize the Customer Experience

When you’re trying to appeal to your entire customer base, it’s easy to overwhelm the individual with irrelevant information. Instead of taking a one-size-fits-all approach, you may want to focus on delivering a personalized experience.

This can help minimize the amount of content the visitor has to deal with, which can simplify the purchasing decision. 

If you want to provide a personalized shopping experience, it might make sense to offer customers a membership service. This is often essential for creating a complete record of the individual’s preferences, habits, and behavior.

All of this data is invaluable for delivering a highly personalized, highly persuasive customer experience.

There are a number of membership plugins available for WordPress, but MemberPress is leading option

Keep your customers, using a membership plugin such as MemberPress.

You can use this plugin to display different content depending on the shopper’s role and capabilities. This can be a quick and easy way to hide information that’s irrelevant to the individual, and prioritize the content that’s more likely to make them convert. 

Meanwhile, if you’re using the popular WooCommerce ecommerce platform, there are a number of add-ons that can help you tailor your website to each user. This includes WooCommerce Customer History:

The WooCommerce History add-on can help you keep your customers.

The Customer History add-on records how each visitor browses your store, and maintains a full purchase history log. You can then use this information to strip out all the unnecessary content and create a more streamlined purchasing journey. 

2. Simplify the Purchasing Journey

By reducing the number of screens the shopper has to navigate, you can reduce the amount of information they come into contact with. This is where a buy now button can be your secret weapon. 

These call to action (CTA) buttons promise to simplify the purchasing journey by transporting the customer directly to the checkout page. You can quickly and easily create this button using our free Buy Now Plus service.

Simply connect Buy Now Plus to your existing Stripe account, or create a new free Stripe account right in the Buy Now Plus setup process. Then you’re ready to create a wide range of high-converting buy now buttons:

The Buy Now Plus dashboard.

After creating a button, you can even deploy it across multiple platforms. This helps you provide a consistent and seamless experience regardless of whether the customer is making a purchase from your website, social media accounts, or marketing emails.

By providing this kind of omnichannel shopping experience, you can make the purchasing process feel effortless and intuitive across multiple platforms. This can help you improve your customer retention rates. 

3. Segment Your Email Campaigns

According to Adobe’s Email Usage Study, Americans spend over five hours a day checking their emails. That’s a huge window of time where you could be promoting your products.

However, most businesses are fully aware of this opportunity, so your typical shopper is probably already drowning in marketing emails. If you add to the pressure, it’s unlikely to end well. The consumer might ignore your messages or unsubscribe from your email list.

Therefore, it’s important to minimize the number of times you contact the customer, while still using email marketing to drive conversions. The best way to achieve this tricky balancing act is by using segmentation. 

A segmented email campaign is where you send targeted messages to your subscribers based on their characteristics or actions, such as their purchase histories. This enables you to replace multiple generic messages with a single email that speaks to the individual shopper’s needs. 

Even if the customer is feeling swamped, highly-targeted messages can still spark a positive reaction. In fact, segmented email campaigns experience 74.53% higher click rates compared to non-segmented campaigns, and companies report a 760% increase in revenue from segmented emails.

All of the major email automation programs support segmentation. Many WordPress plugins also have built-in support for targeted emails, including the free MailPoet plugin:

The MailPoet plugin can help you send targeted emails.

MailPoet comes with an easy-to-use newsletter builder and a selection of responsive templates. It also enables you to send automatic WooCommerce emails.

For instance, you can welcome your new customers, send emails to shoppers who purchased a particular product, and reach out to those who abandoned their carts.

Conclusion 

When it comes to selling your products, the customer needs just enough information to make an informed purchasing decision – and not a single word more.

While it’s tempting to try to dazzle your audience, your typical internet user is already suffering from information overload and won’t thank you for adding to it.

Let’s quickly recap how you can avoid overwhelming your customers: 

  1. Personalize the shopping experience by creating a membership site with MemberPress.
  2. Simplify the purchasing journey by using buy now buttons with Buy Now Plus.
  3. Segment your email campaigns by using a WordPress plugin like MailPoet.

Do you have any questions about how to keep it simple and keep your customers? Let us know in the comments section below!

If you liked this post, be sure to follow us on Twitter, Facebook, and LinkedIn.

4 Ways to Increase Sales That Might Surprise You

When it comes to increasing your sales, you’ll find plenty of advice online. However, the key to grabbing people’s attention is often catching them off guard. Unfortunately, it can be difficult to achieve this when everyone’s using the same techniques.

The good news is there are many ways you can get creative with your marketing, or put a fresh spin on a familiar sales technique.

By stepping outside the box, you can immediately stand out from the competition, and perhaps even secure some additional conversions in the process.

In this post, we’ll share four ways to increase sales that might surprise you. We’ll also discuss tips for implementing each of these techniques, so you can be confident that you’re getting the most out of your marketing activities. Let’s get started! 

1. Monitor Your Competitors on Social Media

With over 2.7 billion monthly active users, Facebook offers an opportunity to promote your products and services to a huge audience. Creating a Facebook Business Page is a great start, but it’s not enough to simply post content and hope for the best. 

To get the maximum return on investment (ROI), you should identify the days and times when your target audience is online. You may also want to look at the type of content that your audience responds most positively to. 

While you could learn from trial and error, you can get a head start by monitoring your closest competitors. Facebook’s Pages to Watch feature can record when your competitors post, how often they post, and their engagement:

Increase sales with Facebook's Pages to Watch feature.

You can then use this data to inform your own social media activities. For example, if content posted on Monday morning generates the most engagement, then it may make sense to publish your own content at this time. 

To start spying on the competition, head over to your Facebook Business Page and select Insights > Overview. Then scroll to the Pages to Watch section: 

Facebook's Pages to Watch feature.

Next, select Add Pages. In the popup, type the first page that you want to monitor and select it:

The Facebook Insights dashboard can help you increase sales.

You can add several brands to your watch list. When you're ready, click on Done. Facebook will now spy on these pages for you, and display all of their activities in your Insights dashboard.

2. Run a User Generated Content (UGC) Contest 

Running a contest is a great way to create buzz around your products. However, to get the maximum ROI, you may want to base your competitions around user generated content (UGC). This is content like product reviews and customer testimonials created by someone outside your business.

There are different ways you can put a competitive slant on UGC. For instance, you could challenge your customers to take the most creative photos featuring your products.

You could ask your social media followers to submit content based on a theme, such as photos of their furry friends on National Pet Day:

A UGC-focused contest.

Alternatively, you could post a photo and ask your followers to come up with a funny caption: 

An example of a caption contest.

This is already a great opportunity to interact with your audience. However, you can take this engagement to the next level by picking a shortlist of potential winners, and then asking your followers to vote by liking, sharing, or commenting on their favorite entries. 

This approach can transform your nominees into temporary brand advocates. That's because they'll probably encourage their friends and family to interact with your content in order to secure more votes.

This exposure and engagement can have a positive impact on your sales. To get started quickly, consider adding a plugin like RafflePress to your site. 

RafflePress plugin homepage

RafflePress makes it super easy to create and manage contests and giveaways. It has pre-built templates and a drag-and-drop builder, so you can quickly build your contest's landing page.

It also has fraud protection, so you don't have to worry about cheating. What's really great is that the free version of RafflePress includes a feature that helps you set up contest rules.

With paid plans, you get more features like email marketing and CRM integrations, viral sharing, polls and surveys, and image submission entries.

3. Generate Large Amounts of Content, Fast

With experts attributing over 40% of revenue to organic traffic, it’s impossible to overestimate the importance of search engine optimization (SEO). Having a publishing schedule is an essential part of an effective SEO strategy.

Content may be king, but it can be difficult to publish a steady stream of new material. Thankfully, there are ways to quickly generate content without compromising on quality. 

In addition to running UGC contests, you could accept guest posts or partner with third parties who can provide you with valuable content in exchange for backlinks.

You could also collect interesting statistics on a subject matter related to your industry, and then publish them as a post.

Data-driven content can be quick to write, and people love to share it:

An example of a statistics blog.

Another option is to interview thought leaders and experts in your industry, then publish this content in multiple formats.

For example, you might post the video to your YouTube channel, include snippets in your podcast, or turn the conversation into an engaging article.

If you already have a library of content, it’s always worth looking for opportunities to refresh and republish old posts.

This might involve updating the information in an article, or adding new images. Putting a fresh spin on older posts can be quicker and easier than creating entirely new content.

4. Leverage the Power of Buy Now Buttons

Just because a customer adds an item to their cart doesn’t mean you’re guaranteed a sale. Every step in the purchasing process is another opportunity for this person to change their mind and abandon their shopping basket. In fact, 69% of customers fail to complete the checkout process.

That’s where buy now buttons come in. These enable customers to jump straight to your checkout page, leaving them with less time to rethink their purchases:

Increase sales with a Buy Now button.

You can create these powerful calls to action (CTAs) using a flexible service such as Buy Now Plus. You'll also be able to post the same button across multiple platforms, including social media.

To get started, simply connect your Stripe account to the free Buy Now Plus service. You can then create a wide range of high-converting buy now buttons without having to write a single line of code:

The Buy Now Plus dashboard.

Buy Now Plus provides everything you need to embed these buttons into your site, add them to your email marketing campaigns, and post them across social media.

For more information on how to drive conversions with buy now buttons, you can check out our complete guide.

Conclusion 

Creativity can change the way people see your brand, which is a huge benefit when you’re trying to make a powerful impression.

By putting a fresh spin on well-worn marketing techniques, you may be able to convince potential customers to choose your business over the competition.

Let’s quickly recap four unique ways to increase your sales: 

  1. Monitor your competitors on social media.
  2. Run a user generated content (UGC) contest.
  3. Generate large amounts of content, fast.
  4. Leverage the power of buy now buttons, using a service such as Buy Now Plus.

Do you have any questions about boosting sales by thinking outside the box? Ask us in the comments section below!

If you liked this post, be sure to follow us on Twitter, Facebook, and LinkedIn.

How to Get Customer Testimonials (3 Easy Ways)

Marketing and advertising are essential for raising brand awareness and securing sales. However, the modern consumer is naturally suspicious of everything that business owners have to say about their own products.

This is where customer testimonials come in. If a third party speaks highly about their experience with your business, then shoppers are more likely to pay attention – and maybe even act on that recommendation. 

In this post, we’ll explore what testimonials are and why they’re so prized by online businesses. We’ll then share three easy ways to generate all the testimonials you need to win over even the most suspicious customer. Let’s get started! 

An Introduction to Customer Testimonials (And Why They’re Important)

Consumer testimonials are recommendations from happy partners and customers who can confirm the value of your products and services. This customer feedback can take the form of lengthy case studies that are sometimes produced together by the client and the company:

An example of a customer testimonial.

In some cases, happy customers simply share their feedback. Many businesses pick their favorite reviews and present them as quotes on their sites and product listings: 

How to get more customer testimonials.

This third-party feedback can be a powerful tool for boosting your sales. According to a report from the Spiegel Research Center, people are 270% more likely to purchase a product that has reviews, as compared to a product that has none.

There’s also evidence to suggest that customer testimonials are more persuasive than any in-house marketing materials. In one study, TurnTo Networks discovered that 90% of consumers are more influenced by user-generated content such as testimonials than email marketing and search engine results.

Your bottom line is influenced by your total number of sales, but also your profit margins. If you ever need to increase your prices, customer testimonials might be the answer. In fact, data from Podium shows that 68% of customers are happy to pay up to 15% more for the same product or service if they’re confident that they’ll have a better experience. 

3 Easy Ways to Get Customer Testimonials

Positive testimonials could be the key to boosting your sales, securing new customers, and potentially increasing your prices. Here are three techniques for ensuring that your business gets the feedback it needs to thrive. 

1. Make It Easy for Customers to Leave Reviews

There’s no such thing as too much positive feedback. However, there is evidence that the first five reviews have the biggest impact on conversions. This means that you may experience an uptick in sales after just a handful of reviews.

You can use a WordPress plugin like WPForms to create a feedback form that's easy for customers to use. The plugin comes with several forms that work great for gathering feedback. One we really like is the survey form.

This form is available in the Surveys and Polls addon:

WPForms Survey Form settings

The template is pre-set, and includes fields like the Rating field and Paragraph Text field. You can even use conditional logic in these fields so that they appear only if a customer rates you below a set threshold.

2. Ask for Customer Testimonials

According to Bright Local, 76% of consumers are happy to leave a review – all you need to do is ask. To increase your chances of receiving positive reviews, it’s smart to approach the customer when their behavior indicates that they’re happy with their experience. 

If a client contacts you about renewing their subscription or leaves a positive comment on your Facebook page, that may be the ideal time to request a review. However, for busy business owners this kind of one-on-one interaction isn’t always possible.

Fortunately, there are ways to automate these requests. Many companies use email software to remind customers that they’ve recently made a purchase, and that you’d appreciate a review:

An example of a review request email.

There’s a chance that automatically contacting everyone may result in some dissatisfied customers leaving negative feedback. However, when it comes to reviews, quantity is key. 

Over half of consumers are more likely to purchase a product that has a large number of reviews and an average rating, compared to a product that has a small number of reviews and an excellent rating.

This suggests that it may be worth risking the occasional poor review, so long as it’s outnumbered by positive feedback.

If you do attract negative reviews, then we always recommend publicly responding to the person, and trying to bring their complaint to a positive conclusion.

If people see you interact with unhappy customers in a polite, helpful manner, they may feel confident that you listen to your audience and always strive to provide a good experience. This could have a positive impact on your sales.

3. Register With Popular Consumer Review Sites

When Canvas8 asked customers which sources they trust to provide honest reviews, third-party sites ranked second. Even when your audience is free to post reviews on your site, there's always the suspicion that you may be moderating this content in some way.

However, you have no control over third-party sites, which makes them a powerful tool for proving the quality of your products:

How to get customer testimonials via your Facebook Page.

If you haven’t done so already, it’s time to register your business with all of the major consumer review platforms. This includes Facebook, Tripadvisor, Yelp, and Google My Business:

Get customer testimonials for your Google listing.

Once you’re registered, we recommend monitoring these platforms carefully, as some consumer review sites highlight businesses that are responsive. This may earn you some additional reviews.

Since these review sites carry so much authority, it’s smart to show people all the platforms where your business is registered. Many developers have created plugins that make it easy to embed this third-party content on your WordPress website. This includes Reviews and Rating, which provides a widget and shortcode for your Google My Business content.

Reviews and Rating WordPress Plugin

Conclusion 

Customer testimonials are one of the most powerful forms of marketing. Research suggests that if you can secure as few as five positive reviews, you might experience an uptick in sales.

To help you set up a steady stream of positive testimonials, we’ve shared the following tips:

  1. Make it easy for customers to leave reviews, using a plugin like WPForms.
  2. Ask customers for testimonials by emailing them after they make a purchase. 
  3. Register your business with popular consumer review sites, such as Tripadvisor and Yelp.

Do you have any questions about how to secure more customer testimonials? Ask us in the comments section below!

If you liked this post, be sure to follow us on Twitter, Facebook, and LinkedIn.

css.php