Many people prefer to complete tasks online. From scheduling appointments to paying electric bills, if users can't do it virtually, they might not do it at all. This same mentality can hold true when it comes to making donations.
Fortunately, enabling your nonprofit to accept donations from your website is a simple process. In fact, once you're online, you may find it's easier and more effective than using mailers or in-person events.
In this post, we'll explore why you should consider accepting online donations. Then we'll show you how to receive contributions using Buy Now Plus. Let's get started!
Why You May Want to Accept Online Donations
These days, many people prefer online donations and don't always have cash or checks at hand. If you're not able to accept online contributions, you're making it difficult, if not impossible, for these people to support your organization.
Enabling online donations can also help you to reach a wider audience. Rather than relying on more traditional methods, you can share your website across social media and email campaigns.
You'll also make it easier for your followers to share your information with their own networks:

Finally, handling donations online can cut down on your paper usage. You can reduce or eliminate your reliance on paper mailers, saving you money on postage costs.
Accepting online contributions is also a significant first step for transitioning to paperless bookkeeping. As such, this method can be advantageous for environmentally conscious businesses.
How to Accept Donations Online (In 3 Easy Steps)
Now that we've covered the benefits of accepting online donations, let's look at starting the process with Buy Now Plus.
1. Sign Up for Buy Now Plus
When you sign up for Buy Now Plus, you'll be asked to connect your Stripe account. This step provides you and your donors with a secure payment gateway.
If you don't have a Stripe account, you'll be able to create one during the Buy Now Plus setup process:
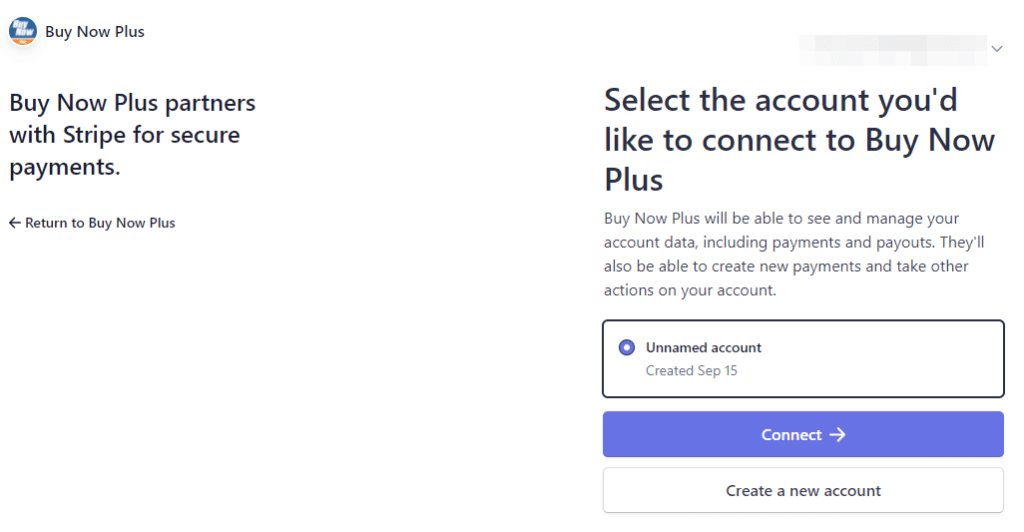
If you already have a Stripe account but would like to create a new one for donations, you can also handle that at this time.
Buy Now Plus enables you to add more than one Stripe account, which could come in handy for organizing your accounting.
2. Design Your Donate Button
Now that you have your Buy Now Plus account ready, it's time to create your first donation button. Start by logging in to your account and navigating to the Buttons page. Then, click on the Add New button.
Here you can add the basic information about your button. This is also where you'll choose which Stripe account to use with it:
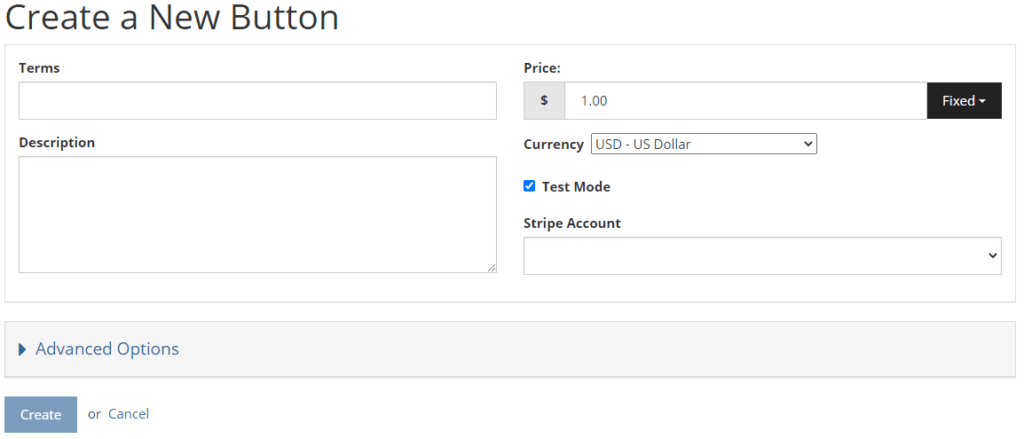
You may want to set the price to Variable using the dropdown menu. This setting enables your donors to choose how much they'd like to give.
Alternatively, you might create a few buttons with preset amounts to encourage donations:

Under the Advanced tab, you can change the text on your button. You can also set a URL that will direct users to a new page once they complete their donations:
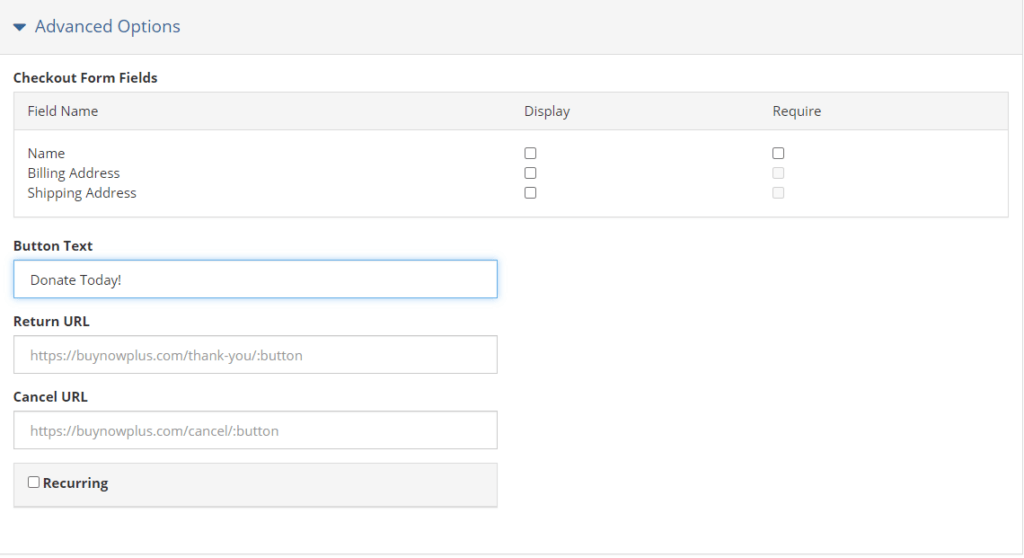
Once you're satisfied with your button, click on the Create button to save it.
3. Share Your Button Everywhere
Finally, you can start sharing your button with your network. Buy Now Plus makes it easy to embed your button anywhere you can add a link.
You may want to start by adding the button in a few places across your website. You might include one in your main navigation menu as well as above the fold on your homepage.
It's also a smart idea to create a landing page dedicated to accepting donations.
You can still share your donation button even if you don't have a website. If you're active on social media, that's a great place to start. You can also include a donation button in your email campaigns.
Regardless of where you'd like to place your button, the process is pretty similar. Simply click on the Share button to the right of your donation button. You'll see a pop up with a link and an embed code:
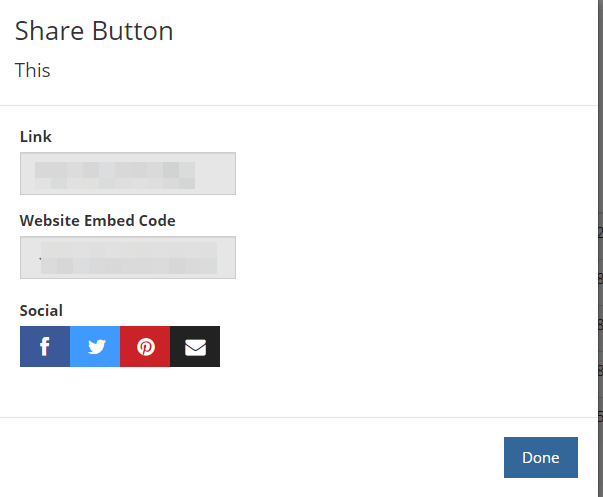
You can also use the social buttons to go directly to the platforms you'd like to share on.
Conclusion
Accepting donations online can be a smart move for any nonprofit. Your donors will likely appreciate the convenience, and it may even save your organization some time and money. Best of all, it's easy to get set up using Buy Now Plus.
Let's recap the three steps to accepting online donations:
- Sign up for Buy Now Plus.
- Design your donate button.
- Share your button everywhere.
Do you have questions about receiving contributions online? Ask us in the comments section below!
If you liked this post, be sure to follow us on Twitter, Facebook, and LinkedIn.

